The kitchen, for me, is the heart of our home. It’s where memories are made, laughter echoes, and bellies are happily filled. As a mom of three, life moves at lightning speed.
Some days, I barely manage to get a nourishing dinner on the table, let alone a special dessert. But then there are those moments, usually after a particularly busy week, when a sweet treat feels like a warm hug, a little reward for everyone. I remember one blustery Saturday afternoon; the kids were restless, sugar cravings were high, and my energy was low.
I yearned for something delightful, something reminiscent of a classic cheesecake, but without all the fuss of baking. That’s when the idea for these incredible strawberry cheesecake crunch bites truly blossomed.
I wanted something easy, no-bake, and packed with flavor, something that would satisfy that creamy, fruity desire without taking up my entire afternoon. After a bit of experimenting, mixing crushed cookies with rich cream cheese, fresh strawberries, and a touch of something extra for that perfect crunch, these delightful strawberry cheesecake crunch bites were born. My kids absolutely adored them, clamoring for more, and honestly, so did I!
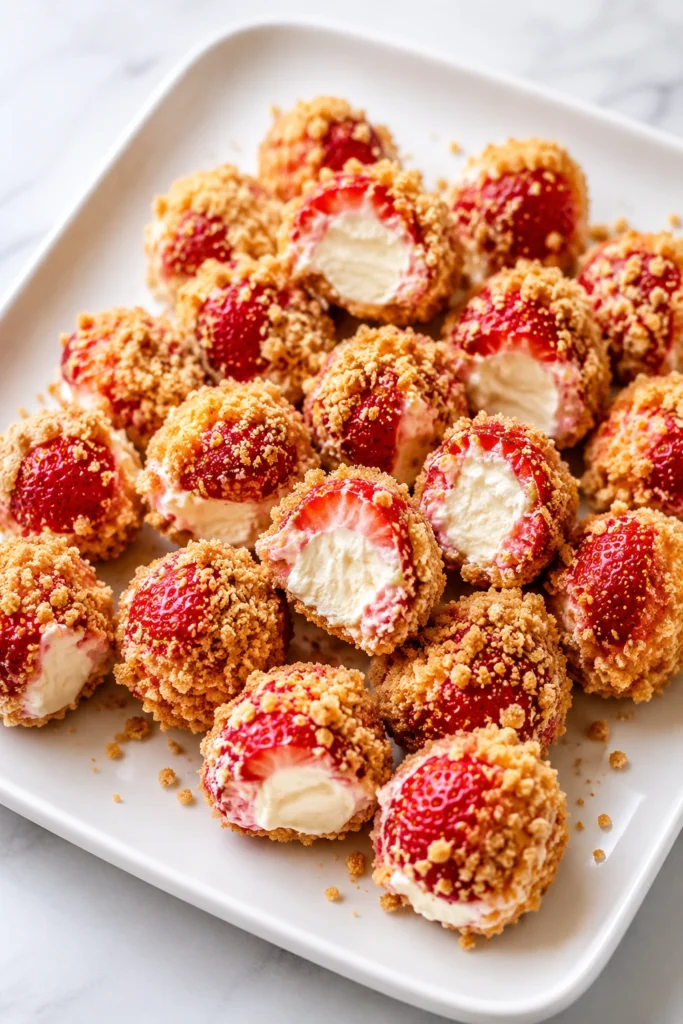
They’re the perfect little squares of joy, a vibrant burst of berry goodness meeting a creamy, dreamy cheesecake center and a satisfying textural crunch. These aren’t just dessert; they’re an act of love, a simple way to bring a smile to everyone’s face, proving that delicious and wholesome (even in a treat!) doesn’t have to be complicated.
Print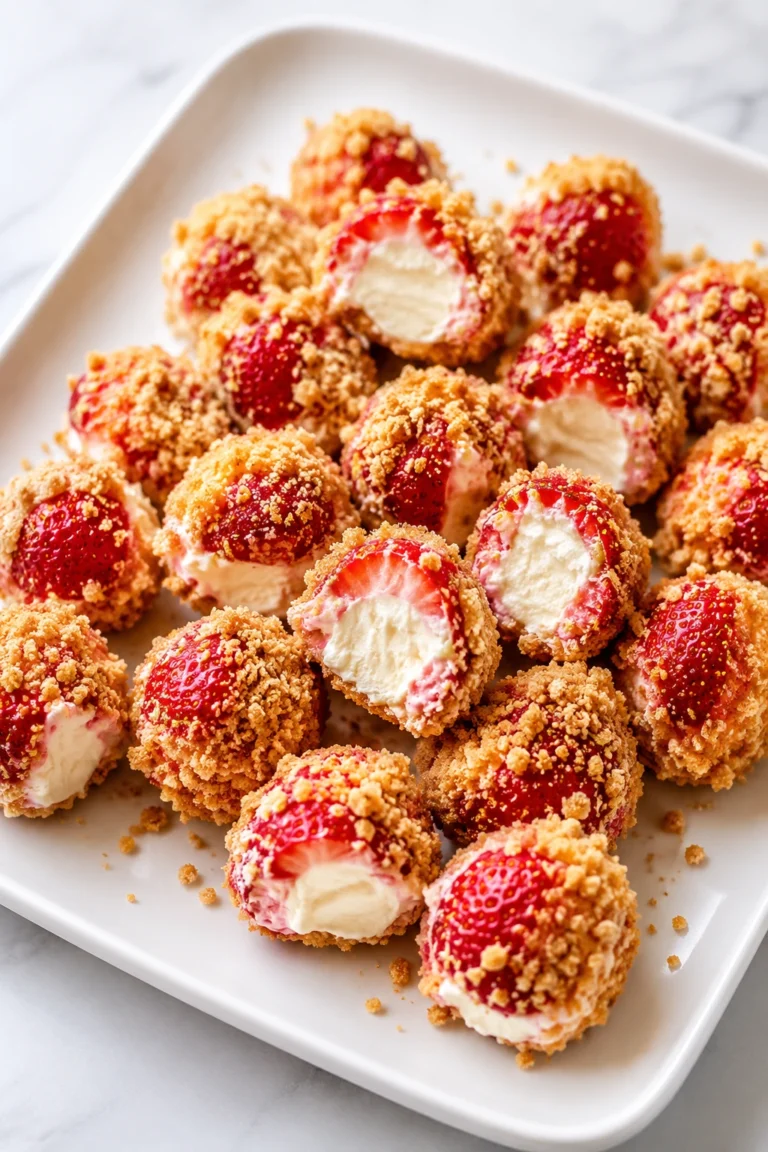
strawberry chessecake crunch bites
These no-bake strawberry cheesecake crunch bites feature a creamy cheesecake filling, a crunchy graham cracker crust, and fresh strawberry topping. Perfect for busy moms or anyone craving an easy, delicious dessert.
- Total Time: 4 hours 20 minutes (includes chilling)
- Yield: 16 bites (8×8 pan, cut into 16 squares)
Ingredients
Graham Cracker Crumbs (or your preferred cookie): 2 cups
Granulated Sugar: 2 tablespoons
Unsalted Butter, melted: ½ cup (1 stick)
Cream Cheese, softened: 16 ounces (2 blocks)
Powdered Sugar: 1 cup
Vanilla Extract: 1 teaspoon
Heavy Cream, cold: 1 cup
Fresh Strawberries, hulled and diced: 2 cups
Granulated Sugar (optional, for sweetness): 1-2 tablespoons
Extra graham cracker crumbs or cookie pieces: ¼ cup
Instructions
1. Prepare Your Pan: First, line an 8×8 or 9×9 inch baking pan with parchment paper, leaving an overhang on two sides. This creates “handles” for easy removal later. Lightly grease the pan underneath the parchment for extra security.
2. Make the Crunch Crust: Next, in a medium bowl, combine the graham cracker crumbs and granulated sugar. Pour in the melted butter. Stir these ingredients thoroughly until the crumbs are evenly moistened and resemble wet sand. Press this mixture firmly and evenly into the bottom of your prepared pan. Use the bottom of a glass or your fingers to compact it well. Place the pan in the refrigerator to chill for at least 15 minutes while you prepare the filling.
3. Whip the Heavy Cream: Now, in a large mixing bowl, using an electric mixer with the whisk attachment (or a stand mixer), beat the cold heavy cream on medium-high speed until it forms stiff peaks. This takes about 2-4 minutes. Set the whipped cream aside.
4. Prepare the Cheesecake Filling: In another large bowl, combine the softened cream cheese, powdered sugar, and vanilla extract. Beat these ingredients with the electric mixer (using the paddle attachment, or cleaned whisk attachment) on medium speed until the mixture becomes completely smooth, creamy, and free of lumps. Scrape down the sides of the bowl as needed.
5. Fold in the Whipped Cream: Gently fold the whipped cream into the cream cheese mixture in two additions. Use a spatula to carefully incorporate it until just combined. Avoid overmixing; you want to maintain that light, airy texture.
6. Assemble the Layers: Retrieve your chilled crust from the refrigerator. Evenly spread the creamy cheesecake filling over the crust. Smooth the top with an offset spatula or the back of a spoon.
7. Add the Strawberry Topping: Next, sprinkle the diced fresh strawberries evenly over the cheesecake layer. If your strawberries aren’t super sweet, you can toss them with 1-2 tablespoons of granulated sugar beforehand. Gently press the strawberries into the cream cheese layer slightly.
8. Chill for Setting: Place the pan back into the refrigerator. Allow the strawberry cheesecake crunch bites to chill for at least 4 hours, or preferably overnight. This crucial step helps the cheesecake set properly, making it easier to cut and ensuring a firm, delicious texture.
9. Cut and Serve: Once thoroughly chilled, use the parchment paper overhang to lift the entire block of cheesecake out of the pan. Place it on a cutting board. Use a sharp knife, wiping it clean between cuts, to slice the cheesecake into desired bite-sized squares or bars.
10. Garnish and Enjoy: Finally, sprinkle with extra graham cracker crumbs or cookie pieces for added crunch and visual appeal. Serve immediately and watch them disappear!
Notes
Softened cream cheese is key for a smooth filling. Chill at least 4 hours (overnight is better) for clean cuts. For gluten-free, use gluten-free graham crackers. For dairy-free, use plant-based cream cheese and coconut cream. Can be frozen for up to 1 month.
- Prep Time: 20 minutes
- Cook Time: 0 minutes
- Category: Dessert
- Method: No-bake
- Cuisine: American
- Diet: Vegetarian
Nutrition
- Serving Size: 1 bite
- Calories: 350
- Sugar: 23g
- Sodium: 220mg
- Fat: 23g
- Saturated Fat: 13g
- Unsaturated Fat: 8g
- Trans Fat: 0.5g
- Carbohydrates: 33g
- Fiber: 1g
- Protein: 4g
- Cholesterol: 65mg
Why You’ll Love These Strawberry Cheesecake Crunch Bites
You need simplicity and deliciousness in your life. As a busy mom, I understand completely. These delightful strawberry cheesecake crunch bites deliver on both counts and then some.
They quickly became a staple in my home, and I know they will in yours too. Here’s why you’ll absolutely adore this recipe:
- Effortless No-Bake Creation: Forget turning on the oven! This recipe requires zero baking, making it perfect for hot summer days or when you simply crave a quick dessert.
- Kid-Approved Flavor: The combination of sweet strawberries, creamy cheesecake, and a crunchy crust is an undeniable hit with children and adults alike. Your little ones will ask for these delicious cheesecake bites again and again.
- Simple, Wholesome Ingredients: We use fresh strawberries and easily accessible pantry staples. You create a treat that feels indulgent but still incorporates fresh fruit.
- Perfect for Any Occasion: These strawberry dessert bites are ideal for potlucks, birthday parties, a casual family dessert, or just a sweet pick-me-up during the week. They present beautifully and disappear quickly.
- Customizable Fun: Easily adapt the fruit, crust, or topping to suit your family’s preferences or what you have on hand. Flexibility is a busy parent’s best friend.
- Make-Ahead Magic: Prepare these delicious crunch bites in advance, store them in the fridge, and pull them out when you’re ready for a delightful treat. This saves precious time on busy days.
Ingredients You’ll Need
Gathering your ingredients is the first step to creating these irresistible strawberry cheesecake crunch bites. I love that most of these items are probably already in your pantry or easily found at any grocery store. Fresh, simple components truly make this recipe shine.
| Component | Ingredient | Quantity |
|---|---|---|
| For the Crunch Crust | Graham Cracker Crumbs (or your preferred cookie) | 2 cups |
| Granulated Sugar | 2 tablespoons | |
| Unsalted Butter, melted | ½ cup (1 stick) | |
| For the Creamy Cheesecake Filling | Cream Cheese, softened | 16 ounces (2 blocks) |
| Powdered Sugar | 1 cup | |
| Vanilla Extract | 1 teaspoon | |
| Heavy Cream, cold | 1 cup | |
| For the Strawberry Layer | Fresh Strawberries, hulled and diced | 2 cups |
| Granulated Sugar (optional, for sweetness) | 1-2 tablespoons | |
| For the Topping/Garnish | Extra graham cracker crumbs or cookie pieces | ¼ cup |
[image 2]
Substitutions & Variations
One of the beautiful aspects of these strawberry cheesecake crunch bites is their incredible versatility. As a mom, I always look for ways to adapt recipes to fit different tastes, dietary needs, or simply whatever ingredients I have on hand. Feel free to get creative and make these crunch bites uniquely yours!
- Crust Alternatives:
- Gluten-Free: Simply use gluten-free graham crackers or crushed gluten-free vanilla wafers for the base.
- Different Cookies: Experiment with crushed shortbread cookies, ginger snaps, or even chocolate sandwich cookies for a different flavor profile.
- Nutty Crunch: Add finely chopped pecans, walnuts, or almonds to your graham cracker crust for an extra layer of flavor and texture.
- Fruit Innovations:
- Mixed Berry Bliss: Substitute strawberries with raspberries, blueberries, or a combination of your favorite berries.
- Tropical Twist: Diced mango or pineapple (well-drained) could add a vibrant, tropical flair.
- Peach Perfection: In season, diced fresh peaches make a wonderful, sweet alternative.
- Cheesecake Filling Swaps:
- Dairy-Free: Use a high-quality plant-based cream cheese alternative and a dairy-free heavy cream or full-fat coconut cream (chilled, scoop out the thick part).
- Lower Sugar: Reduce the amount of powdered sugar or use a sugar substitute designed for baking.
- Citrus Zest: Add a teaspoon of lemon or orange zest to the filling for a bright, refreshing kick.
- Crunchy Topping Ideas:
- Chocolate Drizzle: Melted chocolate or white chocolate drizzled over the top adds an extra layer of indulgence.
- Nut Crunch: Sprinkle with chopped nuts like pistachios or almonds.
- Granola Goodness: A sprinkle of your favorite granola (perhaps peanut butter granola if you’re making that too!) can add a healthy and satisfying crunch.
- Coconut Flakes: Toasted coconut flakes add a lovely texture and tropical hint.
- Flavor Boosters:
- Extracts: A drop or two of almond extract in the filling can complement the berries beautifully.
- Spices: A tiny pinch of cinnamon in the crust or nutmeg in the filling adds subtle warmth.
Step-by-Step Instructions
Creating these delightful strawberry cheesecake crunch bites is an absolute breeze. Follow these straightforward steps, and you’ll have a stunning and delicious dessert ready in no time. Precision helps, but don’t stress; this recipe is forgiving!
- Prepare Your Pan: First, line an 8×8 or 9×9 inch baking pan with parchment paper, leaving an overhang on two sides. This creates “handles” for easy removal later. Lightly grease the pan underneath the parchment for extra security.
- Make the Crunch Crust: Next, in a medium bowl, combine the graham cracker crumbs and granulated sugar. Pour in the melted butter. Stir these ingredients thoroughly until the crumbs are evenly moistened and resemble wet sand. Press this mixture firmly and evenly into the bottom of your prepared pan. Use the bottom of a glass or your fingers to compact it well. Place the pan in the refrigerator to chill for at least 15 minutes while you prepare the filling.
- Whip the Heavy Cream: Now, in a large mixing bowl, using an electric mixer with the whisk attachment (or a stand mixer), beat the cold heavy cream on medium-high speed until it forms stiff peaks. This takes about 2-4 minutes. Set the whipped cream aside.
- Prepare the Cheesecake Filling: In another large bowl, combine the softened cream cheese, powdered sugar, and vanilla extract. Beat these ingredients with the electric mixer (using the paddle attachment, or cleaned whisk attachment) on medium speed until the mixture becomes completely smooth, creamy, and free of lumps. Scrape down the sides of the bowl as needed.
- Fold in the Whipped Cream: Gently fold the whipped cream into the cream cheese mixture in two additions. Use a spatula to carefully incorporate it until just combined. Avoid overmixing; you want to maintain that light, airy texture.
- Assemble the Layers: Retrieve your chilled crust from the refrigerator. Evenly spread the creamy cheesecake filling over the crust. Smooth the top with an offset spatula or the back of a spoon.
- Add the Strawberry Topping: Next, sprinkle the diced fresh strawberries evenly over the cheesecake layer. If your strawberries aren’t super sweet, you can toss them with 1-2 tablespoons of granulated sugar beforehand. Gently press the strawberries into the cream cheese layer slightly.
- Chill for Setting: Place the pan back into the refrigerator. Allow the strawberry cheesecake crunch bites to chill for at least 4 hours, or preferably overnight. This crucial step helps the cheesecake set properly, making it easier to cut and ensuring a firm, delicious texture.
- Cut and Serve: Once thoroughly chilled, use the parchment paper overhang to lift the entire block of cheesecake out of the pan. Place it on a cutting board. Use a sharp knife, wiping it clean between cuts, to slice the cheesecake into desired bite-sized squares or bars.
- Garnish and Enjoy: Finally, sprinkle with extra graham cracker crumbs or cookie pieces for added crunch and visual appeal. Serve immediately and watch them disappear!
[image 3]
Pro Tips for Success
Achieving perfect strawberry cheesecake crunch bites is easy with a few insider tricks. As someone who’s made these countless times for my family, I’ve learned what makes them truly spectacular. Apply these tips for an absolutely flawless dessert:
- Softened Cream Cheese is Key: Always ensure your cream cheese is at room temperature. This is non-negotiable for a smooth, lump-free cheesecake filling. Cold cream cheese results in lumps that won’t beat out. Plan ahead and take it out of the fridge at least an hour before you start.
- Whip Cream Separately: Beat your heavy cream to stiff peaks in a separate bowl before gently folding it into the cream cheese mixture. This technique ensures a light, airy, and fluffy texture for your cheesecake filling. If you try to whip it all together, it won’t achieve the same consistency.
- Don’t Overmix the Filling: Once you add the whipped cream, fold it in gently and stop as soon as it’s just combined. Overmixing can deflate the whipped cream, leading to a denser, less airy filling.
- Chill Time is Crucial: Patience is truly a virtue here. The 4-hour minimum chilling time (overnight is even better!) allows the cheesecake to firm up properly. This prevents a messy cutting experience and ensures your strawberry cheesecake crunch bites hold their shape beautifully.
- Sharp Knife for Clean Cuts: Use a very sharp knife to cut your squares. For extra clean cuts, run the knife under hot water, wipe it dry, and then make a cut. Repeat this process for each slice. This technique creates those beautiful, defined edges.
- Press the Crust Firmly: When creating the crust, press it down very firmly into the pan. This compaction helps it stay together when you cut and lift your bites, preventing a crumbly mess.
- Fresh vs. Frozen Strawberries: Always opt for fresh strawberries for this recipe. Frozen strawberries release too much water as they thaw, which can make your cheesecake watery.
- Taste and Adjust: Before folding in the whipped cream, taste your cream cheese mixture. If you prefer it sweeter, add a little more powdered sugar, one tablespoon at a time. Everyone’s sweet tooth differs!
Storage & Reheating Tips
These delectable strawberry cheesecake crunch bites are perfect for making ahead and enjoying over several days. Proper storage ensures they remain fresh, firm, and incredibly delicious. Reheating isn’t really applicable here, as they’re a no-bake, chilled dessert!
- Refrigerator Storage: Store any leftover cheesecake bites in an airtight container in the refrigerator. This protects them from absorbing other odors and keeps them fresh. They will maintain their best quality for up to 3-4 days.
- Freezing for Longer Enjoyment: You can absolutely freeze these strawberry cheesecake crunch bites! Arrange the cut squares in a single layer on a baking sheet and freeze them until firm (about 1-2 hours). Once firm, transfer them to an airtight freezer-safe container, separating layers with parchment paper to prevent sticking. They will last in the freezer for up to 1 month.
- Thawing Frozen Bites: To enjoy frozen bites, simply remove them from the freezer and let them thaw in the refrigerator for a few hours until soft enough to eat. Alternatively, you can enjoy them slightly frozen for a firmer, ice cream-like treat.
- Preparation Ahead: This recipe is fantastic for meal prepping or party planning. You can prepare the entire batch up to 2 days in advance, store it covered in the refrigerator, and then slice and serve right before your event.
- Serving Temperature: These bites are best served chilled. If they sit out at room temperature for an extended period, the cheesecake filling will soften significantly. Place them back in the fridge if they become too soft.
What to Serve With This Recipe
These delightful strawberry cheesecake crunch bites stand perfectly well on their own as a satisfying sweet treat. However, pairing them with the right complements can elevate the experience, whether for a casual family meal or a special gathering. Think about occasions and accompanying flavors!
- A Simple Beverage:
- Coffee or Tea: A warm cup of coffee, a robust espresso, or a soothing herbal tea creates a lovely contrast to the sweet, cool bites.
- Milk: For the kids (and many adults!), a cold glass of milk is the classic, comforting pairing.
- Sparkling Water with Lemon: A light, bubbly drink with a hint of citrus can cleanse the palate beautifully between bites.
- After a Hearty Meal: These bites make an excellent light and refreshing dessert after a flavorful main course.
- Consider a savory and satisfying meal like Smash Burger Tacos or a Hot Honey Chicken Bowl. The sweet and tangy crunch bites provide a perfect ending to a rich and savory dinner.
- For a lighter but equally delicious option, a High-Protein Pasta Salad followed by these bites makes for a balanced and delightful meal.
- As Part of a Dessert Platter: If you’re hosting a party or potluck, these crunch bites add a vibrant color and appealing texture to a dessert spread.
- Serve alongside brownies, cookies, or small fruit tarts for variety.
- A bowl of fresh whipped cream or a light fruit compote could also accompany them.
- For Brunch or Afternoon Tea: These bites also fit wonderfully into a brunch spread or an afternoon tea setting.
- Offer them alongside scones, muffins, or small sandwiches.
- A pitcher of iced tea or a Mimosa complements the fruitiness.
FAQs
Can I make these strawberry cheesecake crunch bites gluten-free?
Absolutely! You can easily make these delicious strawberry cheesecake crunch bites gluten-free. Simply substitute traditional graham cracker crumbs with a gluten-free version. Many brands offer excellent gluten-free graham cracker alternatives, or you can use crushed gluten-free vanilla wafers or shortbread cookies for the crust.
How long do these no-bake cheesecake bites last in the refrigerator?
When stored properly in an airtight container, your strawberry cheesecake crunch bites will stay fresh and delicious in the refrigerator for up to 3-4 days. For optimal freshness and texture, I always recommend consuming them within that timeframe.
Can I use frozen strawberries for this recipe?
I strongly recommend using fresh strawberries for the best results in these strawberry cheesecake crunch bites. Frozen strawberries release a significant amount of water as they thaw, which can make your cheesecake layer watery or soggy. If you absolutely must use frozen, thaw them completely, drain them very well, and pat them dry before dicing and adding to the recipe.
What if I don’t have heavy cream for the filling?
Heavy cream is crucial for the light and airy texture of the cheesecake filling. Unfortunately, there isn’t a direct substitute that will yield the exact same results. You could try using full-fat coconut cream (the thick cream scooped from a can of chilled coconut milk), but the flavor and texture will be slightly different. For the best outcome, stick with heavy cream.
Can I freeze strawberry cheesecake crunch bites?
Yes, you can! These strawberry cheesecake crunch bites freeze beautifully. After slicing them into individual portions, place them in a single layer on a baking sheet and freeze until solid.
Then, transfer the frozen bites to an airtight freezer-safe container, separating layers with parchment paper to prevent sticking. They will keep well in the freezer for up to one month. Thaw them in the refrigerator before serving, or enjoy them slightly frozen for a delightful treat.
How can I make sure my cheesecake layer is smooth and lump-free?
Two main tips ensure a perfectly smooth cheesecake filling: first, always start with fully softened cream cheese at room temperature. Cold cream cheese will inevitably create lumps. Second, beat the cream cheese, powdered sugar, and vanilla together until completely smooth and creamy before gently folding in the whipped heavy cream. Take your time with this step, scraping down the sides of the bowl as needed.