Oh, my sweet friends, if there’s one thing I’ve learned navigating the beautiful chaos of raising three active kids, it’s that a delicious, nourishing meal doesn’t have to be complicated. There was a time, not so long ago, when Sunday dinner meant a whole roasted chicken that was either bone dry on the breast or practically raw by the bone.
Sound familiar? I’d spend hours fretting, basting, and praying to the poultry gods, only to be met with sighs of “Mom, this chicken is tough!” or “Can I just have a hot dog?” My heart would sink, because for me, food is love, and I wanted my family to feel that warmth and comfort at the dinner table.
Then, a game changer entered my kitchen: the glorious, the simple, the utterly brilliant method of cooking a whole chicken known as Spatchcock Chicken. The first time I tried it, I was skeptical. Cutting out the backbone?
A beautifully browned, incredibly crispy skin, and meat so juicy and tender, every single bite was pure heaven. The best part? It cooks in a fraction of the time of a traditional roast chicken.
Suddenly, those demanding Sunday dinners became relaxed family feasts, and even weeknight chicken became a real possibility. This isn’t just a recipe; it’s a revelation. It transforms an ordinary chicken into an extraordinary meal with minimal fuss, leaving you more time for what truly matters like helping with homework, reading bedtime stories, or simply enjoying the company of your loved ones. Get ready to fall in love with roasted chicken all over again.
Print
Spatchcock Chicken
This Spatchcock Chicken recipe delivers a beautifully browned, crispy-skinned bird with incredibly juicy meat, all in a fraction of the time of a traditional roast. By flattening the chicken, you ensure even cooking and a perfect result every time.
- Total Time: 1 hour 5 minutes
- Yield: 4 servings 1x
Ingredients
Whole Chicken 1 (3–4 lbs / 1.5–2 kg)
Olive Oil 2 tablespoons
Kosher Salt 1.5 teaspoons
Black Pepper 1 teaspoon
Garlic Powder 1 teaspoon
Smoked Paprika 1 teaspoon
Dried Thyme 1 teaspoon
Optional: Fresh Rosemary/Thyme 2-3 sprigs
Optional: Lemon 1/2, sliced
Instructions
1. 1. Prepare Your Workstation: First, grab a large cutting board and a sturdy pair of kitchen shears. A sharp chef’s knife also works, but shears make the backbone removal much easier and safer. Place your whole chicken, breast-side down, on the cutting board.
2. 2. Remove the Backbone: Locate the backbone running down the center of the chicken’s back. Carefully cut along one side of the backbone, from the tail to the neck, using your kitchen shears. You’ll need to apply some pressure to cut through the ribs. Once you’ve cut one side, repeat the process on the other side of the backbone to remove it completely. You can discard the backbone or save it for making stock (which I highly recommend!).
3. 3. Flatten the Chicken: Now, flip the chicken over so it’s breast-side up. Place your hands on top of the breastbone. Firmly press down to flatten the chicken. You’ll hear a satisfying crack as the breastbone breaks and the chicken lays flat. This is exactly what we want! This flattening is key for even cooking and crispy skin.
4. 4. Pat It Dry: Use paper towels to thoroughly pat the chicken dry, both on the skin and underneath. This is a crucial step for achieving that coveted crispy skin. Moisture is the enemy of crispiness!
5. 5. Season Generously: Drizzle the olive oil all over the chicken, then rub it in to coat the skin evenly. In a small bowl, combine the salt, pepper, garlic powder, smoked paprika, and dried thyme. Sprinkle this seasoning blend generously all over the chicken, making sure to coat both sides. Don’t be shy!
6. 6. Prepare for Roasting: Place the seasoned, flattened chicken, skin-side up, on a large baking sheet, preferably one fitted with a wire rack. The rack allows air to circulate around the chicken, promoting even cooking and extra crispiness. If you don’t have a rack, you can simply place it directly on the baking sheet. If using, tuck fresh rosemary/thyme sprigs and lemon slices around the chicken.
7. 7. Preheat Oven: Preheat your oven to 425°F (220°C). A higher temperature initially helps create that beautiful, crispy skin.
8. 8. Roast the Chicken: Transfer the baking sheet to the preheated oven. Roast for 45-60 minutes, or until a meat thermometer inserted into the thickest part of the thigh (without touching bone) reads 165°F (74°C). Cooking time will vary depending on the size of your chicken and your oven. The skin should be deeply golden brown and incredibly crisp.
9. 9. Rest and Serve: Once cooked, carefully remove the chicken from the oven. Transfer it to a clean cutting board. Tent it loosely with aluminum foil and let it rest for 10-15 minutes. This resting period is vital! It allows the juices to redistribute throughout the meat, ensuring every bite is moist and flavorful.
10. 10. Carve and Enjoy: After resting, carve the chicken into desired pieces. Serve it hot and watch your family devour this perfectly cooked masterpiece!
Notes
Use sharp kitchen shears for easy backbone removal. Pat the chicken dry thoroughly for the crispiest skin. Roasting on a wire rack ensures even cooking and helps the bottom skin crisp. Always use a meat thermometer to check doneness (165°F in thigh). Let the chicken rest for 10-15 minutes before carving to retain juices.
- Prep Time: 20 minutes
- Cook Time: 45 minutes
- Category: Main Course
- Method: Roasting
- Cuisine: American
- Diet: Gluten-Free, Dairy-Free
Nutrition
- Serving Size: 1 serving
- Calories: 450
- Sugar: 0g
- Sodium: 800mg
- Fat: 28g
- Saturated Fat: 7g
- Unsaturated Fat: 18g
- Trans Fat: 0g
- Carbohydrates: 1g
- Fiber: 0g
- Protein: 35g
- Cholesterol: 120mg
Why You’ll Love This Spatchcock Chicken Recipe
You’re about to discover your new favorite way to prepare a whole chicken, and for good reason! This Spatchcock Chicken recipe brings so many incredible benefits to your family table. First and foremost, it slashes cooking time dramatically.
By flattening the chicken, you expose more surface area to the heat, allowing it to cook much faster and more evenly than a traditional roast. This means less time waiting for dinner and more time enjoying it.
Moreover, prepare for the crispiest skin you’ve ever achieved on a roasted chicken. Seriously, it’s golden, crackly perfection! Because the chicken cooks flat, the skin gets direct, consistent heat all over, turning wonderfully golden and irresistible. Say goodbye to soggy spots.
But it’s not just about speed and crispiness. This method ensures incredibly juicy and tender meat, every single time. The even cooking prevents the breast meat from drying out while the dark meat finishes cooking.
Each bite delivers succulent flavor. You’ll use simple, wholesome ingredients, making this a nourishing meal you can feel good about serving. It’s truly a simple recipe, making it perfect for busy weeknights or relaxed weekend gatherings. You’ll feel like a culinary genius with minimal effort, impressing everyone at the table.
Ingredients You’ll Need
Gathering your ingredients for this amazing Spatchcock Chicken couldn’t be simpler. You likely have most of these pantry staples on hand already! We focus on fresh, flavorful elements that truly highlight the chicken’s natural goodness. Here’s what you’ll need to create this culinary masterpiece:
| Ingredient | Quantity |
|---|---|
| Whole Chicken | 1 (3-4 lbs / 1.5-2 kg) |
| Olive Oil | 2 tablespoons |
| Kosher Salt | 1.5 teaspoons |
| Black Pepper | 1 teaspoon |
| Garlic Powder | 1 teaspoon |
| Smoked Paprika | 1 teaspoon |
| Dried Thyme | 1 teaspoon |
| Optional: Fresh Rosemary/Thyme | 2-3 sprigs |
| Optional: Lemon | 1/2, sliced |
Always start with a good quality chicken. This forms the foundation of a delicious meal. The olive oil helps the skin crisp up beautifully and carries the flavors of our seasoning blend.
Our simple but powerful mix of salt, pepper, garlic powder, smoked paprika, and dried thyme creates an aromatic crust that permeates every inch of the bird. Feel free to adjust the seasonings to your family’s preferences. A little extra garlic never hurt anyone, right?
[image 2]
Substitutions & Variations
One of the beautiful things about this Spatchcock Chicken recipe is its incredible versatility. Once you master the basic technique, you can truly make it your own! Don’t have dried thyme?
No problem! Feel free to swap it out for dried oregano, rosemary, or even an Italian seasoning blend. Play around with different spice rubs too.
A pinch of cayenne pepper or chili powder adds a delightful kick if you like things spicier. Or, for a hint of warmth and sweetness, try a touch of brown sugar in your rub.
For an extra burst of flavor, consider adding citrus. Before seasoning, rub lemon or orange zest all over the chicken. You can also tuck lemon slices and fresh herb sprigs (like rosemary or thyme) under the skin or inside the cavity for an aromatic infusion.
Think beyond just the seasoning. You can create a marinade instead of a dry rub. Whisk together olive oil, lemon juice, minced garlic, soy sauce, and your favorite herbs for a more robust flavor profile. Marinate the spatchcocked chicken for at least 30 minutes, or up to 4 hours in the refrigerator, before patting dry and roasting.
Want a different kind of kick? Try brushing the chicken with a homemade hot honey glaze during the last 15 minutes of cooking. If you enjoy spicy and sweet flavors, you might even like to check out my recipe for Hot Honey Chicken Bowls for more inspiration on combining those delicious elements.
Experiment with different cooking methods as well. While roasting in the oven is fantastic, a spatchcocked chicken also works wonderfully on the grill or even smoked for an incredible smoky flavor. Just adjust cooking times and temperatures accordingly to ensure it cooks through perfectly. The possibilities truly are endless, so get creative and enjoy making this recipe your own!
Step-by-Step Instructions
Don’t be intimidated by the term “spatchcocking”it sounds fancy, but it’s incredibly straightforward and makes a huge difference. Here’s exactly how we get that chicken flat and ready for roasting:
- Prepare Your Workstation: First, grab a large cutting board and a sturdy pair of kitchen shears. A sharp chef’s knife also works, but shears make the backbone removal much easier and safer. Place your whole chicken, breast-side down, on the cutting board.
- Remove the Backbone: Locate the backbone running down the center of the chicken’s back. Carefully cut along one side of the backbone, from the tail to the neck, using your kitchen shears. You’ll need to apply some pressure to cut through the ribs. Once you’ve cut one side, repeat the process on the other side of the backbone to remove it completely. You can discard the backbone or save it for making stock (which I highly recommend!).
- Flatten the Chicken: Now, flip the chicken over so it’s breast-side up. Place your hands on top of the breastbone. Firmly press down to flatten the chicken. You’ll hear a satisfying crack as the breastbone breaks and the chicken lays flat. This is exactly what we want! This flattening is key for even cooking and crispy skin.
- Pat It Dry: Use paper towels to thoroughly pat the chicken dry, both on the skin and underneath. This is a crucial step for achieving that coveted crispy skin. Moisture is the enemy of crispiness!
- Season Generously: Drizzle the olive oil all over the chicken, then rub it in to coat the skin evenly. In a small bowl, combine the salt, pepper, garlic powder, smoked paprika, and dried thyme. Sprinkle this seasoning blend generously all over the chicken, making sure to coat both sides. Don’t be shy!
- Prepare for Roasting: Place the seasoned, flattened chicken, skin-side up, on a large baking sheet, preferably one fitted with a wire rack. The rack allows air to circulate around the chicken, promoting even cooking and extra crispiness. If you don’t have a rack, you can simply place it directly on the baking sheet. If using, tuck fresh rosemary/thyme sprigs and lemon slices around the chicken.
- Preheat Oven: Preheat your oven to 425°F (220°C). A higher temperature initially helps create that beautiful, crispy skin.
- Roast the Chicken: Transfer the baking sheet to the preheated oven. Roast for 45-60 minutes, or until a meat thermometer inserted into the thickest part of the thigh (without touching bone) reads 165°F (74°C). Cooking time will vary depending on the size of your chicken and your oven. The skin should be deeply golden brown and incredibly crisp.
- Rest and Serve: Once cooked, carefully remove the chicken from the oven. Transfer it to a clean cutting board. Tent it loosely with aluminum foil and let it rest for 10-15 minutes. This resting period is vital! It allows the juices to redistribute throughout the meat, ensuring every bite is moist and flavorful.
Carve and Enjoy: After resting, carve the chicken into desired pieces. Serve it hot and watch your family devour this perfectly cooked masterpiece!
[image 3]
Pro Tips for Success
Achieving that perfect Spatchcock Chicken isn’t just about following the steps; a few pro tips can elevate your meal from good to absolutely unforgettable. Trust me, these small details make a big difference!
- Use Sharp Kitchen Shears: This is my number one tip for spatchcocking! A good, sturdy pair of kitchen shears makes removing the backbone incredibly easy and safe. Don’t struggle with a knife if you don’t have to.
- Pat Dry, Pat Dry, Pat Dry: I cannot stress this enough. Moisture on the skin prevents crisping. Use paper towels to thoroughly dry the chicken’s skin, inside and out, before adding any oil or seasoning. The drier the skin, the crispier it will get.
- Don’t Skip the Rack: Roasting the chicken on a wire rack set inside a baking sheet allows air to circulate underneath the chicken. This ensures even cooking and helps the bottom skin crisp up beautifully, preventing it from getting soggy.
- High Heat is Your Friend: Starting with a higher oven temperature (like 425°F/220°C) helps kickstart the browning and crisping process of the skin. You can lower it slightly if you notice the skin browning too quickly, but generally, a hotter oven is better for that initial crisp.
- Always Use a Meat Thermometer: This is non-negotiable for perfectly cooked, safe chicken. Insert the thermometer into the thickest part of the thigh, making sure it doesn’t touch any bone. You are looking for an internal temperature of 165°F (74°C). This ensures your chicken is cooked through without being overdone and dry.
- Rest Your Chicken: Patience is a virtue, especially after roasting! After removing the chicken from the oven, transfer it to a cutting board and tent it loosely with foil. Let it rest for 10-15 minutes before carving. This resting period allows the juices to redistribute throughout the meat, resulting in a much juicier and more tender final product. If you cut into it too soon, all those delicious juices will simply run out onto your cutting board.
Storage & Reheating Tips
You’ve cooked a magnificent Spatchcock Chicken, and chances are, you might have some delicious leftovers! Properly storing and reheating your chicken ensures it stays safe and tastes just as good the next day.
Storage: Once the chicken has cooled completely, carve any remaining meat off the bone. Store the cooked chicken in an airtight container in the refrigerator for up to 3-4 days. For longer storage, you can freeze the cooked chicken.
Place the carved meat in a freezer-safe bag or container and freeze for up to 3 months. Thaw frozen chicken overnight in the refrigerator before reheating.
Reheating:
- Oven (Best for Crispy Skin): For the best results, especially if you want to revive some of that crispy skin, preheat your oven to 350°F (175°C). Place the chicken pieces on a baking sheet, optionally adding a splash of chicken broth or water to the bottom of the pan to help keep the meat moist. Reheat for 15-20 minutes, or until thoroughly warmed through.
- Microwave (Quickest): If you’re in a hurry, the microwave works. Place chicken pieces on a microwave-safe plate, cover loosely with a damp paper towel to prevent drying, and heat in 30-60 second intervals until hot. Be aware that the skin won’t be crispy using this method.
- Air Fryer (Another Crispy Option): For smaller portions, an air fryer can bring back some crispiness. Place chicken pieces in the air fryer basket in a single layer. Air fry at 350°F (175°C) for 5-8 minutes, checking periodically, until heated through and crisp.
What to Serve With This Recipe
A beautifully roasted Spatchcock Chicken is a star on its own, but pairing it with the right side dishes truly creates a complete and satisfying meal. I always aim for sides that are simple, fresh, and complement the rich flavors of the chicken without overpowering them.
- Roasted Vegetables: This is a classic for a reason! Toss chopped carrots, potatoes, broccoli, or Brussels sprouts with olive oil, salt, and pepper. You can roast them on the same baking sheet as the chicken (add them about halfway through the chicken’s cooking time) or on a separate tray. The flavors meld together wonderfully.
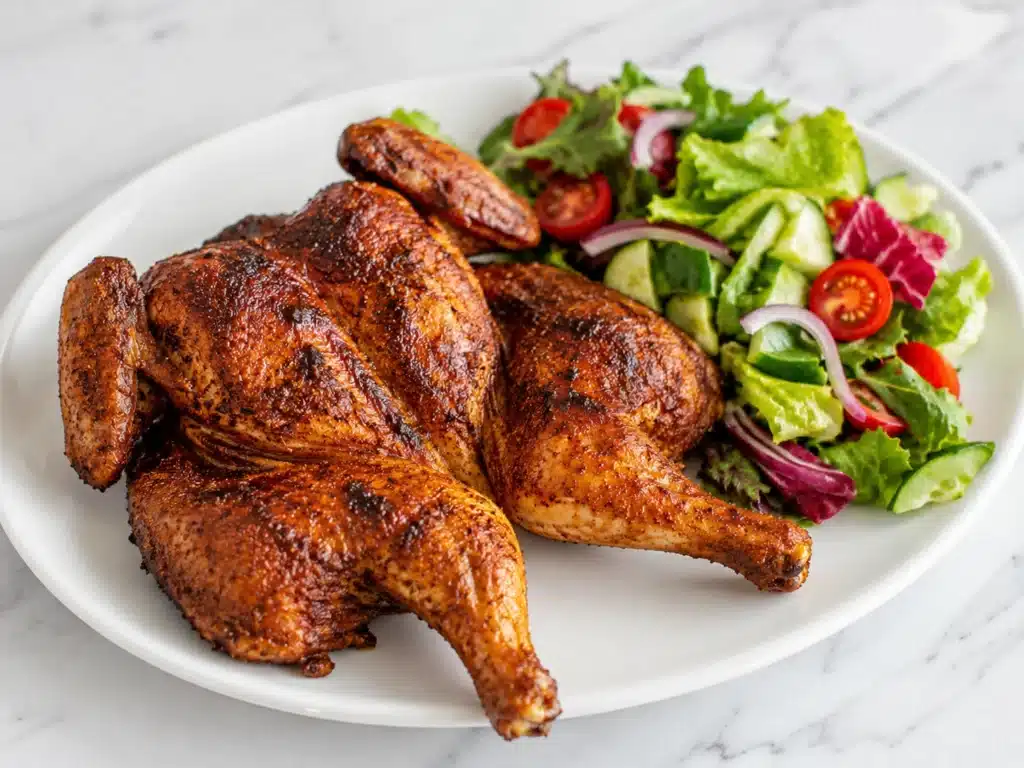
- Simple Green Salad: A crisp, refreshing green salad with a light vinaigrette offers a lovely contrast to the hearty chicken. It adds freshness and a nice textural balance.
- Creamy Mashed Potatoes: Who can resist fluffy, buttery mashed potatoes? They are the ultimate comfort food side and perfect for soaking up any delicious chicken juices.
- Rice or Quinoa: A simple side of steamed rice or quinoa provides a wholesome and easy carbohydrate that pairs well with chicken.
- Crusty Bread: Don’t forget a good loaf of crusty bread for dipping into the pan juices or just enjoying alongside the meal.
- Pasta Salad: For a refreshing, make-ahead option, a cold pasta salad works beautifully. My High-Protein Pasta Salad would be an excellent choice, offering a burst of flavor and a lovely texture contrast.
Choose one or two of these sides, and you’ll have a family favorite meal that’s both delicious and nourishing, proving that even a simple chicken can create a truly memorable dinner.
FAQs About Spatchcock Chicken
Got questions about this fantastic cooking method? Don’t worry, I’ve got answers! Here are some of the most common inquiries about Spatchcock Chicken.
How do you spatchcock a chicken?
To spatchcock a chicken, you essentially remove its backbone and flatten it. Place the chicken breast-side down on a cutting board. Using sturdy kitchen shears, cut along both sides of the backbone from the tail to the neck, then remove it.
Flip the chicken over, breast-side up, and firmly press down on the breastbone until you hear a crack and the chicken lays flat. This process is surprisingly easy and makes a huge difference in cooking.
What are the benefits of spatchcocking a chicken?
The main benefits of spatchcocking are faster and more even cooking, and incredibly crispy skin. Flattening the chicken increases its surface area exposed to heat, reducing cooking time significantly. It also ensures the breast and thigh meat cook at a similar rate, preventing dry breasts while the dark meat finishes. Plus, with the skin fully exposed, it browns and crisps up beautifully all over.
Can I spatchcock a frozen chicken?
No, you should never attempt to spatchcock a frozen or partially frozen chicken. Trying to cut through frozen bone is dangerous and can damage your tools. Always thaw your chicken completely in the refrigerator before spatchcocking. Planning ahead ensures both safety and the best results for your roasted chicken.
How long does it take to cook a spatchcock chicken?
A typical 3-4 pound (1.5-2 kg) spatchcock chicken usually cooks in about 45-60 minutes at 425°F (220°C). This is significantly less time than a traditional whole roasted chicken, which often takes 1.5-2 hours. Always rely on a meat thermometer to ensure doneness, as cooking times can vary based on oven calibration and chicken size.
What temperature should spatchcock chicken be cooked to?
You must cook spatchcock chicken to an internal temperature of 165°F (74°C). Insert a meat thermometer into the thickest part of the thigh, making sure it doesn’t touch any bone. Reaching this temperature ensures the chicken is safe to eat and perfectly cooked through, guaranteeing juicy and tender results every time.
Can I spatchcock a turkey?
Absolutely, yes! Spatchcocking works wonderfully for turkeys as well, especially smaller to medium-sized birds (under 18 lbs/8 kg). The benefits are the same: a faster cooking time, incredibly even cooking throughout the bird, and a wonderfully crispy skin. It’s a fantastic technique for holiday dinners, taking much of the stress out of roasting a large bird.
I hope these tips and answers empower you to try this amazing Spatchcock Chicken recipe. It’s truly a game-changer for simple, nourishing, and delicious family meals!