Ingredients
Whole Chicken 1 (3–4 lbs / 1.5–2 kg)
Olive Oil 2 tablespoons
Kosher Salt 1.5 teaspoons
Black Pepper 1 teaspoon
Garlic Powder 1 teaspoon
Smoked Paprika 1 teaspoon
Dried Thyme 1 teaspoon
Optional: Fresh Rosemary/Thyme 2-3 sprigs
Optional: Lemon 1/2, sliced
Instructions
1. 1. Prepare Your Workstation: First, grab a large cutting board and a sturdy pair of kitchen shears. A sharp chef’s knife also works, but shears make the backbone removal much easier and safer. Place your whole chicken, breast-side down, on the cutting board.
2. 2. Remove the Backbone: Locate the backbone running down the center of the chicken’s back. Carefully cut along one side of the backbone, from the tail to the neck, using your kitchen shears. You’ll need to apply some pressure to cut through the ribs. Once you’ve cut one side, repeat the process on the other side of the backbone to remove it completely. You can discard the backbone or save it for making stock (which I highly recommend!).
3. 3. Flatten the Chicken: Now, flip the chicken over so it’s breast-side up. Place your hands on top of the breastbone. Firmly press down to flatten the chicken. You’ll hear a satisfying crack as the breastbone breaks and the chicken lays flat. This is exactly what we want! This flattening is key for even cooking and crispy skin.
4. 4. Pat It Dry: Use paper towels to thoroughly pat the chicken dry, both on the skin and underneath. This is a crucial step for achieving that coveted crispy skin. Moisture is the enemy of crispiness!
5. 5. Season Generously: Drizzle the olive oil all over the chicken, then rub it in to coat the skin evenly. In a small bowl, combine the salt, pepper, garlic powder, smoked paprika, and dried thyme. Sprinkle this seasoning blend generously all over the chicken, making sure to coat both sides. Don’t be shy!
6. 6. Prepare for Roasting: Place the seasoned, flattened chicken, skin-side up, on a large baking sheet, preferably one fitted with a wire rack. The rack allows air to circulate around the chicken, promoting even cooking and extra crispiness. If you don’t have a rack, you can simply place it directly on the baking sheet. If using, tuck fresh rosemary/thyme sprigs and lemon slices around the chicken.
7. 7. Preheat Oven: Preheat your oven to 425°F (220°C). A higher temperature initially helps create that beautiful, crispy skin.
8. 8. Roast the Chicken: Transfer the baking sheet to the preheated oven. Roast for 45-60 minutes, or until a meat thermometer inserted into the thickest part of the thigh (without touching bone) reads 165°F (74°C). Cooking time will vary depending on the size of your chicken and your oven. The skin should be deeply golden brown and incredibly crisp.
9. 9. Rest and Serve: Once cooked, carefully remove the chicken from the oven. Transfer it to a clean cutting board. Tent it loosely with aluminum foil and let it rest for 10-15 minutes. This resting period is vital! It allows the juices to redistribute throughout the meat, ensuring every bite is moist and flavorful.
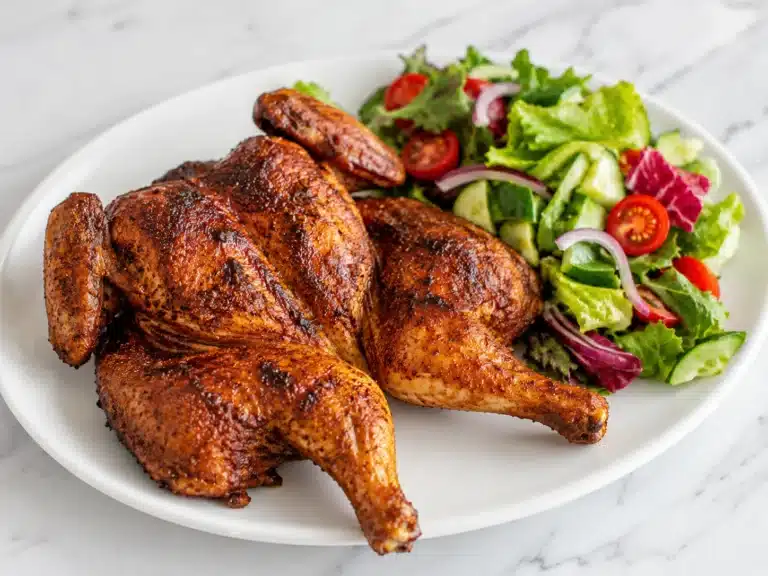
10. 10. Carve and Enjoy: After resting, carve the chicken into desired pieces. Serve it hot and watch your family devour this perfectly cooked masterpiece!
Notes
Use sharp kitchen shears for easy backbone removal. Pat the chicken dry thoroughly for the crispiest skin. Roasting on a wire rack ensures even cooking and helps the bottom skin crisp. Always use a meat thermometer to check doneness (165°F in thigh). Let the chicken rest for 10-15 minutes before carving to retain juices.
- Prep Time: 20 minutes
- Cook Time: 45 minutes
- Category: Main Course
- Method: Roasting
- Cuisine: American
- Diet: Gluten-Free, Dairy-Free
Nutrition
- Serving Size: 1 serving
- Calories: 450
- Sugar: 0g
- Sodium: 800mg
- Fat: 28g
- Saturated Fat: 7g
- Unsaturated Fat: 18g
- Trans Fat: 0g
- Carbohydrates: 1g
- Fiber: 0g
- Protein: 35g
- Cholesterol: 120mg