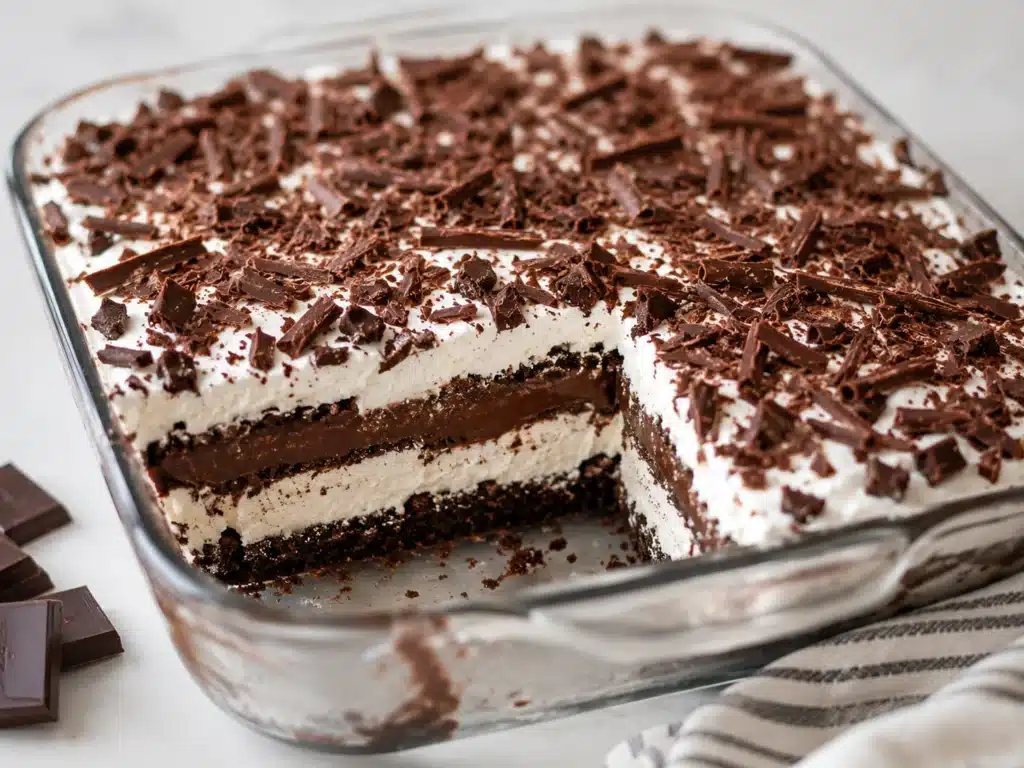
As a mom of three, my kitchen often feels like the heart of our home. It’s where memories are made, laughter echoes, and most importantly, where food becomes an expression of love. I believe deeply in nourishing my family with simple, wholesome meals, but let’s be honest sometimes, a good dessert is just what the soul needs.
For years, I struggled with the dessert dilemma: how to satisfy those inevitable sweet cravings without feeling like I was derailing all our healthy efforts. I wanted something decadent, something that brought pure joy, but also something I could feel good about serving. That’s why I poured my heart into creating this incredible Guilt-Free Chocolate Lasagna.
I remember one particularly chaotic Tuesday evening. The kids had just finished their homework, and a collective groan went up when I mentioned “healthy” dessert. They craved chocolate, something rich and creamy.
Instead of reaching for a sugar-laden store-bought treat, I decided to whip up a batch of my new chocolate creation. Their eyes widened with anticipation as they watched me layer the creamy chocolate goodness. The first bite brought instant silence, followed by a chorus of “Mmm!”s and “Can I have more?” That night, my Guilt-Free Chocolate Lasagna became an instant family legend.
It’s light yet rich, packed with flavor but mindful of ingredients, and truly a treat you can indulge in without a second thought. This isn’t just a recipe; it’s a testament to how delicious and satisfying healthier eating can be, proving that food can indeed be love without the heavy aftermath.
Print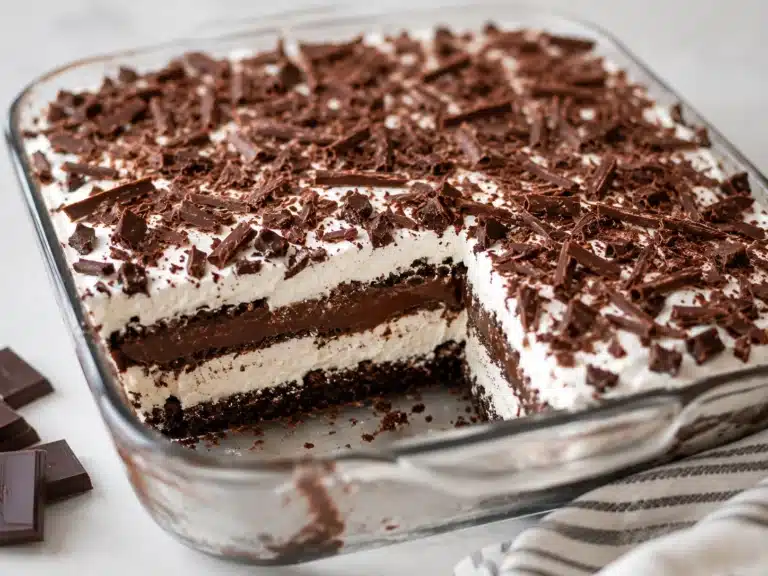
Guilt-Free Chocolate Lasagna
A decadent yet healthier no-bake layered dessert featuring an Oreo crust, creamy cheesecake layer, chocolate pudding, and whipped topping, perfect for satisfying sweet cravings without the guilt.
- Total Time: 4 hours 20 minutes (including chilling)
- Yield: 12 servings 1x
Ingredients
14.3 oz package Oreo Thins (or similar low-sugar chocolate cookies)
1/4 cup unsalted butter, melted
8 oz reduced-fat cream cheese, softened
1/2 cup powdered sugar
1/4 cup milk (any type, I use 1%)
1 teaspoon vanilla extract
8 oz light whipped topping (like Cool Whip Lite), thawed (for cream cheese layer)
2 (1 oz) packages instant sugar-free chocolate pudding mix
3 cups cold milk (any type, I use 1%)
8 oz light whipped topping (like Cool Whip Lite), thawed (for topping)
1/4 cup chocolate shavings or mini chocolate chips (for garnish, optional)
Instructions
1. Prepare the Crust: First, place your Oreo Thins in a food processor and pulse until they form fine crumbs. Alternatively, put them in a zip-top bag and crush them with a rolling pin. Next, transfer the crumbs to a medium bowl. Pour in the melted butter and mix well until the crumbs are thoroughly moistened.
2. Press the Crust: Now, press the crumb mixture firmly and evenly into the bottom of a 9×13 inch baking dish. Use the back of a spoon or your fingers to compact it. Place the dish in the freezer for about 15-20 minutes while you prepare the next layer. This helps the crust set firmly.
3. Make the Cream Cheese Layer: In a large mixing bowl, beat the softened reduced-fat cream cheese with an electric mixer until it’s light and fluffy. Gradually add the powdered sugar, beating until smooth. Pour in the milk and vanilla extract, mixing until just combined.
4. Fold in Whipped Topping (Part 1): Gently fold one container (8 oz) of the thawed light whipped topping into the cream cheese mixture until no streaks remain. This step creates a light and airy layer.
5. Spread Cream Cheese Layer: Remove your baking dish from the freezer. Carefully spread the cream cheese mixture evenly over the chilled crust. Return the dish to the refrigerator to chill while you prepare the chocolate pudding.
6. Prepare the Chocolate Pudding: In another large bowl, whisk together the sugar-free chocolate pudding mixes and cold milk for about 2-3 minutes, until the mixture begins to thicken. It will thicken considerably as it stands.
7. Layer the Pudding: Pour the thickened chocolate pudding mixture carefully over the cream cheese layer in your baking dish. Use a spatula to spread it smoothly and evenly.
8. Top with Whipped Topping (Part 2): Finally, spread the remaining 8 oz container of thawed light whipped topping over the chocolate pudding layer. Make sure to cover the entire surface for a beautiful finish.
9. Chill Thoroughly: Cover the dish loosely with plastic wrap. Refrigerate the Guilt-Free Chocolate Lasagna for at least 4 hours, or preferably overnight, to allow all the layers to set properly and the flavors to meld beautifully.
10. Garnish and Serve: Just before serving, garnish with chocolate shavings or mini chocolate chips if desired. Slice and serve this delightful, healthier chocolate treat!
Notes
Prepare ahead: This dessert is best made the day before serving. For dairy-free, use dairy-free cookies, plant-based butter, dairy-free cream cheese, non-dairy milk, and coconut whipped cream. For gluten-free, use gluten-free chocolate sandwich cookies. Freeze for up to 1 month. Thaw in refrigerator before serving. Store leftovers covered in the fridge for 3-4 days.
- Prep Time: 20 minutes
- Cook Time: 0 minutes
- Category: Dessert
- Method: No-Bake
- Cuisine: American
- Diet: Reduced Sugar, Reduced Fat, Vegetarian
Nutrition
- Serving Size: 1 slice (1/12 of recipe)
- Calories: 290
- Sugar: 18 g
- Sodium: 380 mg
- Fat: 14 g
- Saturated Fat: 7 g
- Unsaturated Fat: 5 g
- Trans Fat: 0 g
- Carbohydrates: 36 g
- Fiber: 2 g
- Protein: 5 g
- Cholesterol: 20 mg
Why You’ll Love This Guilt-Free Chocolate Lasagna Recipe
You’re about to discover your new favorite dessert, and for so many fantastic reasons! This Guilt-Free Chocolate Lasagna truly checks all the boxes. First and foremost, it’s incredibly easy to make.
As a busy mom, I understand the value of a no-bake recipe that comes together without fuss. You won’t spend hours in the kitchen, yet you’ll produce a dessert that looks and tastes like pure sophistication.
Furthermore, this recipe is a healthier spin on a classic favorite. We swap out some heavier ingredients for lighter, more wholesome alternatives, making it a truly “better-for-you” chocolate treat. You get all the creamy, dreamy chocolate flavor you crave, but with less sugar and saturated fat.
This means you can enjoy a generous slice without the typical dessert guilt. It perfectly aligns with my philosophy: food should be delicious and nourishing, never a source of stress.
Moreover, it’s a total crowd-pleaser. Whether you’re hosting a dinner party, bringing a dish to a potluck, or simply treating your family, this layered chocolate delight always earns rave reviews. Kids and adults alike adore its smooth, rich texture and delightful chocolatey taste.
It’s also incredibly versatile. You can easily adapt it to suit various dietary needs or simply play with flavors. Finally, the make-ahead aspect is a lifesaver.
Prepare it the day before, let it chill, and then simply slice and serve when you’re ready. This effortless dessert truly simplifies entertaining and elevates any meal.
Ingredients You’ll Need
Gathering your ingredients is the first step to creating this delightful Guilt-Free Chocolate Lasagna. We use simple, accessible items you probably already have or can easily find at your local grocery store. Here’s what you’ll need:
| Category | Ingredient | Quantity | Notes |
|---|---|---|---|
| For the Crust | Oreo Thins (or similar low-sugar chocolate cookies) | 14.3 oz package | Crush them finely for the base. |
| Unsalted Butter, melted | 1/4 cup | Binds the crumbs together. | |
| For the Cream Cheese Layer | Reduced-Fat Cream Cheese, softened | 8 oz (1 block) | Ensure it’s softened for smooth mixing. |
| Powdered Sugar (confectioners’ sugar) | 1/2 cup | Sweetens the cream cheese layer. | |
| Milk (any type, I use 1%) | 1/4 cup | Helps create a smooth consistency. | |
| Vanilla Extract | 1 teaspoon | Adds warmth and flavor. | |
| Light Whipped Topping (like Cool Whip Lite), thawed | 8 oz (1 container) | Fold in gently for lightness. | |
| For the Chocolate Pudding Layer | Instant Sugar-Free Chocolate Pudding Mix | 2 (1 oz) packages | Look for sugar-free varieties. |
| Cold Milk (any type, I use 1%) | 3 cups | Use cold milk for proper setting. | |
| For the Topping & Garnish | Light Whipped Topping (like Cool Whip Lite), thawed | 8 oz (1 container) | For the top layer. |
| Chocolate Shavings or Mini Chocolate Chips | 1/4 cup | For garnish (optional). |
[image 2]
Substitutions & Variations
One of the beautiful things about this Guilt-Free Chocolate Lasagna is its adaptability. You can easily adjust ingredients to fit dietary preferences or simply to try new flavor profiles. Here are some of my favorite ways to switch things up:
- Gluten-Free: Simply swap out the regular Oreo Thins for gluten-free chocolate sandwich cookies. Many brands offer delicious GF alternatives that work perfectly for the crust.
- Dairy-Free: This takes a few more adjustments but is totally doable! Use dairy-free chocolate sandwich cookies, a plant-based butter alternative for the crust, and dairy-free cream cheese (almond or cashew-based work well). For the whipped topping, opt for coconut whipped cream (ensure it’s fully chilled) or another plant-based whipped topping. Use your favorite non-dairy milk (almond, soy, or oat) for both the cream cheese and pudding layers.
- Crust Alternatives: If you don’t have Oreo Thins, you can use graham cracker crumbs mixed with a little cocoa powder for a different flavor profile. For a nuttier crust, consider finely crushed digestive biscuits or even a blend of almond flour and cocoa powder with melted coconut oil.
- Pudding Flavor: While chocolate is classic, feel free to experiment with other sugar-free instant pudding flavors. Vanilla, white chocolate, or even a sugar-free butterscotch could add an exciting twist to your lighter chocolate treat.
- Added Protein: For an extra boost, try folding a scoop of unflavored or chocolate protein powder into the cream cheese layer or even the pudding layer. Just be mindful of the consistency and add a splash more milk if it becomes too thick.
- Fruity Boost: Layer in some fresh raspberries or sliced strawberries between the chocolate pudding and whipped topping for a refreshing burst of fruitiness. The combination of chocolate and berries is always a winner.
- Nutty Crunch: Sprinkle some finely chopped pecans, walnuts, or almonds over the top along with the chocolate shavings for added texture and a delicious nutty flavor.
- Minty Fresh: Add a few drops of peppermint extract to the cream cheese layer for a refreshing mint chocolate lasagna. This is especially lovely around the holidays!
Step-by-Step Instructions
Let’s get cooking! Making this Guilt-Free Chocolate Lasagna is a straightforward and enjoyable process. Follow these simple steps for a perfect dessert every time:
- Prepare the Crust: First, place your Oreo Thins in a food processor and pulse until they form fine crumbs. Alternatively, put them in a zip-top bag and crush them with a rolling pin. Next, transfer the crumbs to a medium bowl. Pour in the melted butter and mix well until the crumbs are thoroughly moistened.
- Press the Crust: Now, press the crumb mixture firmly and evenly into the bottom of a 9×13 inch baking dish. Use the back of a spoon or your fingers to compact it. Place the dish in the freezer for about 15-20 minutes while you prepare the next layer. This helps the crust set firmly.
- Make the Cream Cheese Layer: In a large mixing bowl, beat the softened reduced-fat cream cheese with an electric mixer until it’s light and fluffy. Gradually add the powdered sugar, beating until smooth. Pour in the milk and vanilla extract, mixing until just combined.
- Fold in Whipped Topping (Part 1): Gently fold one container (8 oz) of the thawed light whipped topping into the cream cheese mixture until no streaks remain. This step creates a light and airy layer.
- Spread Cream Cheese Layer: Remove your baking dish from the freezer. Carefully spread the cream cheese mixture evenly over the chilled crust. Return the dish to the refrigerator to chill while you prepare the chocolate pudding.
- Prepare the Chocolate Pudding: In another large bowl, whisk together the sugar-free chocolate pudding mixes and cold milk for about 2-3 minutes, until the mixture begins to thicken. It will thicken considerably as it stands.
- Layer the Pudding: Pour the thickened chocolate pudding mixture carefully over the cream cheese layer in your baking dish. Use a spatula to spread it smoothly and evenly.
- Top with Whipped Topping (Part 2): Finally, spread the remaining 8 oz container of thawed light whipped topping over the chocolate pudding layer. Make sure to cover the entire surface for a beautiful finish.
- Chill Thoroughly: Cover the dish loosely with plastic wrap. Refrigerate the Guilt-Free Chocolate Lasagna for at least 4 hours, or preferably overnight, to allow all the layers to set properly and the flavors to meld beautifully.
- Garnish and Serve: Just before serving, garnish with chocolate shavings or mini chocolate chips if desired. Slice and serve this delightful, healthier chocolate treat!
[image 3]
Pro Tips for Success
Creating a truly spectacular Guilt-Free Chocolate Lasagna goes beyond just following the steps. Here are my tried-and-true tips to ensure your dessert turns out perfectly every time, embodying that simple, nourishing love I put into my food:
- Soften Cream Cheese Properly: Always let your reduced-fat cream cheese soften at room temperature for at least 30 minutes before you begin. This ensures a lump-free, silky-smooth cream cheese layer. Cold cream cheese will result in a chunky texture, and nobody wants that!
- Don’t Overmix the Whipped Topping: When folding in the light whipped topping, use a gentle hand. Overmixing deflates the air, resulting in a denser layer. You want that fluffy, airy texture for maximum enjoyment.
- Chill is Key: Patience is truly a virtue with this recipe. The minimum 4 hour chill time is crucial for the layers to set and the flavors to fully develop. Ideally, chill it overnight for the best results. A well chilled lasagna holds its shape beautifully when sliced.
- Cold Milk for Pudding: Use very cold milk when preparing the instant pudding. Cold milk helps the pudding set faster and achieve a thicker, more stable consistency, which is exactly what we need for distinct layers.
- Level Layers: Take a moment to evenly spread each layer before adding the next. This creates a visually appealing dessert and ensures a balanced taste in every bite. A small offset spatula works wonders for this.
- Garnish Just Before Serving: While optional, a sprinkle of chocolate shavings or mini chocolate chips elevates the presentation. Add them right before serving to keep them fresh and vibrant.
- For Easy Slicing: Use a sharp knife dipped in hot water and wiped dry between slices. This technique creates clean, perfect slices of your delicious Guilt-Free Chocolate Lasagna.
Storage & Reheating Tips
This Guilt-Free Chocolate Lasagna is not only incredibly tasty but also super convenient for make ahead ease. Proper storage ensures you can enjoy its deliciousness for days!
- Refrigeration: Store any leftover chocolate lasagna tightly covered with plastic wrap or in an airtight container in the refrigerator. It stays wonderfully fresh and delicious for up to 3-4 days. The flavors actually deepen a bit over time, making leftovers a real treat!
- Freezing: You can absolutely freeze this dessert! For best results, cover the entire pan tightly with plastic wrap, then a layer of aluminum foil. You can also slice individual portions and freeze them on a baking sheet before transferring them to an airtight container or freezer bag. This prevents them from sticking together. It will keep well in the freezer for up to 1 month.
- Thawing: If you freeze the whole pan, transfer it to the refrigerator 24 hours before you plan to serve it. For individual frozen slices, move them to the fridge for a few hours, or let them sit at room temperature for about 30-60 minutes. This is a no-bake, cold dessert, so no reheating is necessary or recommended. Just thaw and enjoy!
What to Serve With This Recipe
This Guilt-Free Chocolate Lasagna makes a fantastic standalone dessert, but you can also elevate the experience with a few thoughtful pairings. Because it’s a richer, creamy dessert, I usually opt for something light and refreshing alongside it.
For a complete meal, consider serving a light and fresh main course before this dessert. My High-Protein Pasta Salad or a simple grilled chicken dish would be excellent choices, offering balance without being too heavy. If you’re planning a casual gathering, think about pairing it with something like Smash Burger Tacos or Hot Honey Chicken Bowls. The sweet treat provides a perfect counterpoint to savory flavors.
For a simple dessert pairing, a cup of freshly brewed coffee or a soothing herbal tea complements the chocolate notes beautifully. You could also offer a small side of fresh berries, like raspberries or strawberries, to add a bright, tart contrast to the creamy sweetness.
A light sprinkle of toasted coconut flakes or a drizzle of a sugar-free caramel sauce can also enhance the presentation and flavor profile. Remember, this healthier chocolate treat feels indulgent, so keep other elements simple and fresh!
FAQs
Is this Guilt-Free Chocolate Lasagna truly healthy?
While “healthy” is a broad term, this Guilt-Free Chocolate Lasagna is definitely a “healthier” or “better-for-you” alternative to traditional chocolate lasagna. We use reduced-fat cream cheese, light whipped topping, and sugar-free instant pudding, significantly cutting down on saturated fats and added sugars found in classic recipes. It’s about mindful ingredient choices that allow you to enjoy a delicious chocolate dessert without the usual heavy calorie count or sugar spike.
Can I make Guilt-Free Chocolate Lasagna ahead of time?
Absolutely, yes! This recipe is a dream for meal prep and entertaining. In fact, making it ahead of time is highly recommended.
The layers need a minimum of 4 hours to chill and set properly, but chilling overnight yields the best results. This allows the flavors to fully meld and the texture to become perfectly firm, making it easy to slice and serve. Prepare it the day before your event, and you’ll have one less thing to worry about!
What makes this chocolate lasagna “guilt-free”?
The “guilt-free” aspect comes from the intentional substitutions of common high-calorie and high-sugar ingredients. We opt for Oreo Thins (which have fewer calories and sugar than regular Oreos), light whipped topping instead of heavy cream, reduced-fat cream cheese, and sugar-free instant pudding mix. These swaps drastically lower the overall sugar, fat, and calorie content, providing a delightful and satisfying chocolate dessert that aligns with a more balanced eating approach. It’s truly a lighter chocolate treat.
Can I make this recipe dairy-free or gluten-free?
Yes, you certainly can! For a dairy-free version, use dairy-free chocolate sandwich cookies, a plant-based butter alternative, dairy-free cream cheese, non-dairy milk (like almond or oat milk), and a coconut-based or other plant-based whipped topping. For a gluten-free option, simply swap the regular Oreo Thins for gluten-free chocolate sandwich cookies. The rest of the ingredients are naturally gluten-free.
How long does this Guilt-Free Chocolate Lasagna last?
When stored properly in an airtight container or tightly covered with plastic wrap in the refrigerator, your Guilt-Free Chocolate Lasagna will stay fresh and delicious for 3 to 4 days. You can also freeze it for up to 1 month. Just remember to thaw it in the refrigerator before serving for the best texture and taste. It’s a fantastic recipe to have on hand for when sweet cravings strike!