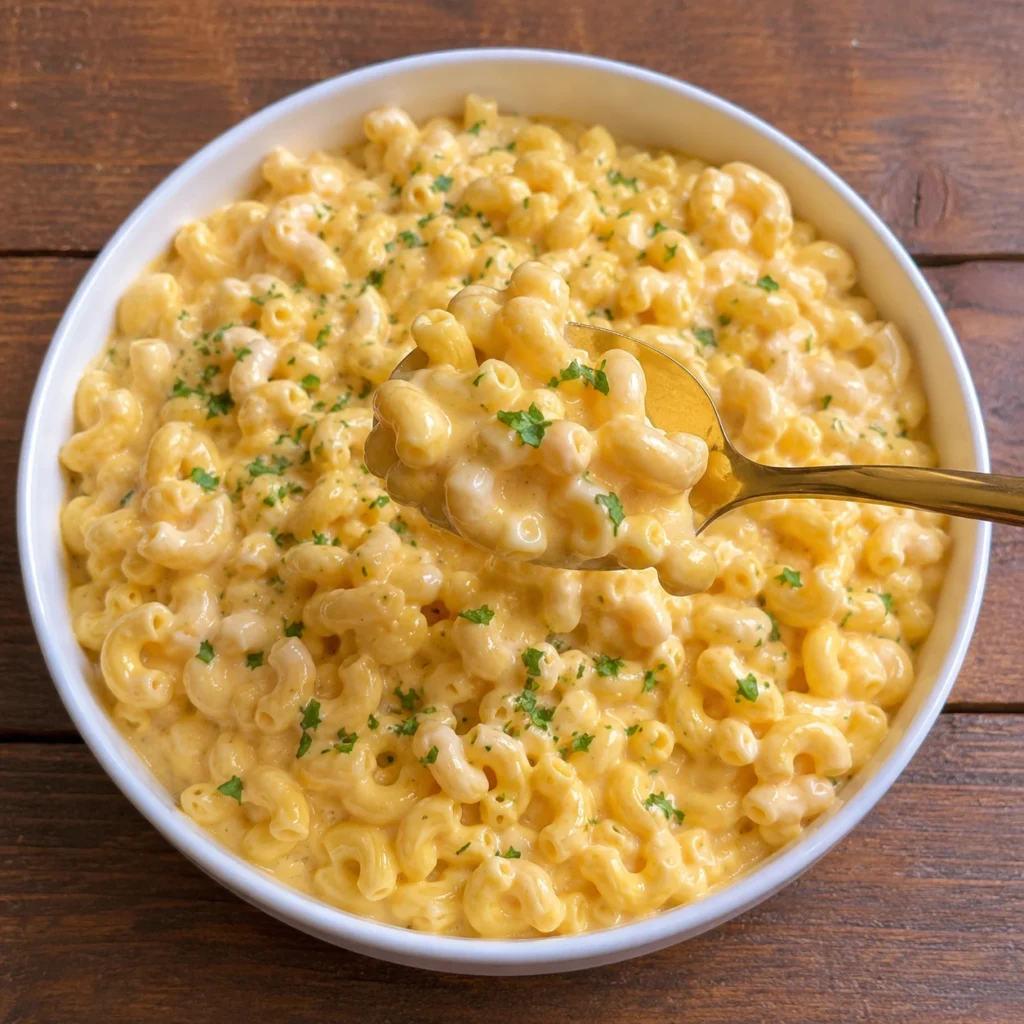
Oh, darling, let me tell you about weeknights at my house. Three kids, three different activity schedules, and inevitably, a chorus of “Mom, I’m hungry!” just as I’m trying to figure out dinner. More often than not, their little faces light up at the mere mention of mac and cheese.
And honestly, who can blame them? It’s a hug in a bowl, a taste of childhood, pure comfort food. But as a mom who believes food is love, I also want that love to be nourishing. That’s why I set out on a mission years ago to create a version that didn’t just fill their bellies but truly fueled their growing bodies.
I experimented endlessly, trying to sneak in extra goodness without anyone suspecting. The trick was finding ways to boost the protein content without sacrificing that creamy, dreamy texture or the classic cheesy flavor everyone adores. After many iterations (and a few near-misses, let’s be honest!), I finally perfected it: my very own High Protein Mac and Cheese.
This isn’t just a meal; it’s a strategic move for busy parents, a secret weapon against the afternoon slump, and a delicious way to ensure your family gets the protein they need. It’s comforting, satisfying, and packed with so much wholesome goodness, you’ll feel great serving it. Trust me, even the pickiest eaters won’t know it’s healthier. They’ll just know it’s utterly delicious mac and cheese.
Print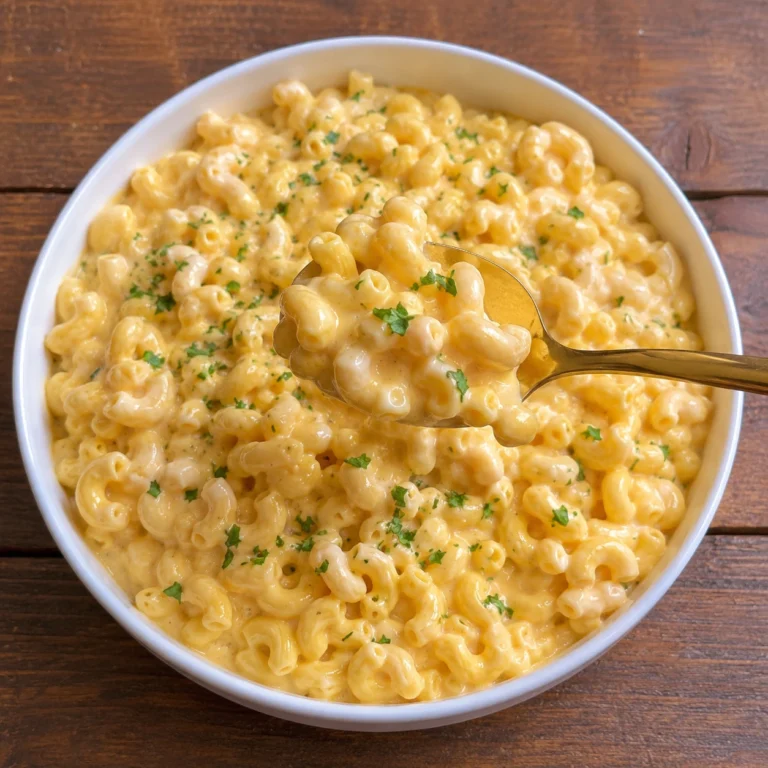
High Protein Mac and Cheese
A high-protein mac and cheese that’s creamy, comforting, and packed with wholesome goodness, perfect for busy families.
- Total Time: 45 minutes
- Yield: 8 servings 1x
Ingredients
1 box (16 oz) elbow macaroni
4 tablespoons unsalted butter
4 tablespoons all-purpose flour
3 cups whole milk
4 oz cream cheese, softened
1 cup cottage cheese
1/2 cup plain Greek yogurt
2 cups (8 oz) sharp cheddar cheese, freshly grated, divided
1 cup (4 oz) Monterey Jack cheese, freshly grated
1/4 cup Parmesan cheese, finely grated (optional)
1 teaspoon Dijon mustard
1 teaspoon garlic powder
1/2 teaspoon onion powder
1/2 teaspoon smoked paprika
1/2 teaspoon salt, or to taste
1/4 teaspoon black pepper, freshly ground
Instructions
1. 1. Cook the Pasta: Bring a large pot of generously salted water to a rolling boil. Add elbow macaroni and cook until al dente. Drain and set aside.
2. 2. Prepare the Protein Boost: In a small blender or food processor, combine cottage cheese and Greek yogurt. Blend until completely smooth. Set aside.
3. 3. Start the Roux: In a large pot or Dutch oven, melt butter over medium heat. Add flour and whisk continuously for 1-2 minutes until smooth and slightly nutty.
4. 4. Add Milk Gradually: Slowly pour in 1 cup of milk, whisking vigorously to avoid lumps. Add remaining 2 cups milk, whisk until smooth and slightly thickened. Bring to a gentle simmer.
5. 5. Melt the Cheeses: Reduce heat to low. Add cream cheese, blended cottage cheese mixture, 1 cup sharp cheddar, all Monterey Jack, and Parmesan (if using). Stir until completely melted and smooth.
6. 6. Season the Sauce: Stir in Dijon mustard, garlic powder, onion powder, smoked paprika, salt, and pepper. Taste and adjust seasonings.
7. 7. Combine Pasta and Sauce: Add drained pasta to sauce and stir until well coated.
8. 8. Bake (Optional): Transfer to a greased 9×13 inch baking dish. Sprinkle remaining 1 cup sharp cheddar on top. Bake at 375°F (190°C) for 20-25 minutes until bubbly and golden. If serving stovetop, serve immediately.
9. 9. Serve Warm: Let rest a few minutes if baked, then serve.
Notes
For extra creaminess, use full-fat dairy. Grate your own cheese for best melting. Blend cottage cheese and yogurt until totally smooth to hide from picky eaters. To make gluten-free, use GF pasta and GF flour. Leftovers keep in fridge for 3-4 days or freeze for up to 3 months. Reheat with a splash of milk.
- Prep Time: 15 minutes
- Cook Time: 30 minutes
- Category: Main Course
- Method: Stovetop and Bake
- Cuisine: American
- Diet: high-protein, vegetarian
Nutrition
- Serving Size: 1 serving (about 1 cup)
- Calories: 520
- Sugar: 9g
- Sodium: 880mg
- Fat: 28g
- Saturated Fat: 16g
- Unsaturated Fat: 10g
- Trans Fat: 0.5g
- Carbohydrates: 42g
- Fiber: 2g
- Protein: 30g
- Cholesterol: 80mg
Why You’ll Love This High Protein Mac and Cheese Recipe
This isn’t just another mac and cheese recipe. It’s a game-changer for so many reasons, perfectly aligning with my philosophy of simple, nourishing, and loved food.
- Protein Powerhouse: Forget the energy crash! This recipe packs a serious protein punch, keeping you and your family full, satisfied, and energized for longer. It’s fantastic for growing kids, active adults, and anyone looking to boost their protein intake without resorting to bland options.
- Unbelievably Creamy: Despite its healthy enhancements, this mac and cheese retains that luxuriously creamy, velvety texture you crave. There are no compromises on deliciousness here.
- Classic Comfort, Healthier Twist: It delivers all the nostalgic comfort of your favorite mac and cheese, but with clever additions that make it a truly wholesome meal. You get the best of both worlds!
- Family-Friendly Favorite: My kids devour this, and yours will too. It’s a guaranteed crowd-pleaser, making mealtime battles a thing of the past.
- Simple & Straightforward: As a busy mom, I value simplicity above all. This recipe uses everyday ingredients and straightforward steps, making it perfect for weeknight dinners.
- Versatile & Adaptable: Easily customize it with your favorite cheeses, add veggies, or adjust seasonings to suit your family’s preferences. It’s incredibly flexible.
Ingredients You’ll Need
Gathering your ingredients is the first step to culinary success. Here’s what you’ll need to create this incredibly satisfying and protein-packed dish. Most of these are likely already staples in your pantry and fridge!
| Ingredient | Quantity | Notes |
|---|---|---|
| Elbow Macaroni | 1 box (16 oz) | Or other small pasta shape |
| Unsalted Butter | 4 tablespoons | |
| All-Purpose Flour | 4 tablespoons | For the roux |
| Milk | 3 cups | Whole milk recommended for creaminess, but 2% works |
| Cream Cheese | 4 oz (half block) | Softened, for extra creaminess and tang |
| Cottage Cheese | 1 cup | Small curd or blended smooth for no texture |
| Plain Greek Yogurt | 1/2 cup | Full-fat for best texture and protein boost |
| Sharp Cheddar Cheese | 2 cups (8 oz) | Freshly grated, divided |
| Monterey Jack Cheese | 1 cup (4 oz) | Freshly grated, for meltiness |
| Parmesan Cheese | 1/4 cup | Finely grated, optional but adds depth |
| Dijon Mustard | 1 teaspoon | Enhances cheese flavor, don’t skip! |
| Garlic Powder | 1 teaspoon | |
| Onion Powder | 1/2 teaspoon | |
| Smoked Paprika | 1/2 teaspoon | For a subtle smoky depth |
| Salt | 1/2 teaspoon, or to taste | |
| Black Pepper | 1/4 teaspoon, or to taste | Freshly ground is best |
[image 2]
Substitutions & Variations
Part of the beauty of this High Protein Mac and Cheese is its incredible flexibility. Don’t be afraid to experiment and make it your own! Here are some ideas to get you started:
- Pasta Power-Ups: While elbow macaroni is classic, feel free to use whole wheat pasta for added fiber, or try chickpea or lentil pasta for an even bigger protein boost and a gluten-free option. Any small shape like shells, cavatappi, or penne works wonderfully.
- Cheese Choices: Mix and match your cheeses! Gruyere, Fontina, Colby Jack, or even a touch of cream cheese can add unique flavors and textures. For a sharper bite, increase the amount of sharp cheddar. If you prefer a milder taste, swap some cheddar for mild Monterey Jack.
- Dairy Swaps: You can use 1% or skim milk, though the sauce will be slightly less rich. For a dairy-free version, use unsweetened almond milk or oat milk, and dairy-free cream cheese and shredded cheese (though the protein content from cottage cheese/Greek yogurt will be reduced or require alternative additions).
- Hidden Veggies: This is a mom’s secret weapon! Stir in steamed broccoli florets, chopped spinach (it wilts right into the sauce!), pureed butternut squash, or finely grated carrots. My kids never notice the extra nutrients.
- Extra Protein Punch: Already high in protein, you can boost it further by stirring in cooked, shredded chicken, diced ham, crumbled bacon, or even drained canned tuna. For a plant-based option, white beans or nutritional yeast can add more protein and savory flavor.
- Spice it Up: A pinch of cayenne pepper or a dash of hot sauce gives it a subtle kick. Add a touch of dry mustard powder to the roux for an even more intense cheesy flavor. Smoked paprika adds a lovely warmth.
- Gluten-Free: Simply use your favorite gluten-free pasta and ensure your other ingredients (like flour for the roux) are certified gluten-free. Many brands offer GF all-purpose flour blends that work perfectly for a roux.
Step-by-Step Instructions
Making this incredible High Protein Mac and Cheese is surprisingly simple. Follow these steps for a perfect, creamy, and satisfying result every time.
- Cook the Pasta: Bring a large pot of generously salted water to a rolling boil. Add your elbow macaroni and cook according to package directions until al dente. You want it slightly firm, as it will continue to cook a bit in the sauce. Drain the pasta well and set it aside.
- Prepare the Protein Boost: In a small blender or food processor, combine the cottage cheese and Greek yogurt. Blend until completely smooth and creamy, with no visible curds. This step is key to a silky sauce. Set aside.
- Start the Roux: In a large, heavy-bottomed pot or Dutch oven, melt the unsalted butter over medium heat. Once melted, sprinkle in the all-purpose flour. Whisk continuously for 1-2 minutes until a smooth paste (the roux) forms and it smells slightly nutty. Don’t let it brown too much.
- Add Milk Gradually: Slowly pour in about 1 cup of the milk, whisking vigorously to prevent lumps. Once smooth, add the remaining 2 cups of milk, continuing to whisk until the sauce is smooth and starting to thicken slightly. Bring it to a gentle simmer, still whisking.
- Melt the Cheeses: Reduce the heat to low. Add the cream cheese, the blended cottage cheese and Greek yogurt mixture, 1 cup of the sharp cheddar, all of the Monterey Jack, and the Parmesan cheese (if using). Stir constantly until all the cheese is completely melted and the sauce is smooth and creamy.
- Season the Sauce: Stir in the Dijon mustard, garlic powder, onion powder, smoked paprika, salt, and black pepper. Taste the sauce and adjust seasonings as needed. This is your chance to get it just right!
- Combine Pasta and Sauce: Add the drained, cooked pasta to the cheese sauce. Stir gently until every piece of pasta is thoroughly coated with that luscious, creamy sauce.
- Bake (Optional, but Recommended!): If you want a golden, bubbly top, transfer the mac and cheese to a greased 9×13 inch baking dish. Sprinkle the remaining 1 cup of sharp cheddar cheese over the top. Bake in a preheated oven at 375°F (190°C) for 20-25 minutes, or until bubbly and the cheese on top is golden brown. If you prefer a stovetop version, simply serve immediately!
- Serve Warm: Let it rest for a few minutes if baked, then scoop out generous portions. This High Protein Mac and Cheese is best enjoyed warm.
[image 3]
Pro Tips for Success
Achieving the perfect, creamy, and satisfying High Protein Mac and Cheese isn’t hard, but a few insider tips can elevate your dish from good to absolutely amazing!
- Grate Your Own Cheese: This is my number one tip for any cheese sauce! Pre-shredded cheeses often contain anti-caking agents that can make your sauce gritty or prevent it from melting smoothly. Freshly grated cheese melts beautifully, creating a silkier, more consistent sauce.
- Don’t Overcook the Pasta: Cook your macaroni just until al dente. It will continue to cook a bit when mixed with the hot sauce and if baked. Slightly undercooked pasta holds its shape better and prevents a mushy texture.
- Whisk, Whisk, Whisk the Roux: When making your roux, whisk continuously to prevent lumps and ensure the flour cooks thoroughly. This step is crucial for a smooth, lump-free sauce.
- Low and Slow for Cheese: When adding the cheeses to the sauce, keep the heat on low. High heat can cause cheese to “break” or become oily, resulting in a greasy, clumpy sauce. Patience is a virtue here.
- Blend That Cottage Cheese: For an undetectable protein boost and ultimate creaminess, do not skip blending the cottage cheese and Greek yogurt until completely smooth. My kids would never guess it’s in there!
- Season Generously and Taste: Don’t be shy with your seasonings. Taste the sauce before adding the pasta and adjust the salt, pepper, and other spices. A little Dijon mustard makes a world of difference in enhancing the cheese flavor without making the sauce taste like mustard.
- The Optional Bake: While delicious straight from the pot, baking adds an irresistible golden, crispy cheese topping and a delightful depth of flavor. If you have the time, I highly recommend it!
- Make Ahead Option: You can assemble the mac and cheese, transfer it to a baking dish, cover, and refrigerate for up to 24 hours. When ready to bake, let it sit at room temperature for 30 minutes before baking, and add an extra 10-15 minutes to the baking time.
Storage & Reheating Tips
Having leftovers of this delicious High Protein Mac and Cheese is a treat! Here’s how to store and reheat it to keep it tasting fantastic.
- Cool Completely: Before storing, allow the mac and cheese to cool down to room temperature. This prevents condensation from forming in the container, which can make it watery.
- Refrigeration: Transfer any leftovers to an airtight container. It will keep beautifully in the refrigerator for 3-4 days.
- Freezing: This mac and cheese freezes surprisingly well! Divide individual portions into freezer-safe containers or bags. It can be frozen for up to 2-3 months. Thaw overnight in the refrigerator before reheating.
- Stovetop Reheating: For best results, reheat on the stovetop over low heat. Add a splash of milk (about 1-2 tablespoons per serving) to help loosen the sauce and restore its creamy texture. Stir frequently until heated through.
- Microwave Reheating: If you’re in a hurry, microwave individual portions. Place the mac and cheese in a microwave-safe dish, add a tablespoon of milk, cover loosely, and heat in 1-minute intervals, stirring in between, until hot.
- Oven Reheating (for baked mac): If you have a larger portion of baked mac and cheese, you can reheat it in the oven. Cover with foil and bake at 300°F (150°C) until warmed through, usually about 20-30 minutes, removing the foil for the last 5-10 minutes if you want to re-crisp the top.
What to Serve With This Recipe
This High Protein Mac and Cheese is hearty enough to be a meal on its own, but it also pairs beautifully with a variety of simple side dishes to create a well-rounded and delightful dinner. Here are some of my family’s favorite pairings:
- Fresh Green Salad: A crisp, light green salad with a vinaigrette dressing offers a refreshing contrast to the richness of the mac and cheese. It’s a perfect way to add some fresh greens to your meal.
- Roasted Vegetables: Roasting brings out the natural sweetness in vegetables. Try roasted broccoli, asparagus, green beans, or Brussels sprouts. Just a drizzle of olive oil, salt, and pepper is all you need.
- Steamed Veggies: For ultimate simplicity, serve with a side of quickly steamed carrots, peas, or corn. They add color and essential vitamins without much fuss.
- Grilled Chicken or Fish: While this mac and cheese is already packed with protein, if you want an extra boost or a more substantial meal, a simple grilled chicken breast or a flaky baked salmon fillet makes an excellent complement. You might even enjoy pairing it with my Hot Honey Chicken Bowls for a flavor adventure!
- Garlic Bread or Dinner Rolls: Sometimes, you just need something to sop up every last bit of that amazing cheese sauce. A crusty piece of garlic bread or a warm dinner roll hits the spot.
- Fruit Salad: For a lighter, sweeter counterpoint, a simple fruit salad with seasonal berries, melon, and grapes can be a lovely refreshing side.
- Other Protein-Packed Sides: If you’re looking to continue the protein theme with other dishes, consider my High Protein Pasta Salad as a cold side dish option for a different texture and flavor profile.
FAQs About High Protein Mac and Cheese
I get a lot of questions about making nourishing family meals, especially when it comes to classic comfort foods like mac and cheese. Here are some common questions about this High Protein Mac and Cheese recipe.
How do you add protein to mac and cheese without changing the taste?
The secret lies in using ingredients that blend seamlessly into the sauce. My recipe uses cottage cheese and Greek yogurt, both of which are blended completely smooth before adding to the sauce. This technique makes them virtually undetectable in terms of texture, and their subtle tang actually enhances the cheesy flavor without overpowering it.
Using full-fat versions also helps maintain creaminess. You can also mix in a scoop of unflavored whey or casein protein powder with a bit of milk before adding it to the sauce, ensuring it dissolves completely.
Can I make this High Protein Mac and Cheese gluten-free?
Absolutely! Making this recipe gluten-free is very simple. Just swap out traditional elbow macaroni for your favorite gluten-free pasta.
There are many fantastic options available now, made from corn, rice, or even legumes like chickpeas, which add even more protein. For the roux, ensure you use a gluten-free all-purpose flour blend. Always double-check ingredient labels to ensure all components are certified gluten-free.
Is this recipe suitable for meal prepping?
Yes, it’s wonderful for meal prepping! You can prepare the entire dish, bake it, let it cool completely, and then divide it into individual portions for the week. Store them in airtight containers in the refrigerator for up to 3-4 days.
It reheats beautifully, especially on the stovetop with a splash of milk to bring back its creamy texture. It can also be frozen in individual portions for longer storage, making your busy weeknights even easier.
What’s the best way to make the sauce extra creamy?
Several factors contribute to an extra creamy sauce. First, use whole milk and full-fat dairy products (like full-fat Greek yogurt and cottage cheese) if possible. Second, ensure you blend your cottage cheese and Greek yogurt until absolutely smooth – no lumps allowed!
Third, always grate your own cheese, as pre-shredded varieties can make the sauce grainy. Finally, stir constantly when melting the cheese over low heat; this prevents the cheese from separating and becoming oily, ensuring a consistently smooth and velvety sauce.
Can I use low-fat cheese or dairy in this recipe?
You can certainly use low-fat cheese and dairy options in this recipe if you prefer. However, be aware that it might slightly alter the final texture and richness of the sauce. Low-fat cheeses sometimes don’t melt as smoothly and can result in a less creamy consistency.
If you opt for low-fat dairy, consider adding an extra tablespoon of butter to your roux or a bit more cream cheese to help maintain some of that luxurious texture and flavor. The protein content from the cottage cheese and Greek yogurt will still be excellent!