Life with three busy kids means constant motion, endless laundry, and a kitchen that often feels like the bustling heart of our home. As a mom, I truly believe food is love, and sharing a delicious, comforting meal or treat with my family is one of my favorite ways to connect. However, let’s be honest: time is a precious commodity.
I always search for simple, nourishing recipes that bring big smiles without big fuss. This is where my beloved Banana Split Torte enters the scene.
I remember summer evenings when I was little, the joy of a classic banana split. The towering ice cream, the sweet bananas, the juicy pineapple, and vibrant cherry on top pure magic! Now, with my own kids, recreating that magic often feels like a monumental task.
Scooping ice cream for three demanding little people while simultaneously managing toppings can quickly devolve into a sticky, sugary battlefield. Consequently, I searched for a way to capture all those beloved flavors in a manageable, make-ahead dessert. My solution? The no-bake Banana Split Torte.
This dessert truly embodies everything I love about simple, comforting food. It takes all the delightful elements of a traditional banana split the sweet bananas, the tangy pineapple, the luscious strawberries, and a chocolatey drizzle and transforms them into an easy, layered dessert. Imagine a buttery graham cracker crust, a creamy, dreamy filling, and fresh fruit piled high, all without ever turning on your oven.
It’s a dessert that speaks to the child in all of us, bringing back those nostalgic memories of summer and sweet indulgence. Moreover, it is remarkably easy to assemble, making it perfect for busy weeknights, potlucks, or any time you need a special treat that practically makes itself. This Banana Split Torte became an instant hit in our house, a guaranteed crowd-pleaser that simplifies dessert making while still delivering that “wow” factor.
Print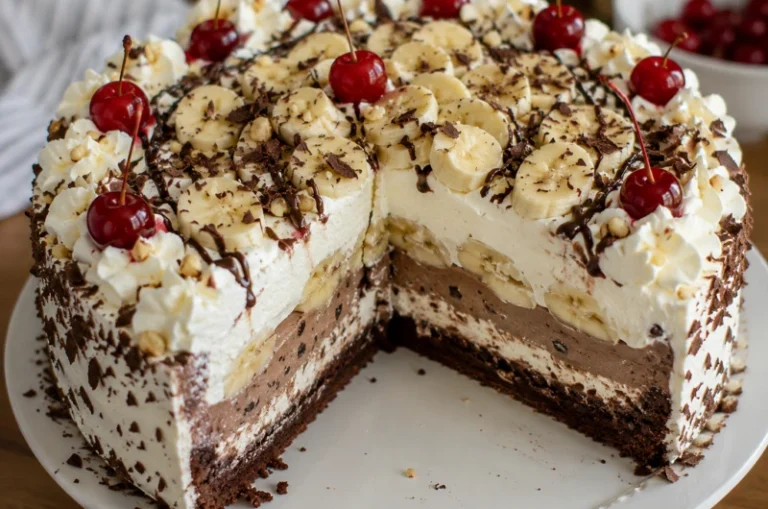
Banana Split Torte
This no-bake Banana Split Torte layers a buttery graham cracker crust with a creamy filling, fresh bananas, pineapple, strawberries, and a fluffy whipped topping, all finished with chocolate syrup, peanuts, and maraschino cherries for a nostalgic, family-friendly dessert.
- Total Time: 4 hours 25 minutes (including 4 hours chilling)
- Yield: 12 servings 1x
Ingredients
For the Crust:
1 ½ cups finely crushed graham crackers (about 1 sleeve)
½ cup unsalted butter, melted
For the Creamy Layers:
8 ounces cream cheese, softened
1 cup powdered sugar, sifted if clumpy
8 ounces whipped topping (e.g., Cool Whip), thawed
¼ cup sweetened condensed milk
For the Fruit & Toppings:
3–4 medium ripe but firm bananas, sliced
1 (20-ounce) can crushed pineapple, well-drained
1 pint fresh strawberries, hulled and sliced
¼ cup chocolate syrup
½ cup chopped peanuts (or walnuts, pecans)
12–15 maraschino cherries, stems removed
Instructions
1. Step 1: Prepare the Crust
2. Crush graham crackers finely using a food processor or a zip-top bag and rolling pin. Mix with melted butter until moistened. Press firmly into the bottom of a 9×13-inch baking dish. Refrigerate for at least 15 minutes.
3. Step 2: Make the Cream Cheese Layer
4. In a large bowl, beat softened cream cheese until light and fluffy (2-3 minutes). Gradually add powdered sugar, beating until smooth. Mix in sweetened condensed milk. Gently fold in half of the thawed whipped topping until no streaks remain.
5. Step 3: Assemble the First Layer
6. Spread the cream cheese mixture evenly over the chilled crust.
7. Step 4: Add the Fruit Layers
8. Arrange sliced bananas over the cream cheese layer. Sprinkle well-drained crushed pineapple over bananas. Arrange sliced strawberries over pineapple.
9. Step 5: Top with Whipped Topping and Chill
10. Spread remaining whipped topping evenly over fruit layers. Cover tightly with plastic wrap. Refrigerate for at least 4 hours or overnight.
11. Step 6: Garnish and Serve
12. Just before serving, drizzle with chocolate syrup, sprinkle chopped peanuts, and place maraschino cherries on top. Slice and serve cold.
Notes
For best results, use room-temperature cream cheese to avoid lumps. Drain pineapple thoroughly to prevent sogginess. Chill for at least 4 hours (overnight preferred) for clean slices. Add garnishes just before serving to maintain crunch and freshness. Store leftovers in the refrigerator for up to 2-3 days. Freezing is not recommended as fruit texture degrades.
- Prep Time: 25 minutes
- Cook Time: 0 minutes
- Category: Dessert
- Method: No-Bake
- Cuisine: American
- Diet: Vegetarian
Nutrition
- Serving Size: 1 slice (1/12 of torte)
- Calories: 405
- Sugar: 33g
- Sodium: 270mg
- Fat: 23g
- Saturated Fat: 12g
- Unsaturated Fat: 9g
- Trans Fat: 0.5g
- Carbohydrates: 47g
- Fiber: 2g
- Protein: 5g
- Cholesterol: 55mg
Why You’ll Love This No-Bake Banana Split Torte
You will absolutely adore this sensational no-bake Banana Split Torte for so many wonderful reasons. First and foremost, its sheer simplicity makes it a kitchen hero. As a busy mom, I appreciate any recipe that saves time without sacrificing flavor, and this torte delivers on both fronts. You won’t need to turn on your oven, which is a huge bonus, especially during warmer months.
Furthermore, this dessert is incredibly family-friendly. The bright, fresh fruit and creamy layers appeal to even the pickiest eaters. My kids always eagerly help arrange the colorful fruit, making it a fun activity we can do together. This truly transforms dessert preparation into a cherished family moment, emphasizing that food is love.
Additionally, the flavor profile is pure nostalgia. Every bite transports you back to classic ice cream parlor days, but in a much more convenient, sliceable form. The combination of sweet bananas, tart pineapple, juicy strawberries, rich chocolate, and crunchy nuts creates a symphony of textures and tastes. It truly hits all the right notes.
Moreover, the Banana Split Torte is a fantastic make-ahead option. Prepare it the day before a gathering, and it will be perfectly chilled and ready to serve when your guests arrive. This eliminates last-minute stress, allowing you more time to enjoy your company.
Finally, its impressive presentation belies its easy preparation, making you look like a culinary genius with minimal effort. This torte truly is a simple, satisfying, and nourishing dessert for any occasion.
Ingredients You’ll Need
Crafting this delightful Banana Split Torte requires simple, readily available ingredients. You probably already have many of these staples in your pantry and fridge. Always choose the freshest produce for the best flavor and texture. Here is everything you will gather to create this amazing dessert:
| Category | Ingredient | Quantity | Notes |
|---|---|---|---|
| For the Crust: | Graham Crackers | 1 ½ cups | Finely crushed (about 1 sleeve) |
| Unsalted Butter | ½ cup | Melted | |
| For the Creamy Layers: | Cream Cheese | 8 ounces | Softened, full-fat for best results |
| Powdered Sugar | 1 cup | Sifted, if clumpy | |
| Whipped Topping (e.g., Cool Whip) | 8 ounces | Thawed, or homemade whipped cream | |
| Sweetened Condensed Milk | ¼ cup | Adds extra creaminess and sweetness | |
| For the Fruit & Toppings: | Bananas | 3-4 medium | Ripe but firm, sliced |
| Canned Crushed Pineapple | 1 (20-ounce) can | Well-drained | |
| Fresh Strawberries | 1 pint | Hulled and sliced | |
| Chocolate Syrup | ¼ cup | For drizzling | |
| Chopped Peanuts | ½ cup | Or walnuts, pecans | |
| Maraschino Cherries | 12-15 | For garnish, stems removed |
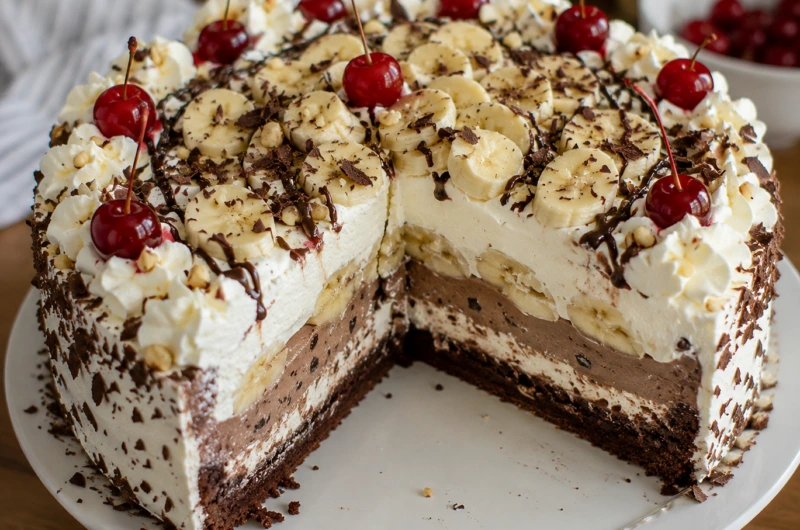
Make sure your cream cheese is at room temperature; this ensures a smooth, lump-free filling. Draining the pineapple thoroughly also prevents a soggy torte. Moreover, using a good quality whipped topping or making your own fresh whipped cream will elevate the texture and flavor of this incredible dessert.
[image 2]
Substitutions & Variations
One of the best aspects of this Banana Split Torte is its incredible versatility. Feel free to customize it based on your family’s preferences or what you have available. Think of these ideas as a starting point to make this torte uniquely yours!
Crust Alternatives:
- Vanilla Wafers: Instead of graham crackers, crush vanilla wafers for a slightly sweeter, more delicate crust.
- Oreo Cookies: For a chocolatey twist, use crushed Oreo cookies (cream filling included!) mixed with melted butter. This creates a decadent dark base.
- Gluten-Free: Easily make this torte gluten-free by using gluten-free graham crackers or your favorite gluten-free cookie crumbs.
Creamy Layer Swaps:
- Homemade Whipped Cream: While thawed whipped topping offers convenience, fresh whipped cream (heavy cream, a touch of powdered sugar, and vanilla extract) provides an even richer, airier texture. Beat it to stiff peaks and fold it gently.
- Greek Yogurt: For a tangier and slightly lighter filling, substitute half of the cream cheese with plain full-fat Greek yogurt. Ensure it is very thick or strain it first to remove excess moisture.
- Nutella Swirl: Swirl a tablespoon or two of Nutella into your cream cheese layer for a hazelnut-chocolate infusion.
Fruit Transformations:
- Mixed Berries: Add blueberries, raspberries, or sliced kiwi alongside or in place of some of the strawberries. Their vibrant colors and flavors truly enhance the torte.
- Peaches or Mango: In season, thinly sliced fresh peaches or diced mango offer a delightful tropical twist. Just ensure they are ripe but firm.
- Canned Fruit Cocktail: For ultimate convenience, drain a can of fruit cocktail well and use it as a mixed fruit layer.
Topping Enhancements:
- Caramel Drizzle: Instead of or in addition to chocolate syrup, drizzle homemade or store-bought caramel sauce over the top. The combination is divine.
- Shredded Coconut: Toasted shredded coconut adds a wonderful texture and tropical flavor.
- Mini Chocolate Chips: Sprinkle mini chocolate chips over the top for extra chocolatey goodness.
- Different Nuts: If peanuts aren’t your favorite, try chopped walnuts, pecans, or even slivered almonds.
Dietary Adjustments:
- Dairy-Free: Use a plant-based whipped topping, dairy-free cream cheese, and a dairy-free butter alternative for the crust.
- Reduced Sugar: Reduce the amount of powdered sugar in the filling, or use a sugar substitute suitable for baking if desired. The fruit and condensed milk already provide natural sweetness.
Feel empowered to experiment! This Banana Split Torte is incredibly forgiving and welcomes your creative additions.
Step-by-Step Instructions
Creating this delightful Banana Split Torte is truly straightforward. Follow these simple steps, and you will have a beautiful, delicious dessert ready to chill.
Step 1: Prepare the Crust
First, crush your graham crackers very finely. You can use a food processor for this, or place them in a zip-top bag and crush them with a rolling pin. Next, melt the butter in a small saucepan or microwave-safe bowl.
Combine the crushed graham crackers and melted butter in a medium bowl, mixing until the crumbs are thoroughly moistened. Press this mixture firmly and evenly into the bottom of a 9×13-inch baking dish. Use the back of a spoon or your hands for a compact crust. Place the prepared crust into the refrigerator to chill for at least 15 minutes while you prepare the filling.
Step 2: Make the Cream Cheese Layer
Meanwhile, in a large mixing bowl, beat the softened cream cheese with an electric mixer until it becomes light and fluffy, about 2-3 minutes. Gradually add the powdered sugar, continuing to beat until the mixture is smooth and well combined. Next, pour in the sweetened condensed milk, mixing until just incorporated.
Finally, gently fold in about half of the thawed whipped topping until no streaks remain. Take care not to overmix; this keeps the filling light and airy.
Step 3: Assemble the First Layer
Retrieve your chilled crust from the refrigerator. Spread the entire cream cheese mixture evenly over the graham cracker crust. Use an offset spatula or the back of a spoon to ensure a smooth, level layer. This forms the delightful base of your torte.
Step 4: Add the Fruit Layers
Now, carefully arrange the sliced bananas over the cream cheese layer. Try to cover the entire surface for consistent flavor in every bite. Immediately after, sprinkle the well-drained crushed pineapple over the bananas.
Make sure you drain the pineapple thoroughly to prevent excess moisture from making the torte soggy. Next, arrange the sliced strawberries over the pineapple layer. Their vibrant red color adds a beautiful contrast and burst of freshness.
Step 5: Top with Whipped Topping and Chill
Spread the remaining half of the thawed whipped topping evenly over the fruit layers. Gently smooth the top with your spatula. Now, cover the baking dish tightly with plastic wrap.
This step is crucial. Place the torte in the refrigerator and chill it for at least 4 hours, or preferably overnight. Proper chilling allows all the layers to set firmly, making for clean slices and a truly satisfying dessert.
Step 6: Garnish and Serve
Just before serving, remove the chilled torte from the refrigerator. Drizzle generously with chocolate syrup. Sprinkle the chopped peanuts evenly over the top.
Finally, place the maraschino cherries artfully on top for that classic banana split finish. Slice and serve immediately. Enjoy every delicious, creamy, fruity bite of your homemade Banana Split Torte!
[image 3]
Pro Tips for Success
Making a truly exceptional Banana Split Torte is simple with a few insider tricks. As a mom who loves creating nourishing and delightful dishes, I have learned a few things that consistently produce fantastic results. Follow these pro tips for a torte that everyone will rave about.
Perfectly Ripe Bananas are Key: Choose bananas that are ripe but still firm. Overly ripe bananas will turn mushy in the torte, affecting the texture. Conversely, green bananas lack the essential sweetness. Slice them just before layering to minimize browning.
Drain Pineapple Thoroughly: This tip is crucial! Excess liquid from the crushed pineapple can make your torte watery and prevent it from setting properly. Press the pineapple in a fine-mesh strainer or paper towels to remove as much juice as possible before layering it. This ensures a firm, delicious torte.
Room Temperature Cream Cheese: Always start with softened cream cheese. Cold cream cheese results in lumps in your filling, no matter how much you beat it. Take it out of the fridge at least 30 minutes to an hour before you plan to mix.
Don’t Overmix the Whipped Topping: When you fold in the whipped topping to the cream cheese mixture, do so gently. Overmixing can deflate the whipped topping, leading to a denser, less airy filling. Fold just until no streaks of white remain.
Chill Time is Non-Negotiable: I cannot stress this enough – give your torte ample time to chill. A minimum of 4 hours is essential, but overnight is always best. This allows the layers to set properly, melding the flavors and ensuring clean, beautiful slices. Patience truly pays off here.
Pre-Slice Your Toppings: Prepare all your fruit and nuts before you begin assembling. This creates a smoother, more efficient assembly process. Have everything ready to go so you can layer quickly and neatly.
Cover Tightly: While chilling, cover the torte tightly with plastic wrap. This prevents it from absorbing refrigerator odors and keeps the surface from drying out. Furthermore, it helps maintain freshness.
Garnish Just Before Serving: Drizzle the chocolate syrup, sprinkle the nuts, and place the maraschino cherries just before serving. This keeps the nuts crunchy, prevents the chocolate from soaking in too much, and ensures the cherries look fresh and vibrant. These small details make a big difference in presentation.
By following these simple yet effective tips, you will create a stunning and delicious Banana Split Torte every single time!
Storage & Reheating Tips
This delightful Banana Split Torte is often best enjoyed fresh, but you can certainly store leftovers or prepare it ahead of time. Proper storage ensures it remains delicious and maintains its fantastic texture.
Storage:
- Refrigeration is Key: Always store any leftover Banana Split Torte in the refrigerator. The dairy and fresh fruit components require consistent cold temperatures to remain safe and delicious.
- Cover Tightly: Transfer any remaining slices to an airtight container, or if keeping it in the original dish, cover it very tightly with plastic wrap. This prevents the torte from absorbing refrigerator odors and keeps the exposed fruit from oxidizing and turning brown.
- Best Enjoyed Within: For optimal freshness, flavor, and texture, aim to consume your Banana Split Torte within 2-3 days. The bananas tend to brown over time, and the crust can become slightly softer.
Reheating:
The beauty of this Banana Split Torte is that it is a no-bake, chilled dessert. Therefore, you do not reheat it. Simply remove it from the refrigerator, slice, and serve!
Enjoy it cold, just as it was intended. If you store individual slices, let them sit at room temperature for just a few minutes before serving to slightly soften the creamy layers, enhancing the overall experience.
Freezing Considerations:
While you can technically freeze some desserts, freezing is not recommended for the Banana Split Torte. The fresh fruit, particularly the bananas, will become mushy and watery upon thawing. The whipped topping and cream cheese layers also tend to lose their ideal texture, becoming grainy. For the best quality, stick to refrigeration and enjoy it fresh.
What to Serve With This Recipe
The Banana Split Torte stands alone as a truly decadent and satisfying dessert. However, consider it the grand finale to a simple, nourishing family meal. As a mom of three, I focus on wholesome dinners that provide a good foundation before we indulge in a sweet treat. Here are some ideas for what to serve alongside this spectacular torte:
Simple Weeknight Dinners:
- Light Grilled Chicken or Fish: A grilled chicken breast or a flaky white fish, seasoned simply with herbs and lemon, makes for a light and healthy main course. This allows the torte to truly shine as the star of the dessert course.
- Fresh Salads: Serve the torte after a crisp, vibrant salad. A simple green salad with a vinaigrette dressing, or even a more substantial one like my High-Protein Pasta Salad, offers a refreshing contrast.
- Easy Burgers or Sandwiches: For a classic comfort meal, pair the torte with homemade burgers or hearty sandwiches. My kids love a good burger night, and this torte makes the perfect sweet ending. You could even try my Smash Burger Tacos for a fun twist!
Casual Gatherings & Potlucks:
- Barbecue Favorites: This torte is a fantastic dessert for any summer barbecue or potluck. It pairs beautifully with grilled ribs, pulled pork, or even my Hot Honey Chicken Bowls. The refreshing fruit cuts through the richness of grilled meats.
- Picnic Spreads: Pack it up for a picnic! It travels well (just keep it chilled) and provides a wonderful sweet treat alongside sandwiches, fruit salads, and other picnic staples.
Beverage Pairings:
- Milk or Coffee: For the ultimate comfort, serve slices of Banana Split Torte with a tall glass of cold milk. For adults, a fresh cup of coffee or even a decaf option makes a lovely pairing, cutting through the sweetness.
- Iced Tea or Lemonade: On a warm day, a refreshing iced tea or homemade lemonade complements the fruitiness of the torte perfectly.
Ultimately, this Banana Split Torte is a celebratory dessert. Enjoy it after any meal that brings your family together, knowing that food prepared with love truly nourishes both body and soul. If you’re looking for another simple, nourishing idea for breakfast or a snack, check out my Peanut Butter Overnight Oats!
FAQs
Can I make this Banana Split Torte ahead of time?
Absolutely! Making this Banana Split Torte ahead of time is one of its greatest advantages. You can assemble the entire torte, including all the layers of crust, cream cheese, fruit, and whipped topping, the day before you plan to serve it.
This allows ample time for the layers to set properly and for the flavors to meld beautifully. However, wait to add the chocolate syrup, chopped nuts, and maraschino cherries until just before serving. This ensures the nuts remain crunchy, and the presentation stays vibrant and fresh.
How long does a Banana Split Torte last in the refrigerator?
Your delicious Banana Split Torte will last for approximately 2-3 days in the refrigerator. For the best quality, flavor, and texture, consume it within this timeframe. Make sure you store it in an airtight container or cover the dish very tightly with plastic wrap.
This prevents the bananas from browning excessively and keeps the other ingredients fresh. After 3 days, the bananas may become too soft, and the overall texture might begin to decline, though it would likely still be safe to eat if stored properly.
Can I use different fruits in my Banana Split Torte?
Yes, you absolutely can! The beauty of this Banana Split Torte lies in its adaptability. While bananas, pineapple, and strawberries are classic banana split components, feel free to get creative with other fruits.
Consider adding sliced kiwi for a vibrant green color and tangy flavor, fresh blueberries or raspberries for extra berry goodness, or even thinly sliced peaches when in season. Just ensure any canned fruits are thoroughly drained to prevent excess moisture. Always choose ripe but firm fruits for the best texture in your torte.
What makes this Banana Split Torte a “torte”?
A “torte” traditionally refers to a rich, multilayered cake, often made with little to no flour, typically containing ground nuts or breadcrumbs. In modern culinary language, especially with no-bake versions, the term often describes a rich, elaborate dessert with multiple distinct layers.
Our Banana Split Torte fits this description perfectly because it features a layered structure with a crumb crust, creamy filling, and multiple fruit and whipped topping layers, all coming together in a decadent, impressive presentation. It elevates the classic banana split into a more formal, sliceable dessert form.