It was a Tuesday afternoon, chaos in full swing. My three little ones, fresh off the bus, crashed into the kitchen, a whirlwind of backpacks and snack demands. Their energy levels were through the roof, and my own felt dangerously low.
I craved something sweet, something comforting, but something fast. Banana bread felt too involved, cookies too messy. Then, it hit me a flash of inspiration from a childhood classic.
What if I combined the creamy, dreamy flavor of banana pudding with the crispy, satisfying crunch of Rice Krispies treats? And just like that, the legend of our *banana pudding rice krispies* was born.
I whisked together a few simple ingredients, mashed some ripe bananas, and watched as their little eyes widened with anticipation. The aroma alone started to calm the storm. Within minutes, these no-bake wonders were chilling in the fridge, promising sweet relief.
When they finally took their first bite, silence descended a rare and precious gift in our home. Their smiles, sticky and wide, spoke volumes.
It was more than just a treat; it was a moment of pure, unadulterated joy, a reminder that food truly is love, especially when it’s easy and delicious. Since that day, these *banana pudding rice krispies* have become a cherished family favorite, a go to for playdates, potlucks, and those chaotic Tuesdays when a mom just needs a little kitchen magic.
Print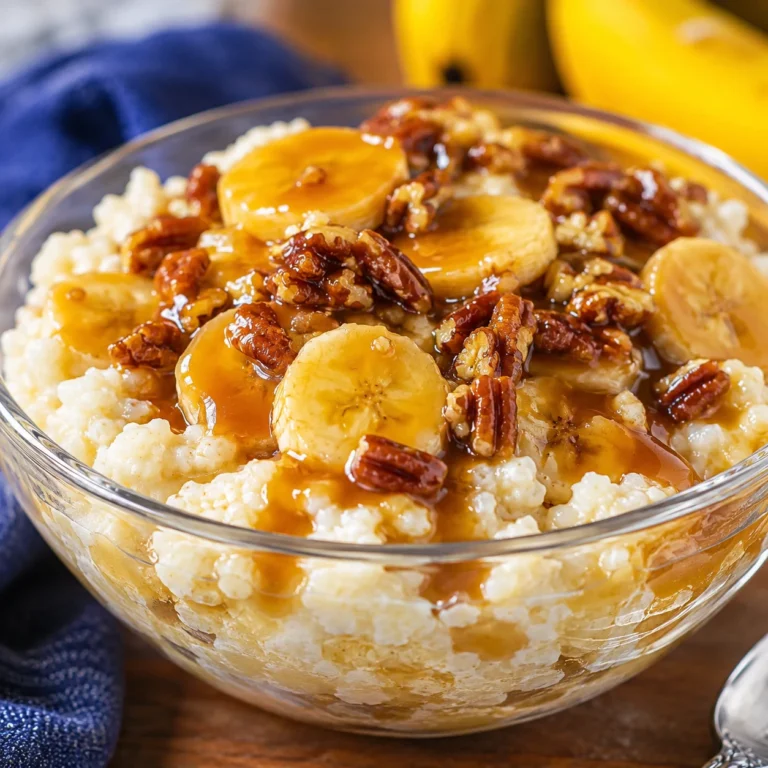
banana pudding rice krispies
Banana pudding rice krispies are a no-bake dessert that combines the creamy, sweet flavor of banana pudding with the crispy texture of Rice Krispies treats. Perfect for busy weeknights, these treats are quick to make and loved by both kids and adults.
- Total Time: 20 minutes (plus 2 hours chilling)
- Yield: 12 servings
Ingredients
Unsalted Butter: 4 tablespoons
Mini Marshmallows: 10 ounces (about 6 cups)
Ripe Bananas: 2 medium
Instant Vanilla Pudding Mix: 3.4 ounces (1 small box)
Milk: 2 tablespoons
Vanilla Extract: 1 teaspoon
Rice Krispies Cereal: 6 cups
Nilla Wafers (crushed): 1/2 cup (optional)
Fresh Banana Slices: 1/2 cup (optional, for garnish)
Instructions
1. Line a 9×13 inch baking pan with parchment paper, leaving overhang. Grease paper lightly.
2. In a large microwave-safe bowl, melt butter and marshmallows in microwave: heat 1 minute, stir, then 30-second intervals until smooth. Alternatively, melt on stovetop over low heat.
3. In a separate bowl, mash bananas. Stir in dry pudding mix, milk, and vanilla extract until well combined.
4. Pour banana mixture into melted marshmallow mixture and stir until fully blended.
5. Add Rice Krispies cereal and fold gently until evenly coated.
6. Transfer mixture to prepared pan. Using a greased spatula or wax paper, press evenly and firmly into a compact layer. Do not overpress.
7. If desired, sprinkle crushed Nilla wafers on top and press gently. Garnish with fresh banana slices (tossed with lemon juice to prevent browning).
8. Refrigerate for at least 2 hours until set.
9. Lift treats from pan using parchment overhang, cut into squares with a greased knife, and serve.
Notes
Use very ripe bananas for best flavor. Do not overcook marshmallows. Work quickly once cereal is added. Store in airtight container in refrigerator for up to 2-3 days. Freezing is not recommended due to fresh bananas.
- Prep Time: 10 minutes
- Cook Time: 10 minutes
- Category: Dessert
- Method: No-bake
- Cuisine: American
- Diet: Vegetarian
Nutrition
- Serving Size: 1 square
- Calories: 250
- Sugar: 22g
- Sodium: 200mg
- Fat: 8g
- Saturated Fat: 4.5g
- Unsaturated Fat: 3g
- Trans Fat: 0g
- Carbohydrates: 42g
- Fiber: 1g
- Protein: 3g
- Cholesterol: 15mg
Why You’ll Love These Banana Pudding Rice Krispies
You absolutely must try these *banana pudding rice krispies*! First and foremost, they are incredibly simple to make. No baking required, which means less time in the kitchen and more time enjoying those precious moments with your family.
Furthermore, they are a total crowd pleaser. Kids adore them, and adults find themselves transported back to their childhood with every bite. The nostalgic flavors of creamy banana pudding perfectly marry with the satisfying crunch of Rice Krispies.
You get that beloved sweetness, that hint of banana, and that delightful texture all in one easy to handle square. Moreover, these treats are remarkably versatile. You can whip them up for a quick dessert, pack them in lunchboxes, or serve them at any gathering. They are truly the perfect blend of convenience, comfort, and deliciousness, a simple recipe that feels like a warm hug.
Ingredients You’ll Need
Gathering your ingredients for these delightful banana pudding treats is straightforward. You likely have many of these items in your pantry already! This recipe focuses on fresh, simple ingredients that come together to create a truly irresistible dessert.
| Ingredient | Quantity | Notes |
|---|---|---|
| Unsalted Butter | 4 tablespoons | Helps create the gooey marshmallow base. |
| Mini Marshmallows | 10 ounces (about 6 cups) | The core of any great Rice Krispies treat. |
| Ripe Bananas | 2 medium | Look for yellow bananas with a few brown spots for best flavor. |
| Instant Vanilla Pudding Mix | 3.4 ounces (1 small box) | Adds that classic banana pudding flavor. Do NOT prepare it with milk. |
| Milk | 2 tablespoons | Just a splash to help blend the pudding mix. |
| Vanilla Extract | 1 teaspoon | Enhances all the sweet flavors. |
| Rice Krispies Cereal | 6 cups | The crispy star of the show! |
| Nilla Wafers (crushed) | 1/2 cup | Optional, for topping and extra banana pudding authenticity. |
| Fresh Banana Slices | 1/2 cup | Optional, for garnish. Toss with lemon juice to prevent browning. |
Substitutions & Variations
These *banana pudding rice krispies* offer a fantastic base for creativity in the kitchen. Feel free to adapt them to your family’s preferences or dietary needs. You control the outcome!
* Dairy-Free Option: Simply swap the unsalted butter for a dairy free butter alternative. Many excellent plant-based butters work beautifully in this recipe, maintaining that rich flavor and texture. You can also use a dairy-free milk alternative for the splash of milk needed with the pudding mix.
* Gluten-Free Version: Ensure you purchase a certified gluten free rice cereal. Most major brands now offer a gluten-free option, making this a simple swap. Double check your marshmallows and pudding mix, though most are naturally gluten-free, it is always wise to verify.
* Healthier Twist: While these are a treat, you can lighten them slightly. Reduce the amount of marshmallows by about a quarter and consider adding a tablespoon of nut butter to the melted marshmallow mixture for extra protein and healthy fats. You could also experiment with whole-grain crisp rice cereal, if available.
* Add-Ins & Toppings: Get creative! Stir in some chocolate chips with the cereal for a chocolate-banana combination. You could also fold in a handful of chopped nuts like pecans or walnuts for an extra crunch and savory balance.
For an even more decadent experience, drizzle melted white chocolate over the top before chilling.
* Spice It Up: A pinch of cinnamon or nutmeg mixed with the pudding powder can add a warm, comforting note to your *banana pudding rice krispies*. These spices beautifully complement the banana flavor.
* Different Pudding Flavors: While vanilla is classic, experiment with other instant pudding flavors. Butterscotch, coconut, or even a cream cheese flavor could offer a unique twist to the traditional banana pudding experience.
* Nut Butter Boost: For an extra layer of flavor and some healthy fats, stir in 2-3 tablespoons of your favorite nut butter (peanut butter, almond butter, cashew butter) into the melted marshmallow mixture before adding the cereal. This adds richness and a delightful nutty note.
Step-by-Step Instructions
Making these banana pudding treats is incredibly simple, truly a labor of love that pays off big time! Follow these steps, and you will have a delicious dessert ready in no time.
1. Prepare Your Pan: First, line a 9×13 inch baking pan with parchment paper or wax paper. Ensure you leave an overhang on the sides; this helps with easy removal later.
Lightly grease the paper with cooking spray or a little butter. Set it aside.
2.Melt Butter and Marshmallows: Next, grab a large, microwave safe bowl. Add your 4 tablespoons of unsalted butter and 10 ounces of mini marshmallows to the bowl. Heat them in the microwave for 1 minute, then stir well.
Continue heating in 30-second intervals, stirring after each, until the mixture is completely smooth and melted. This typically takes about 2-3 minutes total. Alternatively, you can melt them in a large pot over low heat on the stovetop, stirring constantly until smooth.
3. Combine Pudding Mix and Bananas: While the marshmallows melt, peel and mash your two ripe bananas in a separate bowl. You want them mostly smooth, but a few small lumps are fine.
Add the 3.4-ounce box of instant vanilla pudding mix, 2 tablespoons of milk, and 1 teaspoon of vanilla extract to the mashed bananas. Stir everything together until well combined and relatively smooth. The mixture will be thick.
4. Integrate Flavors: Pour the banana pudding mixture directly into your melted marshmallow mixture. Stir vigorously until completely blended.
You want a uniform, creamy, and banana scented marshmallow base. This step infuses the classic banana pudding flavor throughout your treats.
5.Add Cereal: Now, add your 6 cups of Rice Krispies cereal to the bowl. Using a greased spatula or spoon, fold the cereal into the marshmallow mixture. Work quickly but gently, ensuring every piece of cereal gets coated evenly.
6. Press into Pan: Immediately transfer the entire mixture into your prepared 9×13 inch pan. Use your greased spatula or a piece of greased wax paper to firmly and evenly press the mixture into the pan.
You want a compact, level layer. Don’t press too hard, or your treats might become too dense.
7.Top (Optional) and Chill: If desired, sprinkle the crushed Nilla wafers over the top and gently press them down. You can also arrange fresh banana slices on top. Place the pan in the refrigerator and chill for at least 2 hours, or until the treats are completely set.
8. Slice and Serve: Once firm, lift the treats out of the pan using the parchment paper overhang. Place them on a cutting board.
Use a sharp, greased knife to cut them into squares. Enjoy your delicious *banana pudding rice krispies*!
Pro Tips for Success
Making perfect *banana pudding rice krispies* is simple, but a few pro tips can elevate your treats from good to absolutely amazing. Pay attention to these details for the best results!
* Choose Ripe Bananas: Always use very ripe bananas for this recipe. Look for bananas with plenty of brown spots on the peel; these have the most natural sweetness and intense banana flavor. Under-ripe bananas will result in a less flavorful treat.
* Don’t Overcook Marshmallows: When melting marshmallows, whether in the microwave or on the stovetop, cook them just until smooth. Overcooking can make them brittle and hard once cooled, resulting in tough treats instead of delightfully chewy ones. Stir frequently if using the stovetop method.
* Work Quickly: The marshmallow mixture sets surprisingly fast once you add the cereal. Have all your ingredients measured and ready to go before you start melting the marshmallows. This ensures you can mix and press everything before it becomes too stiff to manage.
* Grease Your Tools: Marshmallow is incredibly sticky. Lightly grease your spatula, your hands (if pressing by hand), and even your knife for cutting. This prevents sticking and makes the process much smoother.
A little cooking spray works wonders.
* Even Pressure is Key: When pressing the mixture into the pan, apply even, gentle pressure. If you press too hard, your *banana pudding rice krispies* will become overly dense and hard.
A lighter, even press creates that perfect balance of chewy and crispy.
* Chill Thoroughly: Do not rush the chilling process. Giving the treats at least 2 hours in the refrigerator allows them to firm up completely.
This makes them easier to cut and ensures they hold their shape beautifully.
* Prevent Banana Browning: If you plan to garnish with fresh banana slices, toss them very lightly in a tiny amount of lemon juice or pineapple juice before placing them on top. This prevents them from browning too quickly, keeping your treats looking fresh and appealing.
Storage & Reheating Tips
Proper storage ensures your *banana pudding rice krispies* stay fresh and delicious. Because this recipe uses fresh bananas, they do require a little more care than traditional Rice Krispies treats.
* Storage: Always store your banana pudding treats in an airtight container. Place them in the refrigerator immediately after they have set. The airtight container prevents them from drying out and absorbing other refrigerator odors.
This also helps maintain their freshness.
* Duration: These treats maintain their best quality for about 2-3 days when stored correctly in the refrigerator. After that, the fresh bananas can start to soften too much, and the texture may change.
You will notice the banana flavor might intensify a bit.
* Serving Temperature: While these are best served chilled directly from the refrigerator, you can let them sit at room temperature for 10-15 minutes before serving if you prefer a slightly softer, chewier texture.
* Freezing: Freezing is generally not recommended for these treats.
The fresh bananas can become very mushy and watery upon thawing, significantly altering the texture and quality. Stick to refrigerating them for optimal enjoyment.
* Preventing Sogginess: The key to avoiding sogginess is proper storage.
Do not leave them uncovered in the refrigerator. The moisture from the fridge can make them sticky and less crispy.
* Preparing Ahead: You can definitely prepare these a day in advance for a party or gathering.
Simply make them, chill them thoroughly, then store them in the airtight container in the fridge until ready to serve. This makes party planning so much easier!
What to Serve With This Recipe
These *banana pudding rice krispies* are a fantastic dessert all on their own, but pairing them with the right meal can create a truly memorable experience. Think about balancing the sweetness with something savory and hearty.
For a family dinner, consider something robust and satisfying before diving into these sweet treats. We love serving these after a meal that is both filling and simple to prepare. For instance, a flavorful and easy-to-make option like Smash Burger Tacos provides a savory, satisfying main course that perfectly complements the dessert’s sweetness. They are quick, fun, and a guaranteed hit with everyone.
If you are looking for a lighter, perhaps more refreshing meal, a crisp salad or a protein-packed dish works wonderfully. A vibrant High-Protein Pasta Salad offers a fantastic balance of flavors and textures, ensuring you feel nourished before enjoying a little indulgence. Alternatively, for something with a bit of a kick, a Hot Honey Chicken Bowl provides a delicious main course that contrasts beautifully with the sweet, comforting notes of the banana pudding treats.
Remember, these *banana pudding rice krispies* also make an excellent addition to any potluck or party spread. Serve them alongside other finger foods, fresh fruit platters, or even a simple scoop of vanilla ice cream for an extra special touch. They are so versatile, fitting into almost any meal plan as a delightful finish.
FAQs
Can I make banana pudding rice krispies ahead of time?
Absolutely! You can prepare these *banana pudding rice krispies* up to 1-2 days in advance. Make sure you store them in an airtight container in the refrigerator to keep them fresh and prevent them from drying out. This makes them perfect for parties or meal prepping desserts.
How do I prevent my banana pudding treats from getting soggy?
The key to preventing sogginess lies in proper storage and not over mashing the bananas. Store them in an airtight container in the refrigerator. Additionally, avoid leaving them at room temperature for extended periods, especially in humid environments, as this can affect their texture.
Can I use fresh pudding instead of instant pudding mix for this recipe?
No, this recipe specifically calls for instant vanilla pudding mix *without* preparing it first. You add the dry powder directly to the mashed bananas and a splash of milk. Pre-made or cooked pudding would add too much moisture and alter the texture of your *banana pudding rice krispies*.
Are these banana pudding rice krispies healthy?
While these are a delicious treat, they are an indulgence. They contain sugar and marshmallows. However, they do offer some natural goodness from the fresh bananas. You can make slight adjustments, like reducing marshmallows slightly or using a whole-grain cereal, for a marginally healthier version, but enjoy them in moderation as a delightful dessert.
What if I don’t have Nilla Wafers?
No problem at all! The Nilla wafers are an optional topping for extra flavor and texture, enhancing the classic banana pudding feel. You can simply omit them, or substitute with other crushed vanilla cookies, graham crackers, or even a sprinkle of toasted coconut for a different twist. Your *banana pudding rice krispies* will still be incredibly delicious without them.