As a mom of three, my kitchen often feels like the bustling heart of our home. It’s where memories are made, laughter echoes, and frankly, where most of our snacks disappear! Between school runs, playdates, and balancing work, finding time to bake something truly nourishing that everyone loves can feel like a superhero feat.
I love food, and I believe it truly is love, but it also needs to be simple and good for us. There are days when I crave a rich, decadent treat you know, the kind that makes your eyes roll back in pure bliss. Yet, I also want to fuel my family, not just fill them with empty calories. This internal tug of war led me on a delicious mission, and let me tell you, I struck gold.
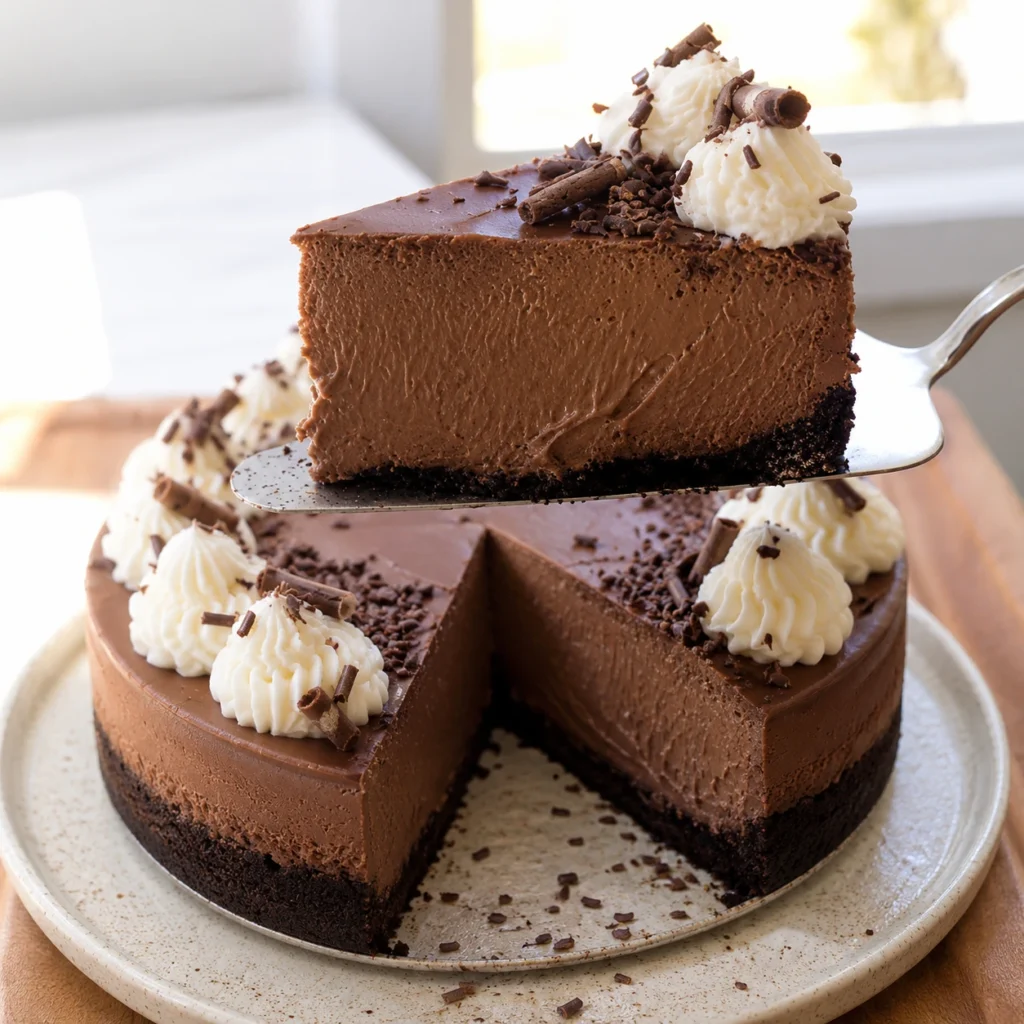
I present to you my latest obsession, a dessert that perfectly marries indulgence with smart nutrition: the Chocolate Protein Cheesecake. Forget everything you thought about healthy desserts being bland or boring. This isn’t just a chocolate cheesecake; it’s a creamy, dreamy, protein-packed powerhouse that satisfies every chocolate craving without any guilt.
My kids devour it, my husband asks for seconds, and I feel good knowing they’re getting a hefty dose of protein along with that rich cocoa flavor. It’s become a staple in our household, a true testament to how easy, simple, and satisfying a nourishing treat can be. This recipe transforms humble ingredients into a show-stopping, wholesome dessert. Trust me, your taste buds and your body will thank you!
Print
Chocolate Protein Cheesecake
A creamy, dreamy, protein-packed chocolate cheesecake that satisfies every chocolate craving without guilt. Made with Greek yogurt and chocolate protein powder, it’s a wholesome dessert perfect for families.
- Total Time: 5 hours 20 minutes (includes cooling and chilling)
- Yield: 12 servings 1x
Ingredients
For the Crust:
1 ½ cups graham cracker crumbs
¼ cup melted unsalted butter
2 tablespoons granulated sugar (or erythritol/stevia blend)
For the Filling:
24 oz cream cheese (light or full-fat), softened
1 cup plain Greek yogurt (0% or 2%)
½ cup unsweetened cocoa powder
½ cup chocolate protein powder (whey or plant-based)
¾ cup sweetener (granulated erythritol, stevia blend, or sugar)
3 large eggs
1 teaspoon vanilla extract
¼ teaspoon salt
Optional Topping:
Sugar-free chocolate syrup, fresh berries, or whipped cream as desired
Instructions
1. 1. Preheat oven to 325°F (160°C). Lightly grease a 9-inch springform pan. If using a water bath, wrap the pan tightly with heavy-duty aluminum foil.
2. 2. Make the crust: In a medium bowl, combine graham cracker crumbs, melted butter, and sugar. Mix until evenly moistened. Press firmly into the bottom of the prepared pan.
3. 3. Pre-bake the crust (optional): Bake for 8-10 minutes. Remove and set aside to cool slightly.
4. 4. Prepare the filling: In a large bowl, beat softened cream cheese with an electric mixer on medium speed until smooth and creamy, 2-3 minutes.
5. 5. Add Greek yogurt, vanilla, and salt; beat until combined, scraping down sides.
6. 6. Sift cocoa powder and protein powder into the mixture. Add sweetener. Beat on low then medium until smooth, scraping as needed. Do not overmix.
7. 7. Add eggs one at a time, beating on low just until incorporated after each.
8. 8. Pour filling over crust. Tap pan on counter to release air bubbles.
9. 9. If using water bath: Place foil-wrapped pan in a larger roasting pan. Pour hot water halfway up the sides. Bake 50-65 minutes until edges are set but center still wobbles slightly.
10. 10. If not using water bath: Bake directly on middle rack for 50-65 minutes.
11. 11. After baking, turn off oven and leave cheesecake inside with door ajar for 1 hour.
12. 12. Remove from oven and water bath (if used). Remove foil. Cool completely on a wire rack.
13. 13. Cover loosely with plastic wrap and refrigerate for at least 4-6 hours, preferably overnight.
14. 14. To serve, run a thin knife around the edge before releasing springform. Slice, top as desired, and enjoy.
Notes
For best results, all ingredients should be at room temperature. Do not overmix after adding eggs. Use a water bath to prevent cracking. Chill thoroughly for the best texture. Store leftovers in refrigerator for up to 5-7 days or freeze for up to 2-3 months.
- Prep Time: 20 minutes
- Cook Time: 60 minutes
- Category: Dessert
- Method: Baked (water bath optional)
- Cuisine: American
- Diet: High protein; can be gluten-free, dairy-free, or low sugar with substitutions
Nutrition
- Serving Size: 1 slice (1/12 of cheesecake)
- Calories: 295
- Sugar: 12g
- Sodium: 380mg
- Fat: 17g
- Saturated Fat: 10g
- Unsaturated Fat: 5g
- Trans Fat: 0.3g
- Carbohydrates: 22g
- Fiber: 4g
- Protein: 18g
- Cholesterol: 105mg
Why You’ll Love This Chocolate Protein Cheesecake Recipe
This isn’t just another dessert; it’s a game changer for anyone who loves chocolate but also prioritizes their health and wellness. You will absolutely fall in love with this particular Chocolate Protein Cheesecake recipe for so many compelling reasons. First and foremost, it delivers an incredibly rich, decadent chocolate flavor that satisfies even the most intense cravings.
We’re talking deep, dark chocolate goodness that tastes utterly indulgent. Yet, it does all this without the excessive sugar and unhealthy fats typically found in traditional cheesecakes. This means you can enjoy a generous slice feeling completely guilt-free.
Secondly, this recipe is packed with protein. As a mom, I constantly look for ways to sneak extra protein into our diets, and this dessert makes it incredibly easy and delicious. Thanks to ingredients like Greek yogurt and protein powder, each serving contributes significantly to your daily protein intake, helping you feel fuller and more satisfied.
This makes it a fantastic post-workout treat, a smart snack, or a nourishing dessert after any meal. Furthermore, preparing this healthy protein cheesecake is surprisingly simple. You don’t need expert baking skills or fancy equipment.
The steps are straightforward, making it accessible for even beginner bakers. The ingredient list features common pantry staples, so you won’t hunt for obscure items. It’s also incredibly versatile.
You can easily adapt it with different flavors or toppings, ensuring it never gets boring. Finally, and perhaps most importantly, my kids absolutely adore it! Finding a healthy dessert that receives rave reviews from even the pickiest eaters is a win in my book. This chocolate protein cheesecake recipe truly is a treat for everyone.
Ingredients You’ll Need
Gathering your ingredients is the first step towards creating this delightful, protein-packed dessert. Luckily, everything on this list is simple and readily available, proving that nourishing food doesn’t need to be complicated. Here’s what you’ll need to bring this amazing Chocolate Protein Cheesecake to life:
| Component | Ingredient | Quantity |
|---|---|---|
| For the Crust: | Graham Cracker Crumbs | 1 ½ cups |
| Melted Butter (unsalted) | ¼ cup | |
| Granulated Sugar (or erythritol/stevia blend) | 2 tablespoons | |
| For the Filling: | Cream Cheese (light or full-fat, softened) | 24 oz (3 blocks) |
| Plain Greek Yogurt (0% or 2%) | 1 cup | |
| Unsweetened Cocoa Powder | ½ cup | |
| Chocolate Protein Powder (whey or plant-based) | ½ cup | |
| Sweetener (granulated erythritol, stevia blend, or sugar) | ¾ cup (or to taste) | |
| Large Eggs | 3 | |
| Vanilla Extract | 1 teaspoon | |
| Pinch of Salt | ¼ teaspoon | |
| Optional Topping: | Sugar-Free Chocolate Syrup, Fresh Berries, or Whipped Cream | As desired |
[image 2]
Substitutions & Variations
One of the beautiful things about this Chocolate Protein Cheesecake recipe is its incredible flexibility. Life happens, dietary needs change, and sometimes you just crave something a little different! I love to experiment in the kitchen, and this recipe lends itself perfectly to creative twists. Here are some fantastic substitutions and variations to help you make this healthy dessert truly your own:
- Crust Alternatives: If graham crackers aren’t your preference, you have plenty of options. For a gluten-free version, simply use gluten-free graham crackers or a crust made from almond flour. Combine 1 ½ cups of almond flour with ¼ cup melted coconut oil and 2 tablespoons of sweetener, then press it into your pan. You can also use crushed Oreos (for a less healthy but delicious twist), digestive biscuits, or even a blend of nuts and dates for a no-bake, ultra healthy base. For a truly minimalist approach, you can even omit the crust entirely and bake the filling directly in a greased springform pan.
- Dairy-Free Delight: Making this cheesecake dairy-free is simpler than you might think. Substitute the cream cheese with a dairy-free cream cheese alternative. Brands like Kite Hill or Miyoko’s Kitchen offer fantastic options. For the Greek yogurt, use a plain, unsweetened dairy-free yogurt like coconut yogurt or almond yogurt. Ensure your protein powder is also plant-based (pea, rice, or soy protein work well).
- Protein Powder Power: I use chocolate protein powder for an intense chocolate flavor, but you can definitely experiment. Vanilla protein powder works beautifully if you want a lighter chocolate taste. You can even try a mocha flavored protein powder for a coffee twist! Always choose a protein powder you enjoy the taste of, as its flavor will subtly influence the final product.
- Sweetener Swaps: The beauty of using erythritol or a stevia blend is the low calorie aspect. However, if you prefer, you can use regular granulated sugar, coconut sugar, or even maple syrup (adjusting liquid content slightly) as your sweetener. Just taste and adjust to your desired sweetness level.
- Flavor Boosters: Elevate the chocolate experience! Add a pinch of espresso powder to the filling to deepen the chocolate flavor without making it taste like coffee. A few drops of peppermint extract create a delicious chocolate mint cheesecake. Orange zest and a touch of orange extract can turn it into a chocolate orange dream.
- Texture Twists: For an extra rich, gooey texture, fold in ½ cup of sugar-free chocolate chips or chopped dark chocolate after mixing the filling but before pouring it into the crust.
- Topping Transformations: The sky’s the limit here! Drizzle with sugar-free caramel sauce, sprinkle with toasted coconut flakes, or add a dollop of my Peanut Butter Overnight Oats topping for a unique twist. Fresh berries like raspberries or strawberries always pair beautifully with chocolate. A light dusting of cocoa powder or powdered erythritol also adds an elegant touch.
Step-by-Step Instructions
Creating this delicious Chocolate Protein Cheesecake is a straightforward process. Follow these simple steps, and you’ll have a delightful, nourishing dessert ready to impress!
- Prepare Your Pan & Oven: First, preheat your oven to 325°F (160°C). Lightly grease a 9-inch springform pan. If you plan to bake in a water bath (highly recommended for a crack-free cheesecake), wrap the bottom and sides of the springform pan tightly with heavy-duty aluminum foil to prevent water from seeping in.
- Make the Crust: In a medium bowl, combine the graham cracker crumbs, melted butter, and granulated sugar (or your chosen sweetener). Mix thoroughly until the crumbs are evenly moistened. Press this mixture firmly and evenly into the bottom of your prepared springform pan. Use the back of a spoon or the bottom of a glass to compact it well.
- Pre-Bake the Crust (Optional, but Recommended): Place the pan with the crust into the preheated oven and bake for 8-10 minutes. This helps set the crust and prevents it from becoming soggy. Remove from the oven and set aside to cool slightly while you prepare the filling.
- Prepare the Cheesecake Filling: In a large mixing bowl, beat the softened cream cheese with an electric mixer on medium speed until smooth and creamy, about 2-3 minutes. Make sure it’s completely lump-free.
- Add Wet Ingredients: Add the Greek yogurt, vanilla extract, and pinch of salt to the cream cheese mixture. Continue beating on medium speed until everything combines well, scraping down the sides of the bowl as needed.
- Incorporate Dry Ingredients: Sift the unsweetened cocoa powder and chocolate protein powder directly into the cream cheese mixture. Add your chosen sweetener. Beat on low speed initially to prevent the powders from flying everywhere, then increase to medium until all ingredients incorporate smoothly and you see no streaks of dry powder. Do not overmix.
- Add Eggs: Crack the eggs into a separate small bowl, then add them one at a time to the cheesecake mixture. Beat on low speed just until each egg incorporates. Overmixing the eggs can introduce too much air, which can cause cracks during baking.
- Pour into Pan: Pour the smooth, rich chocolate protein cheesecake filling over the pre-baked (or unbaked) crust in the springform pan. Gently tap the pan on your counter a few times to release any air bubbles.
- Bake the Cheesecake (Water Bath Method): If using a water bath, carefully place the foil-wrapped springform pan into a larger roasting pan. Pour hot water into the roasting pan until it reaches about halfway up the sides of the springform pan. Carefully transfer the entire roasting pan with the cheesecake to the preheated oven.
- Bake the Cheesecake (No Water Bath): If not using a water bath, simply place the springform pan directly onto the middle rack in your preheated oven.
- Bake Time: Bake for 50-65 minutes. The cheesecake is ready when the edges appear set, but the center still has a slight wobble when you gently shake the pan. Do not overbake!
- Cooling Process: Turn off the oven, but leave the cheesecake inside with the oven door slightly ajar for about 1 hour. This slow cooling helps prevent cracks.
- Chill Thoroughly: Remove the cheesecake from the oven and the water bath (if used). Carefully remove the foil. Let it cool completely on a wire rack at room temperature. Once cool, cover it loosely with plastic wrap and refrigerate for at least 4-6 hours, or preferably overnight. Chilling is crucial for the cheesecake to firm up and for the flavors to fully develop.
- Serve and Enjoy: Once thoroughly chilled, carefully run a thin knife around the edge of the pan before releasing the springform. Slice, top with your favorite garnishes, and enjoy this incredibly delicious and healthy protein cheesecake!
[image 3]
Pro Tips for Success
Making a perfect Chocolate Protein Cheesecake involves a few key techniques that can elevate your results from good to absolutely fabulous. These are the little secrets I’ve learned along the way, helping ensure a creamy texture and crack-free finish every time:
- Room Temperature Ingredients are Key: This is a non-negotiable tip for cheesecake perfection. Ensure your cream cheese and eggs are at room temperature. This allows them to combine smoothly without lumps, creating a uniform, silky batter. Cold ingredients will result in a lumpy filling and an uneven texture.
- Do Not Overmix the Filling: Mix the cream cheese until smooth, then incorporate other ingredients gradually. Once you add the eggs, mix only until just combined. Overmixing incorporates too much air into the batter, which expands during baking and then collapses as the cheesecake cools, leading to unsightly cracks.
- The Water Bath Method is Your Friend: While optional, baking your cheesecake in a water bath creates a moist, humid environment in the oven. This helps the cheesecake cook evenly, prevents the edges from drying out and cracking, and results in that signature silky-smooth texture. Remember to wrap your springform pan tightly with heavy-duty foil.
- Don’t Overbake: Overbaking is the number one cause of dry, cracked cheesecakes. Look for edges that are set, but the center should still have a slight wobble when you gently jiggle the pan. The residual heat from the oven will continue to cook the cheesecake as it cools.
- Slow Cooling Prevents Cracks: Once baking finishes, don’t yank the cheesecake out of the oven immediately. Turn off the oven, crack the door open slightly, and let the cheesecake slowly cool inside for about an hour. This gradual temperature change minimizes drastic contraction, preventing cracks.
- Chill, Chill, Chill: Patience is a virtue when it comes to cheesecake. A minimum of 4-6 hours of chilling is essential, but overnight is even better. Chilling allows the cheesecake to firm up properly, develop its full flavor, and achieve that iconic dense, creamy texture. Rushing this step will result in a soft, messy slice.
- Use Quality Ingredients: Since the ingredient list is relatively simple, the quality of each component shines through. Use good quality cocoa powder for a rich chocolate flavor and a protein powder you genuinely enjoy the taste of.
- Clean Slices: For perfectly clean slices, dip your knife in hot water and wipe it clean between each cut. This prevents the cheesecake from sticking to the blade and creates beautiful, neat servings.
Storage & Reheating Tips
Making a delicious Chocolate Protein Cheesecake means you often have leftovers, which is fantastic! This cheesecake stores beautifully, making it perfect for meal prepping your desserts or enjoying a quick treat throughout the week. Knowing how to properly store it ensures you maintain its creamy texture and rich flavor.
Storage:
- Refrigerator: Once the cheesecake cools completely, cover it tightly with plastic wrap or transfer slices to an airtight container. Store it in the refrigerator for up to 5-7 days. The flavors actually deepen a bit over time, so a slice on day two or three can be even better!
- Freezer: For longer storage, this protein cheesecake freezes wonderfully. You can freeze it whole or in individual slices. To freeze a whole cheesecake, ensure it’s completely chilled. Wrap it tightly in several layers of plastic wrap, then an additional layer of aluminum foil. For slices, wrap each slice individually in plastic wrap, then place them in an airtight freezer-safe container or freezer bag. It will keep well in the freezer for up to 2-3 months.
Reheating (or rather, Thawing):
- From Refrigerator: No reheating needed here! This cheesecake is meant to be enjoyed chilled. Simply remove it from the fridge, slice, and serve.
- From Freezer (Whole): Transfer the wrapped frozen cheesecake to the refrigerator and let it thaw slowly overnight. This gradual thawing helps preserve its texture.
- From Freezer (Slices): You can thaw individual slices in the refrigerator for a few hours, or you can even enjoy them slightly frozen for a firmer, almost ice cream-like dessert. For a quicker thaw, you can leave a wrapped slice on the counter for about 30-60 minutes, but return it to the fridge if not eaten immediately.
Remember, always store your cheesecake in an airtight manner to prevent it from absorbing odors from other foods in your fridge or freezer, and to keep it from drying out. This ensures every bite tastes as fresh and delicious as the first!
What to Serve With This Recipe
This Chocolate Protein Cheesecake is a star all on its own, a truly satisfying and nourishing dessert. However, a few simple additions can elevate the experience even further, turning a delicious treat into a memorable occasion. As a mom, I always appreciate versatile recipes that fit into various family meals, and this cheesecake pairs beautifully with so many options.
For a light, elegant presentation, consider fresh berries. Raspberries, strawberries, or blueberries add a beautiful burst of color, a tangy counterpoint to the rich chocolate, and an extra dose of antioxidants. A dollop of light whipped cream (dairy or coconut-based for a dairy-free option) also adds a cloud-like texture and a touch of sweetness. For the true chocolate lovers, a drizzle of sugar-free chocolate syrup or a sprinkle of mini sugar-free chocolate chips provides an extra layer of indulgence.
Beyond toppings, think about what kind of meal this decadent but healthy dessert would complete. It makes a fantastic ending to a weeknight dinner when you want something satisfying but not too heavy. Perhaps you’ve made a quick and easy Smash Burger Taco night, and you need a sweet finish.
Or maybe you’re planning a lighter lunch with my High Protein Pasta Salad, and you want a little something extra. This cheesecake fits right in.
For breakfast or a quick snack on the go, a slice of this protein cheesecake pairs wonderfully with your morning coffee or a glass of milk. It offers a much more exciting and fulfilling option than plain yogurt. It’s even great after an active afternoon, giving you a boost of protein and delicious flavor.
For dinner inspiration, check out my Hot Honey Chicken Bowls; they would precede this cheesecake perfectly, balancing savory and sweet. This cheesecake is also wonderful served alongside a small scoop of sugar-free vanilla or chocolate ice cream for an extra cold treat. No matter how you serve it, this chocolate protein cheesecake always impresses!
FAQs About Chocolate Protein Cheesecake
Is this Chocolate Protein Cheesecake genuinely healthy?
Yes, absolutely! This Chocolate Protein Cheesecake recipe prioritizes nourishing ingredients. We use light cream cheese, high-protein Greek yogurt, and protein powder, significantly reducing the fat and sugar content compared to traditional cheesecakes while boosting protein. It offers a balanced macronutrient profile, making it a much healthier and more satisfying dessert choice.
Can I make this Chocolate Protein Cheesecake ahead of time?
Definitely! In fact, making this protein cheesecake ahead of time is highly recommended. It needs a minimum of 4-6 hours to chill and set properly, but chilling overnight allows the flavors to meld beautifully and the texture to become perfectly firm. This makes it an excellent option for entertaining or meal prepping your desserts for the week.
What type of protein powder works best for this recipe?
I recommend using a chocolate-flavored whey protein powder for the best texture and flavor. However, a good quality plant-based protein powder (like pea or a blend) can also work well if you prefer a dairy-free option. Just ensure it’s a protein powder you genuinely enjoy the taste of, as its flavor will come through in the cheesecake.
Can I make this Chocolate Protein Cheesecake gluten-free?
Yes, you can easily make this Chocolate Protein Cheesecake gluten-free. Simply substitute the graham cracker crumbs with gluten-free graham cracker crumbs or use a crust made from almond flour. The filling itself is naturally gluten-free, provided your protein powder is certified gluten-free.
Why did my cheesecake crack, and how can I prevent it?
Cracks often happen from sudden temperature changes or overbaking. To prevent them, ensure your ingredients are at room temperature, do not overmix the batter (especially after adding eggs), use a water bath during baking, and allow the cheesecake to cool slowly in the oven with the door ajar. Avoid overbaking; the center should still have a slight wobble when you remove it.
How long does this Chocolate Protein Cheesecake last in the fridge?
When stored properly in an airtight container or tightly wrapped with plastic wrap, your Chocolate Protein Cheesecake will stay fresh and delicious in the refrigerator for up to 5-7 days. It’s perfect for enjoying a healthy treat throughout the week!