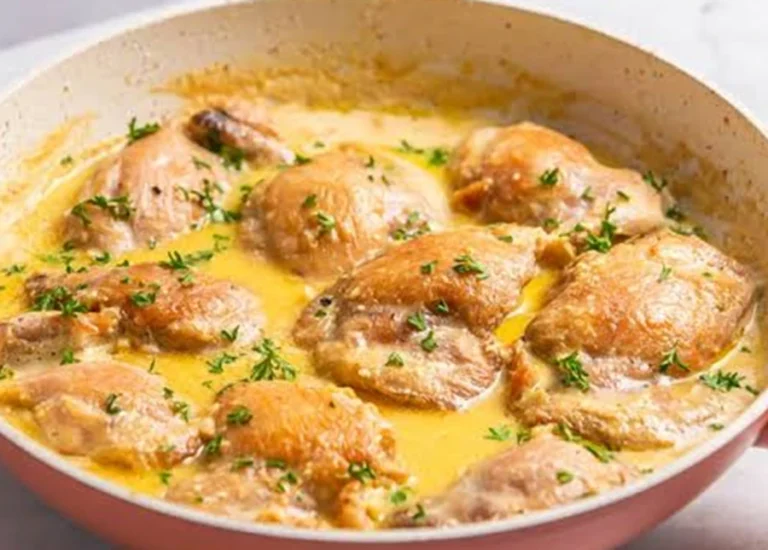
Ingredients
6–8 Bone-in, Skin-on Chicken Thighs (about 2.5–3 lbs)
4 tablespoons Unsalted Butter
1 tablespoon Olive Oil
6–8 cloves Fresh Garlic, minced or finely chopped
1 cup Chicken Broth (low-sodium)
1 cup Heavy Cream
2 tablespoons Fresh Parsley, chopped (for garnish)
1 teaspoon Dried Thyme (or 1 tablespoon fresh)
1 teaspoon Salt (or to taste)
½ teaspoon Black Pepper (or to taste)
1 teaspoon Cornstarch (optional, mixed with 1 tablespoon cold water for slurry)
Instructions
1. Prepare the Chicken: First, pat your chicken thighs very dry with paper towels. This crucial step helps achieve crispy skin. Next, generously season both sides of the chicken with salt and black pepper.
2. Sear the Chicken: Heat the olive oil and 2 tablespoons of butter in a large oven-safe skillet (cast iron works best!) over medium-high heat. Once the butter melts and the pan is hot, carefully place the chicken thighs skin-side down in the skillet. Do not overcrowd the pan; cook in batches if necessary. Sear for 6-8 minutes, undisturbed, until the skin becomes golden brown and crispy.
3. Flip and Finish Searing: Flip the chicken thighs over. Sear for another 3-4 minutes on the flesh side. Remove the chicken from the skillet and set it aside on a plate. Do not clean the pan; those browned bits add fantastic flavor.
4. Sauté the Garlic: Reduce the heat to medium-low. Add the remaining 2 tablespoons of butter to the same skillet. Once melted, add the minced garlic and dried thyme. Sauté for about 1 minute, stirring constantly, until fragrant. Do not let the garlic burn.
5. Deglaze and Build the Sauce: Pour in the chicken broth. Scrape up any browned bits from the bottom of the pan with a wooden spoon. This step, called deglazing, adds immense flavor to your sauce. Bring the broth to a gentle simmer.
6. Add Cream and Simmer: Slowly stir in the heavy cream. Bring the sauce back to a gentle simmer. If you want a thicker sauce, whisk 1 teaspoon of cornstarch with 1 tablespoon of cold water until smooth. Stir this slurry into the simmering sauce. Continue to stir until the sauce thickens slightly, about 1-2 minutes.
7. Return Chicken and Finish Cooking: Carefully place the seared chicken thighs back into the skillet, skin-side up, nestling them into the creamy sauce. Reduce the heat to low. Cover the skillet and let it simmer for 10-15 minutes, or until the chicken reaches an internal temperature of 165°F (74°C). The sauce will continue to thicken slightly.
8. Rest and Serve: Remove the skillet from the heat. Let the chicken rest in the sauce for 5 minutes. This allows the juices to redistribute, ensuring maximum tenderness. Garnish generously with fresh chopped parsley before serving.
Notes
Pat Chicken Dry Thoroughly: This is a non-negotiable step for crispy skin. Moisture on the chicken’s surface prevents browning. Use paper towels to blot away every drop of moisture before seasoning.
Do Not Overcrowd the Pan: Give each chicken thigh space to breathe in the skillet. Overcrowding lowers the pan temperature and steams the chicken instead of searing it. Work in batches if necessary to ensure a beautiful, golden crust.
Use Fresh Garlic: Freshly minced garlic delivers a pungent, vibrant flavor that garlic powder simply cannot replicate. Invest in a good garlic press or take the time to finely chop it. You will truly taste the difference.
Do Not Overcook the Chicken: Chicken thighs remain juicy even if slightly overcooked, but aiming for perfect doneness ensures the best texture. Use an instant-read meat thermometer inserted into the thickest part of the thigh, avoiding the bone. Cook until it reaches 165°F (74°C). This guarantees tender, succulent meat.
Scrape Up Fond: Those browned bits stuck to the bottom of the pan after searing the chicken are pure flavor. When you add the broth, use a wooden spoon to scrape them up. This process, called deglazing, infuses your sauce with incredible depth.
Taste and Adjust Seasoning: Always taste your sauce before returning the chicken to the pan. Adjust the salt and pepper as needed. A squeeze of fresh lemon juice at the end can also brighten the flavors beautifully.
Let it Rest: After cooking, let the chicken rest in the sauce for a few minutes off the heat. This allows the juices to redistribute throughout the meat, resulting in a more tender and moist chicken.
Storage: Refrigerate promptly in an airtight container for up to 3-4 days. Freeze (with caution due to potential texture changes in dairy sauce) for up to 3 months; thaw overnight in refrigerator. Reheat gently on stovetop, microwave, or oven, adding a splash of broth or cream if needed.
- Prep Time: 15 minutes
- Cook Time: 40 minutes
- Category: Main Course
- Method: Pan-sear and Simmer
- Cuisine: American
- Diet: Gluten-Free
Nutrition
- Serving Size: 1 thigh with sauce
- Calories: 520
- Sugar: 2g
- Sodium: 720mg
- Fat: 38g
- Saturated Fat: 17g
- Unsaturated Fat: 15g
- Trans Fat: 0.5g
- Carbohydrates: 5g
- Fiber: 0g
- Protein: 35g
- Cholesterol: 215mg