I had promised them something fun for dinner, something that wasn’t just “another casserole.” My brain was spinning, trying to conjure up a meal that was quick, satisfying, and didn’t involve a mountain of dishes. That’s when it hit me those amazing garlic parmesan cheeseburger bombs I’d been dreaming of! Little pockets of cheesy, savory goodness, all wrapped up in a golden crust.
I knew these cheeseburger bombs would be a huge hit, turning a chaotic weeknight into a moment of pure, delicious joy. And they were. The silence at the dinner table (a rare occurrence!) spoke volumes.
My kids devoured them, asking for seconds before I even cleared the first plate. That’s the magic of these garlic parmesan cheeseburger bombs they’re not just a meal; they’re an experience, a simple way to bring smiles to hungry faces. This recipe became an instant family favorite, a go to when I want maximum flavor with minimal fuss. Trust me, you’re going to love making (and eating!) these incredible cheeseburger bites.
Print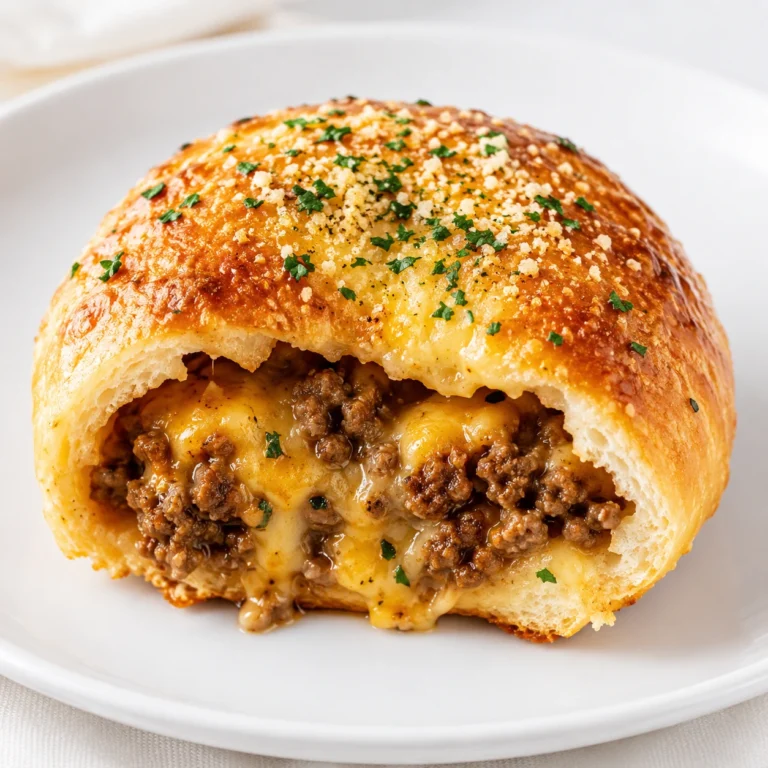
garlic parmesan cheeseburger bombs
These garlic parmesan cheeseburger bombs are savory pockets of ground beef, melted cheddar, and Parmesan wrapped in flaky biscuit dough, brushed with butter and baked until golden. They’re a quick, kid-friendly weeknight dinner that delivers classic cheeseburger flavor with minimal fuss.
- Total Time: 33 minutes
- Yield: 8 cheeseburger bombs 1x
Ingredients
1 lb ground beef (80/20 or 90/10 lean)
3–4 cloves garlic, minced (or 1 tsp garlic powder)
1/2 cup yellow onion, finely diced (optional)
1 tbsp Worcestershire sauce
Salt and black pepper to taste (start with 1/2 tsp salt, 1/4 tsp pepper)
1 (16.3 oz) can refrigerated biscuit dough (flaky layers or homestyle)
6–8 slices cheddar cheese (or 1 cup shredded)
1/4 cup grated Parmesan cheese
2 tbsp melted butter
1 tsp dried parsley (optional, for garnish)
Instructions
1. 1. Brown the ground beef in a large skillet over medium-high heat, breaking it apart with a spoon. Drain excess grease. Stir in minced garlic, diced onion (if using), Worcestershire sauce, salt, and pepper. Cook 2-3 minutes until onion softens and garlic is fragrant. Remove from heat and set aside to cool slightly (10-15 minutes).
2. 2. Preheat oven to 375°F (190°C). Line a baking sheet with parchment paper.
3. 3. Open the can of biscuit dough and separate into individual rounds. Gently press or stretch each round thinner if needed.
4. 4. Lay a biscuit round on the prepared baking sheet. Place one slice of cheddar cheese (or a small handful of shredded cheese) in the center. Spoon about 1-2 tablespoons of the cooled meat mixture onto the cheese. Top with another small piece of cheese if desired.
5. 5. Pull the edges of the dough up and over the filling and pinch tightly to seal, forming a neat round ball. Place seam-side down on the baking sheet. Repeat with remaining biscuits and filling.
6. 6. Melt the butter and brush over the tops of each bomb. Sprinkle generously with grated Parmesan cheese.
7. 7. Bake for 15-18 minutes, until golden brown and cooked through. Let cool 1-2 minutes before serving. Garnish with dried parsley if desired.
Notes
Cool the meat mixture before assembling to prevent soggy dough and make sealing easier. Don’t overfill; use about 1-2 tablespoons of meat per bomb. Seal dough edges very tightly to prevent cheese leakage. For variations: use ground turkey/chicken or plant-based meat, try different cheeses (provolone, mozzarella, pepper jack), substitute puff pastry or pizza dough for biscuit dough, or add jalapeños, bacon bits, or extra veggies. Store leftovers in an airtight container in the fridge for 3-4 days. Reheat in oven at 350°F for 10-15 minutes or in air fryer at 325°F for 5-7 minutes. To freeze: flash freeze cooked or unbaked bombs, then transfer to freezer bag; bake frozen unbaked bombs at 375°F for 25-30 minutes.
- Prep Time: 15 minutes
- Cook Time: 18 minutes
- Category: Main Course
- Method: Baking
- Cuisine: American
- Diet: none
Nutrition
- Serving Size: 2 bombs
- Calories: 420
- Sugar: 5g
- Sodium: 820mg
- Fat: 26g
- Saturated Fat: 11g
- Unsaturated Fat: 12g
- Trans Fat: 1g
- Carbohydrates: 30g
- Fiber: 1g
- Protein: 22g
- Cholesterol: 70mg
Why You’ll Love These Garlic Parmesan Cheeseburger Bombs
You know those recipes that just hit differently? These garlic parmesan cheeseburger bombs are absolutely one of them. First, they are incredibly simple to prepare, making them a perfect fit for busy weeknights when you need dinner on the table fast.
I’m a mom of three; “fast” is my middle name when it comes to cooking! Furthermore, these savory pockets are a guaranteed kid-pleaser. My picky eaters yes, even the one who typically dissects every meal devour these cheesy delights without a single complaint. Their small, handheld size makes them fun and easy for little hands to manage, too.
Moreover, the flavor combination in these cheeseburger bombs is truly irresistible. The rich, savory ground beef blends perfectly with melty cheese, all seasoned with a fragrant punch of garlic and salty Parmesan. Each bite offers an explosion of classic cheeseburger taste, amplified by that buttery, golden crust. You get all the comfort of a cheeseburger without the bun falling apart!
Finally, this recipe offers fantastic versatility. You can easily customize the fillings to suit your family’s preferences or whatever ingredients you have on hand. Craving a little spice?
Add some jalapeños! Want extra veggies? Finely dice some onions or bell peppers into your meat mixture.
These garlic parmesan cheeseburger bombs are more than just a meal; they are an invitation to gather around the table and enjoy good food and great company. You really can’t go wrong with such a delicious and adaptable dinner solution.
Ingredients You’ll Need
Gathering your ingredients for these delightful garlic parmesan cheeseburger bombs is incredibly straightforward. You likely have most of these items in your pantry already! Freshness makes a difference, especially with the garlic and cheese.
| Ingredient | Quantity | Notes |
|---|---|---|
| Ground Beef | 1 lb | 80/20 or 90/10 lean for best flavor without excess grease |
| Garlic | 3-4 cloves | Minced, or 1 tsp garlic powder |
| Yellow Onion | 1/2 cup | Finely diced (optional, but adds flavor) |
| Worcestershire Sauce | 1 tbsp | Adds umami depth |
| Salt & Black Pepper | To taste | Start with 1/2 tsp salt, 1/4 tsp pepper |
| Refrigerated Biscuit Dough | 1 (16.3 oz) can | Flaky layers or homestyle work great |
| Cheddar Cheese | 6-8 slices | Or 1 cup shredded; your favorite melting cheese |
| Parmesan Cheese | 1/4 cup | Grated, for topping |
| Butter | 2 tbsp | Melted, for brushing |
| Dried Parsley | 1 tsp | For garnish (optional) |
[image 2]
Substitutions & Variations
The beauty of these garlic parmesan cheeseburger bombs lies in their adaptability! Don’t feel limited by the original recipe; embrace creativity and make them your own. You can easily adjust ingredients based on dietary needs, preferences, or what you have available in your kitchen.
Meat Substitutions
- Ground Turkey or Chicken: For a leaner option, swap the ground beef for ground turkey or chicken. Just be sure to add a little extra olive oil to the pan when browning, as these meats are leaner and can dry out more easily. You might also want to boost the seasoning a bit to compensate for the milder flavor.
- Plant-Based Ground: You can absolutely make these vegetarian or vegan by using your favorite plant-based ground “meat” alternative. Many brands offer excellent texture and flavor that mimic traditional ground beef.
Cheese Variations
- Different Cheeses: While cheddar is classic, experiment with other great melting cheeses. Provolone, mozzarella, Colby Jack, or even a spicy pepper jack would all be fantastic in these cheeseburger bombs. Consider a blend for more complex flavor.
- Cheese Quantity: Feel free to add more or less cheese depending on your preference. More cheese always equals more melty goodness, in my book!
Dough Alternatives
- Puff Pastry: For an even flakier, more delicate crust, substitute puff pastry for the biscuit dough. Thaw it according to package directions, then cut it into squares. The method for wrapping the filling remains similar.
- Pizza Dough: If you prefer a chewier crust, use store-bought pizza dough. Roll it out and cut it into rounds or squares. This provides a more substantial “bomb” and is equally delicious.
Flavor Boosters & Add-ins
- Spicy Kick: Incorporate a pinch of red pepper flakes into your meat mixture, or add a few diced pickled jalapeños with the cheese.
- Extra Veggies: Finely diced mushrooms, bell peppers, or even spinach can blend seamlessly into the meat mixture, adding extra nutrients without being overpowering. Ensure you sauté these additions with the onion to remove excess moisture.
- Bacon Bits: Everything is better with bacon, right? Stir in some cooked, crumbled bacon bits with your meat mixture for an extra layer of savory flavor.
- Different Seasonings: Beyond salt and pepper, try a dash of onion powder, smoked paprika, or a ready-made “burger seasoning” blend.
These variations prove just how versatile these garlic parmesan cheeseburger bombs can be. Don’t hesitate to experiment and find your family’s favorite combination!
Step-by-Step Instructions
Making these garlic parmesan cheeseburger bombs is a breeze! Just follow these simple steps, and you’ll have a delicious, satisfying meal ready in no time. I promise, even with little ones underfoot, you can totally nail this recipe.
- Prepare Your Meat Mixture: First, brown the ground beef in a large skillet over medium-high heat. Break it apart with a spoon as it cooks. Drain any excess grease from the pan. Then, stir in the minced garlic, diced onion (if using), Worcestershire sauce, salt, and pepper. Cook for another 2-3 minutes, just until the onion softens and the garlic becomes fragrant. Remove the skillet from the heat and set it aside to cool slightly.
- Preheat Oven & Prep Pan: Next, preheat your oven to 375°F (190°C). Line a baking sheet with parchment paper. This prevents sticking and makes cleanup much easier.
- Divide the Dough: Open the can of biscuit dough. Separate the biscuits into individual rounds. If you have the larger “flaky layer” style biscuits, you might gently press them thinner or slightly stretch them.
- Assemble the Bombs: Lay out a biscuit round on your prepared baking sheet. Place one slice of cheddar cheese (or a small handful of shredded cheese) in the center of the biscuit. Next, spoon about 1-2 tablespoons of the cooled ground beef mixture onto the cheese. Top the meat with another small piece of cheese if desired.
- Seal Them Up: Carefully pull the edges of the biscuit dough up and over the filling. Pinch them together tightly at the top to seal the “bomb.” You want to make sure there are no gaps for the cheese to escape during baking! Roll it gently between your palms to form a neat, round ball.
- Arrange on Baking Sheet: Place the sealed cheeseburger bombs seam-side down on the parchment-lined baking sheet, leaving a little space between each one.
- Brush & Bake: Melt the butter in a small bowl. Brush the tops of each cheeseburger bomb with the melted butter. Sprinkle generously with grated Parmesan cheese. Bake for 15-18 minutes, or until the biscuits are golden brown and cooked through. The cheese inside will be wonderfully melted.
- Serve Immediately: Remove from the oven and let them cool for a minute or two before serving. They will be very hot! Garnish with fresh parsley if you like.
See? So simple! You just created a fantastic, family-friendly meal. Enjoy those warm, gooey garlic parmesan cheeseburger bombs!
[image 3]
Pro Tips for Success
Want your garlic parmesan cheeseburger bombs to turn out perfectly every single time? These little tricks will elevate your results from good to absolutely fantastic. I’ve learned them through trial and error (mostly error with my first attempts!), so you don’t have to.
- Cool the Meat Mixture: This is a crucial step! Allow your cooked ground beef mixture to cool for at least 10-15 minutes before you start assembling the bombs. Hot meat will start to cook the biscuit dough prematurely and make it harder to handle and seal properly. Warm meat can also lead to soggy dough.
- Don’t Overfill: It’s tempting to cram in as much delicious filling as possible, but resist the urge! Overfilling the biscuit dough makes it incredibly difficult to seal the bombs tightly. A tablespoon or two of meat and a slice of cheese are usually plenty.
- Seal Tightly: This might be the most important tip. Pinch the dough edges together very, very well to create a strong seal. If you don’t, your cheese might leak out during baking, creating a messy (though still tasty!) situation on your baking sheet.
- Use Parchment Paper: Always, always line your baking sheet with parchment paper. This prevents any potential sticking, especially if a little cheese does escape. Cleanup becomes a breeze!
- Even Baking: Give your cheeseburger bombs some space on the baking sheet. Overcrowding the pan can lead to uneven baking, with some bombs not browning as well as others. If you have a small baking sheet, bake them in two batches.
- Customize Your Cheese: While cheddar is classic, experiment with other cheeses like provolone, mozzarella, or even a spicy pepper jack for an extra kick. Freshly grated Parmesan on top makes a big difference compared to the pre-shredded kind.
- Don’t Forget the Brush: Brushing the tops with melted butter before baking adds a beautiful golden sheen and helps the Parmesan adhere perfectly, creating that irresistible crust.
Follow these simple tips, and you will achieve perfectly golden, gooey, and utterly delicious garlic parmesan cheeseburger bombs that will impress everyone at the table!
Storage & Reheating Tips
These garlic parmesan cheeseburger bombs are so good, you might not have many leftovers! But if you do, or if you want to make a double batch for meal prep, proper storage and reheating are key to maintaining their deliciousness.
Storage
- Refrigeration: Once completely cooled, store leftover cheeseburger bombs in an airtight container in the refrigerator for up to 3-4 days. Placing a paper towel in the bottom of the container can help absorb any excess moisture and prevent them from getting soggy.
- Freezing (Cooked): These bombs freeze remarkably well! After they cool completely, arrange them in a single layer on a baking sheet and flash freeze them for about an hour until solid. This prevents them from sticking together. Then, transfer the frozen bombs to a freezer-safe bag or airtight container. They will keep well in the freezer for up to 2-3 months.
- Freezing (Unbaked): You can also freeze them unbaked! Assemble the bombs as directed, but do not brush with butter or sprinkle with Parmesan. Flash freeze them until solid, then transfer to a freezer-safe bag. When ready to bake, place frozen bombs on a parchment-lined baking sheet, brush with butter, sprinkle with Parmesan, and bake at 375°F (190°C) for 25-30 minutes, or until golden brown and cooked through.
Reheating
- Oven (Recommended): For the best results, reheat refrigerated or thawed frozen cheeseburger bombs in a preheated oven or toaster oven at 350°F (175°C) for 10-15 minutes, or until warmed through and the crust is crisp again. This method helps maintain their texture.
- Air Fryer: An air fryer works wonderfully for reheating! Place refrigerated bombs in a single layer in the air fryer basket and cook at 325°F (160°C) for 5-7 minutes, checking halfway, until hot and crispy. For frozen, cook at 350°F (175°C) for 10-15 minutes.
- Microwave: While convenient, the microwave can sometimes make the biscuit dough soft or a bit chewy. If you’re in a hurry, microwave individual bombs for 30-60 seconds, or until heated through. Be aware that the crust won’t be as crispy as with other methods.
With these tips, you can enjoy these delicious garlic parmesan cheeseburger bombs days after making them, or have them ready to pull out of the freezer for an even quicker meal!
What to Serve With This Recipe
These savory garlic parmesan cheeseburger bombs are incredibly satisfying on their own, but pairing them with the right side dishes truly elevates the meal. As a mom always looking for balanced, simple plates, I aim for sides that complement the rich flavors without being too heavy or complicated. Here are some of my family’s favorite accompaniments:
- Crisp Green Salad: A fresh, vibrant green salad offers a wonderful contrast to the rich cheeseburger bombs. Toss mixed greens with a light vinaigrette, some cherry tomatoes, and cucumber slices. It adds freshness and a nice crunch.
- Oven-Baked Fries or Sweet Potato Fries: You can never go wrong with a classic! Serve these bombs with a batch of crispy oven-baked French fries or sweet potato fries for that ultimate burger-and-fries experience. A quick sprinkle of salt and a dash of garlic powder makes them extra special.
- Roasted Vegetables: Roasting vegetables brings out their natural sweetness and creates an easy, nourishing side. Broccoli, asparagus, or Brussels sprouts tossed with olive oil, salt, and pepper, then roasted until tender-crisp, pair beautifully.
- Coleslaw: A creamy or vinegar-based coleslaw provides a tangy, refreshing counterpoint that cuts through the richness of the cheeseburger bombs.
- Dipping Sauces: Offer a variety of dipping sauces! Classic ketchup and mustard are always a hit. You could also whip up a simple “special sauce” with mayonnaise, ketchup, relish, and a dash of hot sauce, or even a creamy ranch or BBQ sauce.
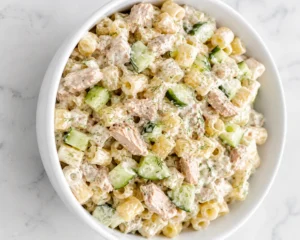
- Simple Pasta Salad: For a heartier side, a light pasta salad is a great option. Try something like my High-Protein Pasta Salad for a balanced and flavorful accompaniment that’s easy to make ahead.
- Quick Fruit Salad: Sometimes, a simple bowl of fresh fruit provides the perfect light and sweet finish to a savory meal. Grapes, melon, or berries are always a hit.
Whether you choose a light salad or a more substantial side, these suggestions will help you create a complete and delicious meal around your incredible garlic parmesan cheeseburger bombs.
FAQs about Garlic Parmesan Cheeseburger Bombs
You’ve got questions about these amazing garlic parmesan cheeseburger bombs, and I’ve got answers! Let’s tackle some common inquiries to ensure your cooking experience is smooth and delicious.
Can I make garlic parmesan cheeseburger bombs ahead of time?
Absolutely! You can prepare the meat mixture a day or two in advance and store it in an airtight container in the refrigerator. When you’re ready to bake, simply assemble the bombs with the cooled meat mixture.
You can also assemble the entire bombs (without baking) and refrigerate them for a few hours. Just make sure to cover them tightly to prevent the dough from drying out. You might need to add a minute or two to the baking time if they are very cold.
Are these cheeseburger bombs freezer-friendly?
Yes, they are! You can freeze these cheeseburger bombs both baked or unbaked. For baked bombs, let them cool completely, then flash freeze them on a baking sheet before transferring them to a freezer-safe bag or container.
They will last for 2-3 months. For unbaked bombs, assemble them, flash freeze, then transfer to a freezer bag. Bake directly from frozen, adding extra baking time (around 25-30 minutes).
What kind of biscuit dough works best for cheeseburger bombs?
I find that the larger, “flaky layers” or “homestyle” refrigerated biscuit dough (like Pillsbury Grands!) works best. These biscuits are a good size for wrapping around the filling and create a wonderfully tender, flaky crust. Avoid the smaller, thinner biscuits as they might be too small to fully enclose the filling.
Can I use ground turkey or chicken instead of beef?
Yes, you definitely can! Ground turkey or chicken makes a delicious and leaner alternative. Just ensure you season the poultry well, as it can be milder in flavor than beef.
Brown it thoroughly, drain any liquid, and then proceed with the recipe as directed. You might also want to add a touch more oil to the pan when browning the leaner meats to prevent sticking.
How do I make these cheeseburger bombs gluten-free?
Making these garlic parmesan cheeseburger bombs gluten-free is quite simple. The main ingredient you need to swap is the biscuit dough. Look for gluten-free refrigerated biscuit dough in the specialty or refrigerated section of your grocery store.
The rest of the ingredients ground beef, cheese, garlic, etc. are naturally gluten-free. Always double check ingredient labels to ensure no hidden gluten.