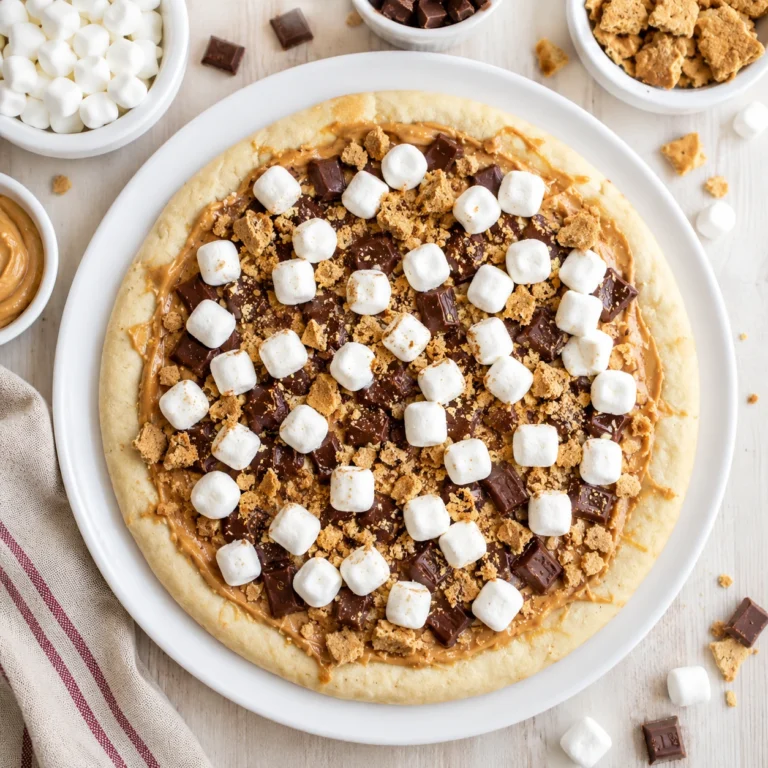
Ingredients
Pre-made Pizza Dough: 1 ball (13-16 oz)
Graham Crackers: 10-12 full sheets
Unsalted Butter: 6 tablespoons
Semi-Sweet Chocolate Chips: 1 cup (about 6 oz)
Milk Chocolate Chips: 1 cup (about 6 oz)
Mini Marshmallows: 3-4 cups
Powdered Sugar: 1 tablespoon (Optional, for dusting before serving)
Cooking Spray: As needed
Instructions
1. 1. Preheat Your Oven: Start by preheating your oven to 400°F (200°C). This ensures your pizza cooks evenly and quickly.
2. 2. Prepare Your Pizza Pan: Lightly spray a 12-inch round pizza pan or baking sheet with cooking spray. This prevents sticking and helps with easy removal.
3. 3. Form the Graham Cracker Crust: In a medium bowl, combine the finely crushed graham crackers with the melted butter. Stir thoroughly until the crumbs are evenly moistened. Press this mixture firmly and evenly onto the bottom of your prepared pizza pan, forming a thin crust. You can use the back of a spoon or your clean hands to compact it well.
4. 4. Pre-Bake the Crust (Optional, but Recommended): For a crispier crust, bake the graham cracker base for 5-7 minutes. This helps set it before adding the toppings.
5. 5. Roll Out the Pizza Dough: If using pre-made pizza dough, lightly flour a clean surface. Roll out the pizza dough into a 12-inch circle. Carefully transfer the dough circle over your pre-baked graham cracker crust. Gently press the edges of the pizza dough into the edges of the pan, forming a slight rim. If you skipped pre-baking, you can press the graham cracker crust onto the pizza dough after rolling.
6. 6. Bake the Dough Base: Place the pizza dough base (with or without the graham cracker crust beneath it) into the preheated oven and bake for 8-10 minutes, or until it is lightly golden brown and slightly puffed. This creates a sturdy base for your toppings.
7. 7. Add the Chocolate: Remove the partially baked pizza crust from the oven. Evenly sprinkle both the semi-sweet and milk chocolate chips over the warm crust. The residual heat will start to melt them beautifully.
8. 8. Top with Marshmallows: Generously scatter the mini marshmallows over the chocolate layer. Be sure to cover the chocolate completely for that classic s’mores look and taste.
9. 9. Final Bake: Return the S’Mores Pizza to the oven. Bake for another 3-5 minutes, or until the marshmallows are puffed, golden brown, and slightly toasted. Watch it carefully during this stage, as marshmallows can go from perfect to burnt very quickly!
10. 10. Cool and Serve: Carefully remove the pizza from the oven. Let it cool on the pan for about 5-10 minutes before slicing. This allows the chocolate to set slightly and prevents the toppings from sliding off when you cut into it. If desired, dust lightly with powdered sugar before serving. Slice into wedges and serve warm! Enjoy the pure delight of this homemade treat. It truly is a simple pleasure.
Notes
Pro Tips for Success:
* Do Not Overbake the Crust: The initial bake for your pizza dough is just to set it and give it a slight head start. You do not want it fully cooked, as it will bake more with the toppings. A light golden color is perfect.
* Watch Those Marshmallows: Marshmallows brown very quickly! Keep a close eye on your S’Mores Pizza during the final baking stage. Once they are puffed and have a nice golden hue, pull it out. A little char is good for flavor, but you want to avoid burning them.
* Use a Pizza Stone (If You Have One): If you own a pizza stone, use it! Preheat it with your oven for at least 30 minutes. A hot stone will give your crust an extra crispy bottom, similar to a traditional pizza, enhancing the texture contrast with the gooey toppings.
* Chill the Dough Slightly: If your pizza dough is very soft and sticky, pop it in the refrigerator for 10-15 minutes before rolling. This makes it easier to handle and prevents it from sticking to your rolling pin or work surface.
* Even Topping Distribution: Ensure you spread the chocolate chips and marshmallows evenly across the crust. This guarantees every single slice gets a perfect balance of all the s’mores elements.
* Let It Rest: It is tempting to dive in immediately, but allowing your S’Mores Pizza to cool for 5-10 minutes after baking is crucial. This helps the chocolate firm up slightly, preventing it from running everywhere when you slice it, and makes for cleaner cuts.
* Use Good Quality Chocolate: While chocolate chips are convenient, chopped chocolate bars (especially a mix of milk and semi-sweet) will melt more smoothly and provide a richer, more luxurious chocolate experience.
* Grease Your Pizza Cutter: Marshmallows can be incredibly sticky. Lightly spray your pizza cutter with cooking spray before slicing your S’Mores Pizza to prevent the marshmallows from sticking and tearing.
* Get Creative with Your Crumb Layer: Do not be limited to just graham crackers. You could use crushed vanilla wafers, shortbread cookies, or even chocolate cookies for the base crumb layer for different flavor profiles.
Storage & Reheating Tips:
* Storage at Room Temperature: If you plan to eat the leftover S’Mores Pizza within a few hours, you can loosely cover it with foil or plastic wrap and leave it on the counter. However, for best quality and freshness, refrigeration is usually preferred.
* Storage in the Refrigerator: For longer storage, allow the pizza to cool completely to room temperature. Then, transfer slices to an airtight container or wrap the entire pizza tightly with plastic wrap or aluminum foil. Store it in the refrigerator for up to 2-3 days. The marshmallows might lose some of their crispness, but the flavors will still be delightful.
* Reheating – Oven Method (Recommended): Preheat your oven to 300°F (150°C). Place individual slices or the entire pizza on a baking sheet. Heat for 5-10 minutes, or until the marshmallows are slightly puffed and the chocolate is melted and warm. Watch carefully to prevent burning.
* Reheating – Toaster Oven Method: For a single slice, a toaster oven works wonderfully. Place the slice directly on the rack (or on a small piece of foil) and heat at 300°F (150°C) for 3-5 minutes, again, until warmed through and marshmallows are soft.
* Reheating – Microwave Method (Least Recommended): While you can microwave it, it is generally not ideal for S’Mores Pizza. The marshmallows tend to get rubbery and the crust can become soft. If you must use a microwave, heat in short 15-second bursts until just warmed.
* Freezing (Not Recommended): The texture of the marshmallows and crust will significantly degrade upon thawing.
FAQs About S’Mores Pizza:
* Can I make S’Mores Pizza ahead of time? You can prepare certain elements in advance (crush graham crackers, mix with butter for crust and store in fridge; have dough ready). Once fully assembled and baked, it is best eaten within a few hours for optimal texture, but leftovers can be stored and reheated.
* What kind of pizza dough works best? Store-bought pre-made pizza dough from the refrigerated section is convenient. Homemade pizza dough also works well. The key is a sturdy, neutral-flavored base.
* My marshmallows burned! How can I prevent this? Keep a very close eye on the pizza during the final baking stage. Pull it from the oven the moment marshmallows puff and achieve a light golden-brown color. A broiler can be used for 30-60 seconds for a quick toast, but watch even more carefully.
* Can I use different types of chocolate? Absolutely! Experiment with all milk chocolate, all dark chocolate, white chocolate chips, chopped chocolate bars, peanut butter chips, or caramel bits.
* How do I get the graham cracker crust to stick to the pizza dough? If pre-baking the graham cracker crust separately, it forms a solid base. Place the rolled-out pizza dough on top and gently press its edges down over the graham cracker crust edges. If skipping pre-baking, simply press the graham cracker mixture onto the rolled-out pizza dough before baking, ensuring an even layer.
* Is this S’Mores Pizza suitable for parties or gatherings? Yes, it’s an absolute showstopper – visually appealing, easy to slice, and universally loved. Be prepared for it to disappear quickly!
Nutrition Disclaimer: All nutrition facts are estimates based on standard ingredient values and an estimated yield of 8 slices.
- Prep Time: 15 minutes
- Cook Time: 20 minutes
- Category: Dessert
- Method: Baking
- Cuisine: American
- Diet: Vegetarian
Nutrition
- Serving Size: 1 slice
- Calories: 582
- Sugar: 41.6g
- Sodium: 325mg
- Fat: 29g
- Saturated Fat: 14.5g
- Unsaturated Fat: 9.5g
- Trans Fat: 0.1g
- Carbohydrates: 74.5g
- Fiber: 1.5g
- Protein: 8.9g
- Cholesterol: 25mg