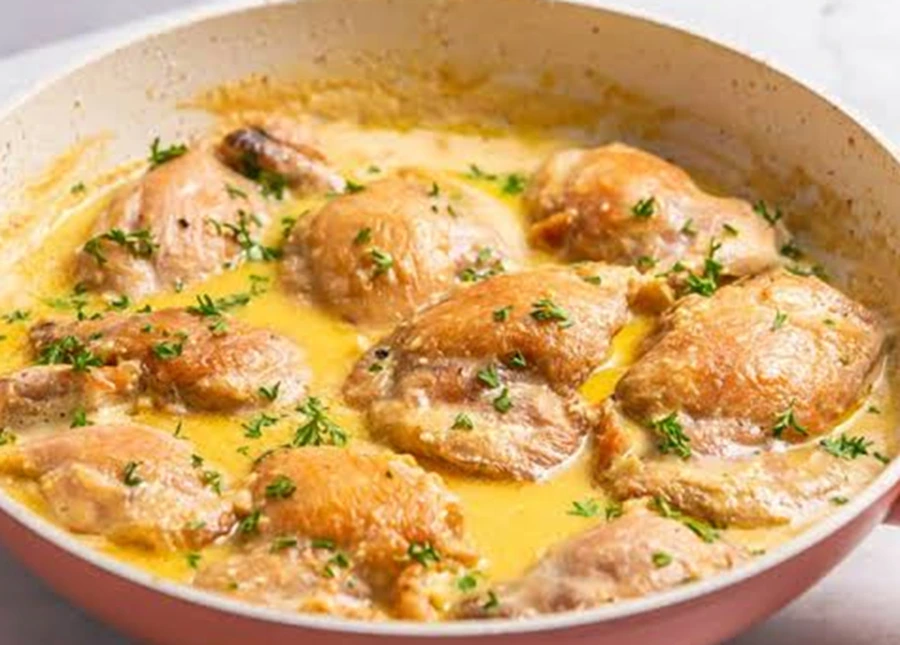
Life as a mom of three often feels like a beautiful, chaotic marathon. Between school pickups, homework battles, and cheering at soccer games, dinnertime can easily become another stressful hurdle. But I refuse to let it!
Food, for me, is love a way to gather my tribe, nourish their bodies, and connect at the end of a busy day. That’s why I constantly search for recipes that deliver big on flavor without demanding hours in the kitchen. And let me tell you, this recipe for Creamy Garlic Butter Chicken Thighs hit the jackpot.
I remember one particularly crazy Tuesday. The kids were overtired, hungry, and on the verge of a full-blown meltdown. I desperately needed a meal that felt like a warm hug but came together fast.
I looked in the fridge, spotted some chicken thighs, and inspiration struck. A quick sear, a simple sauce bubbling with fresh garlic and rich butter, a splash of cream… and suddenly, the most incredible aroma filled our kitchen. Those tender chicken thighs, bathed in a silky, savory sauce, turned the evening around.
My usually picky eaters devoured every last bite, asking for seconds. That night, these Creamy Garlic Butter Chicken Thighs cemented their place as a family favorite, a true weeknight hero. They’re proof that simple ingredients can create something truly extraordinary, bringing comfort and joy to the busiest of tables.
Print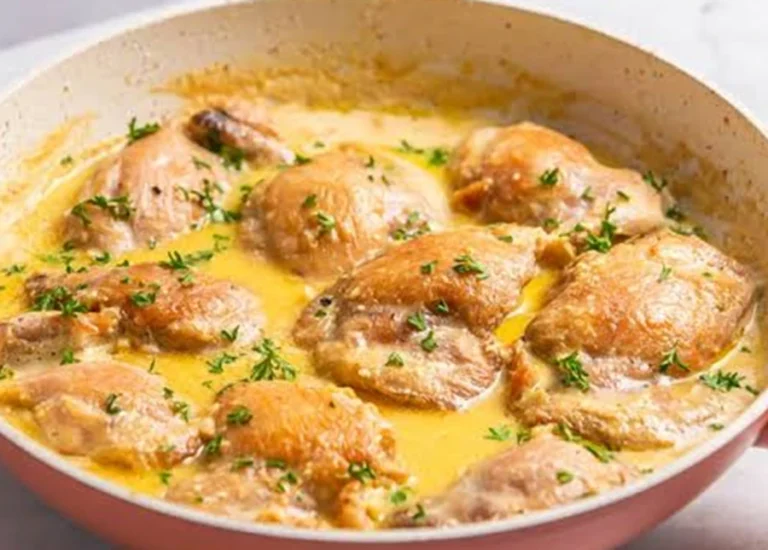
Creamy Garlic Butter Chicken Thighs
Craving a restaurant-quality dinner at home? These Creamy Garlic Butter Chicken Thighs are packed with juicy chicken, crispy golden skin, and a rich garlic butter sauce all ready in just 30 minutes!
- Total Time: 55 minutes
- Yield: 6–8 servings 1x
Ingredients
6–8 Bone-in, Skin-on Chicken Thighs (about 2.5–3 lbs)
4 tablespoons Unsalted Butter
1 tablespoon Olive Oil
6–8 cloves Fresh Garlic, minced or finely chopped
1 cup Chicken Broth (low-sodium)
1 cup Heavy Cream
2 tablespoons Fresh Parsley, chopped (for garnish)
1 teaspoon Dried Thyme (or 1 tablespoon fresh)
1 teaspoon Salt (or to taste)
½ teaspoon Black Pepper (or to taste)
1 teaspoon Cornstarch (optional, mixed with 1 tablespoon cold water for slurry)
Instructions
1. Prepare the Chicken: First, pat your chicken thighs very dry with paper towels. This crucial step helps achieve crispy skin. Next, generously season both sides of the chicken with salt and black pepper.
2. Sear the Chicken: Heat the olive oil and 2 tablespoons of butter in a large oven-safe skillet (cast iron works best!) over medium-high heat. Once the butter melts and the pan is hot, carefully place the chicken thighs skin-side down in the skillet. Do not overcrowd the pan; cook in batches if necessary. Sear for 6-8 minutes, undisturbed, until the skin becomes golden brown and crispy.
3. Flip and Finish Searing: Flip the chicken thighs over. Sear for another 3-4 minutes on the flesh side. Remove the chicken from the skillet and set it aside on a plate. Do not clean the pan; those browned bits add fantastic flavor.
4. Sauté the Garlic: Reduce the heat to medium-low. Add the remaining 2 tablespoons of butter to the same skillet. Once melted, add the minced garlic and dried thyme. Sauté for about 1 minute, stirring constantly, until fragrant. Do not let the garlic burn.
5. Deglaze and Build the Sauce: Pour in the chicken broth. Scrape up any browned bits from the bottom of the pan with a wooden spoon. This step, called deglazing, adds immense flavor to your sauce. Bring the broth to a gentle simmer.
6. Add Cream and Simmer: Slowly stir in the heavy cream. Bring the sauce back to a gentle simmer. If you want a thicker sauce, whisk 1 teaspoon of cornstarch with 1 tablespoon of cold water until smooth. Stir this slurry into the simmering sauce. Continue to stir until the sauce thickens slightly, about 1-2 minutes.
7. Return Chicken and Finish Cooking: Carefully place the seared chicken thighs back into the skillet, skin-side up, nestling them into the creamy sauce. Reduce the heat to low. Cover the skillet and let it simmer for 10-15 minutes, or until the chicken reaches an internal temperature of 165°F (74°C). The sauce will continue to thicken slightly.
8. Rest and Serve: Remove the skillet from the heat. Let the chicken rest in the sauce for 5 minutes. This allows the juices to redistribute, ensuring maximum tenderness. Garnish generously with fresh chopped parsley before serving.
Notes
Pat Chicken Dry Thoroughly: This is a non-negotiable step for crispy skin. Moisture on the chicken’s surface prevents browning. Use paper towels to blot away every drop of moisture before seasoning.
Do Not Overcrowd the Pan: Give each chicken thigh space to breathe in the skillet. Overcrowding lowers the pan temperature and steams the chicken instead of searing it. Work in batches if necessary to ensure a beautiful, golden crust.
Use Fresh Garlic: Freshly minced garlic delivers a pungent, vibrant flavor that garlic powder simply cannot replicate. Invest in a good garlic press or take the time to finely chop it. You will truly taste the difference.
Do Not Overcook the Chicken: Chicken thighs remain juicy even if slightly overcooked, but aiming for perfect doneness ensures the best texture. Use an instant-read meat thermometer inserted into the thickest part of the thigh, avoiding the bone. Cook until it reaches 165°F (74°C). This guarantees tender, succulent meat.
Scrape Up Fond: Those browned bits stuck to the bottom of the pan after searing the chicken are pure flavor. When you add the broth, use a wooden spoon to scrape them up. This process, called deglazing, infuses your sauce with incredible depth.
Taste and Adjust Seasoning: Always taste your sauce before returning the chicken to the pan. Adjust the salt and pepper as needed. A squeeze of fresh lemon juice at the end can also brighten the flavors beautifully.
Let it Rest: After cooking, let the chicken rest in the sauce for a few minutes off the heat. This allows the juices to redistribute throughout the meat, resulting in a more tender and moist chicken.
Storage: Refrigerate promptly in an airtight container for up to 3-4 days. Freeze (with caution due to potential texture changes in dairy sauce) for up to 3 months; thaw overnight in refrigerator. Reheat gently on stovetop, microwave, or oven, adding a splash of broth or cream if needed.
- Prep Time: 15 minutes
- Cook Time: 40 minutes
- Category: Main Course
- Method: Pan-sear and Simmer
- Cuisine: American
- Diet: Gluten-Free
Nutrition
- Serving Size: 1 thigh with sauce
- Calories: 520
- Sugar: 2g
- Sodium: 720mg
- Fat: 38g
- Saturated Fat: 17g
- Unsaturated Fat: 15g
- Trans Fat: 0.5g
- Carbohydrates: 5g
- Fiber: 0g
- Protein: 35g
- Cholesterol: 215mg
Why You’ll Love These Creamy Garlic Butter Chicken Thighs
You need this recipe in your life, especially if you juggle a busy schedule but still crave delicious, homemade meals. First, these Creamy Garlic Butter Chicken Thighs are incredibly simple to make. You do not need any fancy culinary skills here.
Second, the flavor profile is outstanding. Rich, savory garlic butter perfectly complements the juicy chicken. Furthermore, the creamy sauce coats everything in pure deliciousness.
It transforms ordinary chicken into something truly special. Additionally, this dish uses readily available ingredients. You likely have most of them in your pantry right now.
Finally, this recipe is a total crowd-pleaser. Even the pickiest eaters often ask for more. These tender chicken thighs consistently win rave reviews from family and friends.
Ingredients You’ll Need
Creating these incredible creamy garlic butter chicken thighs starts with fresh, quality ingredients. You will appreciate the simplicity of this list. Each component plays a vital role in building that irresistible flavor.
| Ingredient | Quantity | Notes |
|---|---|---|
| Bone-in, Skin-on Chicken Thighs | 6-8 (about 2.5-3 lbs) | Pat them very dry for crispy skin. You can use boneless, skinless thighs too, but adjust cooking time. |
| Unsalted Butter | 4 tablespoons | Real butter adds incredible richness to the sauce. |
| Olive Oil | 1 tablespoon | Helps prevent the butter from burning during searing. |
| Fresh Garlic | 6-8 cloves | Minced or finely chopped. Fresh garlic makes all the difference! |
| Chicken Broth | 1 cup | Low-sodium broth allows you to control the salt content. |
| Heavy Cream | 1 cup | This creates the luxurious, creamy texture. Do not substitute with milk. |
| Fresh Parsley | 2 tablespoons | Chopped, for garnish and a touch of freshness. |
| Dried Thyme (or fresh) | 1 teaspoon (or 1 tbsp fresh) | Adds an earthy, aromatic note to the dish. |
| Salt | 1 teaspoon (or to taste) | Season generously before cooking and adjust at the end. |
| Black Pepper | ½ teaspoon (or to taste) | Freshly ground pepper offers the best flavor. |
| Cornstarch (optional) | 1 teaspoon | Mixed with 1 tbsp cold water, for thickening the sauce if desired. |
[image 2]
Substitutions & Variations
This creamy garlic butter chicken thighs recipe is wonderfully adaptable. You can easily tailor it to your dietary needs or simply experiment with new flavors. Feel free to get creative in your kitchen!
Chicken Options
While bone-in, skin-on thighs provide maximum flavor and juiciness, you can certainly use other cuts. Boneless, skinless chicken thighs work beautifully; they cook a bit faster, so watch them carefully. If you prefer chicken breasts, slice them in half horizontally to create thinner cutlets.
This ensures even cooking and prevents dryness. Adjust the cooking time accordingly for breasts, typically searing for 3-4 minutes per side and then simmering in the sauce for less time. Furthermore, chicken drumsticks also make a great alternative. Just increase the total cooking time until they reach an internal temperature of 165°F (74°C).
Cream Alternatives
Heavy cream gives the sauce its signature richness, but other options exist. For a slightly lighter sauce, use half-and-half. However, it will not be as thick or rich.
If you need a dairy-free version, full-fat canned coconut milk provides a wonderful creamy texture. Be aware that it will impart a subtle coconut flavor to the sauce, which can be quite delicious but different. For a truly decadent sauce, a block of cream cheese, softened and whisked in at the end, also thickens beautifully.
Herb & Spice Twists
Parsley and thyme offer classic flavors, yet you can easily change them. Fresh rosemary or dried Italian seasoning make excellent additions. Consider adding a pinch of red pepper flakes for a subtle kick.
Smoked paprika introduces a lovely smoky depth and color. Moreover, a squeeze of fresh lemon juice at the end brightens the entire dish, cutting through the richness beautifully. Stirring in a tablespoon of sun-dried tomato paste with the garlic also adds a fantastic umami punch.
Adding Vegetables
You can easily turn this into a one-pan meal by adding vegetables. Sliced mushrooms brown beautifully alongside the chicken. Fresh spinach or kale wilts quickly into the sauce at the very end.
Asparagus spears or halved cherry tomatoes also make excellent additions. Add firmer vegetables like broccoli florets or bell peppers to the pan after searing the chicken, letting them soften before returning the chicken to the sauce.
Cheesy Indulgence
For extra richness and flavor, stir in a handful of grated Parmesan cheese or shredded mozzarella at the end. The cheese melts into the warm sauce, creating an even more luxurious experience. This addition is particularly delightful with pasta or rice.
Step-by-Step Instructions
Follow these simple steps to create perfectly tender and flavorful creamy garlic butter chicken thighs. You will be amazed at how easily this delicious meal comes together.
- Prepare the Chicken: First, pat your chicken thighs very dry with paper towels. This crucial step helps achieve crispy skin. Next, generously season both sides of the chicken with salt and black pepper.
- Sear the Chicken: Heat the olive oil and 2 tablespoons of butter in a large oven-safe skillet (cast iron works best!) over medium-high heat. Once the butter melts and the pan is hot, carefully place the chicken thighs skin-side down in the skillet. Do not overcrowd the pan; cook in batches if necessary. Sear for 6-8 minutes, undisturbed, until the skin becomes golden brown and crispy.
- Flip and Finish Searing: Flip the chicken thighs over. Sear for another 3-4 minutes on the flesh side. Remove the chicken from the skillet and set it aside on a plate. Do not clean the pan; those browned bits add fantastic flavor.
- Sauté the Garlic: Reduce the heat to medium-low. Add the remaining 2 tablespoons of butter to the same skillet. Once melted, add the minced garlic and dried thyme. Sauté for about 1 minute, stirring constantly, until fragrant. Do not let the garlic burn.
- Deglaze and Build the Sauce: Pour in the chicken broth. Scrape up any browned bits from the bottom of the pan with a wooden spoon. This step, called deglazing, adds immense flavor to your sauce. Bring the broth to a gentle simmer.
- Add Cream and Simmer: Slowly stir in the heavy cream. Bring the sauce back to a gentle simmer. If you want a thicker sauce, whisk 1 teaspoon of cornstarch with 1 tablespoon of cold water until smooth. Stir this slurry into the simmering sauce. Continue to stir until the sauce thickens slightly, about 1-2 minutes.
- Return Chicken and Finish Cooking: Carefully place the seared chicken thighs back into the skillet, skin-side up, nestling them into the creamy sauce. Reduce the heat to low. Cover the skillet and let it simmer for 10-15 minutes, or until the chicken reaches an internal temperature of 165°F (74°C). The sauce will continue to thicken slightly.
- Rest and Serve: Remove the skillet from the heat. Let the chicken rest in the sauce for 5 minutes. This allows the juices to redistribute, ensuring maximum tenderness. Garnish generously with fresh chopped parsley before serving.
[image 3]
Pro Tips for Success
Achieving truly spectacular creamy garlic butter chicken thighs involves a few simple tricks. These expert tips will help you create a dish that tastes like it came from a restaurant, all from your own kitchen.
Pat Chicken Dry Thoroughly: This is a non-negotiable step for crispy skin. Moisture on the chicken’s surface prevents browning. Use paper towels to blot away every drop of moisture before seasoning.
Do Not Overcrowd the Pan: Give each chicken thigh space to breathe in the skillet. Overcrowding lowers the pan temperature and steams the chicken instead of searing it. Work in batches if necessary to ensure a beautiful, golden crust.
Use Fresh Garlic: Freshly minced garlic delivers a pungent, vibrant flavor that garlic powder simply cannot replicate. Invest in a good garlic press or take the time to finely chop it. You will truly taste the difference.
Do Not Overcook the Chicken: Chicken thighs remain juicy even if slightly overcooked, but aiming for perfect doneness ensures the best texture. Use an instant-read meat thermometer inserted into the thickest part of the thigh, avoiding the bone. Cook until it reaches 165°F (74°C). This guarantees tender, succulent meat.
Scrape Up Fond: Those browned bits stuck to the bottom of the pan after searing the chicken are pure flavor. When you add the broth, use a wooden spoon to scrape them up. This process, called deglazing, infuses your sauce with incredible depth.
Taste and Adjust Seasoning: Always taste your sauce before returning the chicken to the pan. Adjust the salt and pepper as needed. A squeeze of fresh lemon juice at the end can also brighten the flavors beautifully.
Let it Rest: After cooking, let the chicken rest in the sauce for a few minutes off the heat. This allows the juices to redistribute throughout the meat, resulting in a more tender and moist chicken.
Storage & Reheating Tips
Having leftovers of these creamy garlic butter chicken thighs is a wonderful thing! Proper storage and reheating ensure you enjoy every bit of this delicious meal. You will appreciate these practical tips.
Storage
Refrigerate Promptly: Allow the cooked chicken and sauce to cool completely. Transfer them to an airtight container. Store in the refrigerator for up to 3-4 days. Promptly chilling prevents bacterial growth.
Freezing (with caution): While you can freeze this dish, be aware of texture changes. Dairy-based sauces sometimes separate or become grainy after freezing and thawing. The chicken itself will freeze well.
Place the cooled chicken thighs and sauce in a freezer-safe container. Freeze for up to 3 months. Thaw overnight in the refrigerator before reheating.
Reheating
Stovetop is Best: For best results, reheat the chicken and sauce gently on the stovetop. Place the leftovers in a skillet over medium-low heat. Add a splash of chicken broth or heavy cream if the sauce seems too thick or dry.
Stir occasionally until heated through. Do not boil vigorously, as this can cause the sauce to separate.
Microwave Option: You can reheat individual portions in the microwave. Place the chicken and sauce in a microwave-safe dish. Heat in 1-minute intervals, stirring between each, until thoroughly warmed. Be cautious not to overheat, as this can dry out the chicken.
Oven Reheating: For larger portions, preheat your oven to 300°F (150°C). Place the chicken and sauce in an oven-safe dish, covered with foil. Reheat for 15-20 minutes, or until warmed through. Again, a splash of broth or cream helps maintain moisture.
What to Serve With This Recipe
These creamy garlic butter chicken thighs truly shine with a variety of side dishes. You can easily create a balanced and satisfying meal. Here are some of my favorite pairings:
Carb Sides
- Creamy Mashed Potatoes: The ultimate classic pairing. Mashed potatoes soak up every bit of that incredible garlic butter sauce. They make for a truly comforting meal.
- Fluffy White or Brown Rice: Simple and effective. Rice provides a neutral base, allowing the rich chicken flavor to stand out.
- Pasta: Toss some cooked fettuccine or linguine directly into the sauce. The noodles become coated in creamy goodness. For another fantastic pasta option, check out my High-Protein Pasta Salad.
- Crusty Bread: Do not let any of that delicious sauce go to waste! A good crusty baguette or ciabatta is perfect for dipping and soaking up every drop.
Vegetable Sides
- Steamed Green Beans or Asparagus: These offer a fresh, crisp contrast to the rich chicken. A quick blanch with a squeeze of lemon juice works wonders.
- Roasted Broccoli or Brussels Sprouts: Roasting brings out their natural sweetness and gives them a lovely texture. They provide a great balance to the creamy sauce.
- Simple Side Salad: A light, refreshing green salad with a vinaigrette dressing cuts through the richness of the dish.
- Sautéed Spinach: Wilt a bag of fresh spinach with a little garlic. It’s a quick and healthy addition that pairs beautifully.
Other Ideas
- For another simple chicken dish with a kick, you might enjoy my Hot Honey Chicken Bowls.
- If you’re looking for quick breakfast ideas, try these Peanut Butter Overnight Oats.
- For a fun and quick dinner, my Smash Burger Tacos are always a hit!
FAQs
You have questions about these creamy garlic butter chicken thighs, and I have answers! These frequently asked questions will help ensure your cooking success.
Can I use chicken breasts instead of thighs for this Creamy Garlic Butter Chicken Thighs recipe?
Absolutely! You can easily substitute boneless, skinless chicken breasts. However, chicken breasts cook faster and can dry out if overcooked.
I recommend slicing larger breasts in half horizontally to create thinner cutlets. Sear them for 3-4 minutes per side and then simmer in the sauce for a shorter period, typically 5-8 minutes, until they reach an internal temperature of 165°F (74°C).
How do I make the creamy garlic butter sauce thicker?
If your creamy garlic butter sauce seems too thin, you have a few options. First, you can simmer it uncovered for a few extra minutes, allowing some of the liquid to evaporate. Alternatively, create a cornstarch slurry: whisk 1 teaspoon of cornstarch with 1 tablespoon of cold water until smooth.
Stir this mixture into the simmering sauce gradually, stirring constantly, until it reaches your desired thickness. Remember, the sauce will thicken a bit more as it cools.
Can I make this Creamy Garlic Butter Chicken Thighs recipe dairy-free?
Yes, you can adapt this recipe to be dairy-free. Replace the butter with a dairy-free butter alternative. Substitute the heavy cream with full-fat canned coconut milk.
Be aware that coconut milk will impart a subtle coconut flavor to the sauce. This can be a delicious twist, but it will taste different from the traditional dairy version. Ensure your chicken broth is also dairy-free.
Is this creamy chicken recipe freezer-friendly?
While you can freeze this creamy chicken dish, be aware that dairy-based sauces can sometimes change texture after freezing and thawing, potentially becoming slightly grainy or separating. The chicken itself freezes well. If you choose to freeze, store it in an airtight, freezer-safe container for up to 3 months. Thaw overnight in the refrigerator and reheat gently on the stovetop, adding a splash of broth or dairy-free milk to reconstitute the sauce if needed.
What kind of chicken thighs are best for this dish?
I highly recommend using bone in, skin on chicken thighs for this creamy garlic butter chicken recipe. The bone helps retain moisture, ensuring the chicken stays incredibly juicy. The skin crisps up beautifully during searing, adding an extra layer of texture and flavor that is simply irresistible. However, boneless, skinless thighs also work well if that’s what you have on hand; just adjust your cooking times.