Life with three busy kids often feels like a beautiful whirlwind. Between school pickups, playdates, and endless laundry cycles, finding time for myself sometimes feels like a mythical quest. However, one constant remains: my deep-seated belief that food is love.
I pour my heart into creating simple, nourishing meals that make our family feel good, both inside and out. But let’s be honest, even the most dedicated health enthusiast needs a little dessert now and then. My kids, with their uncanny ability to sniff out anything sweet, frequently ask for treats.
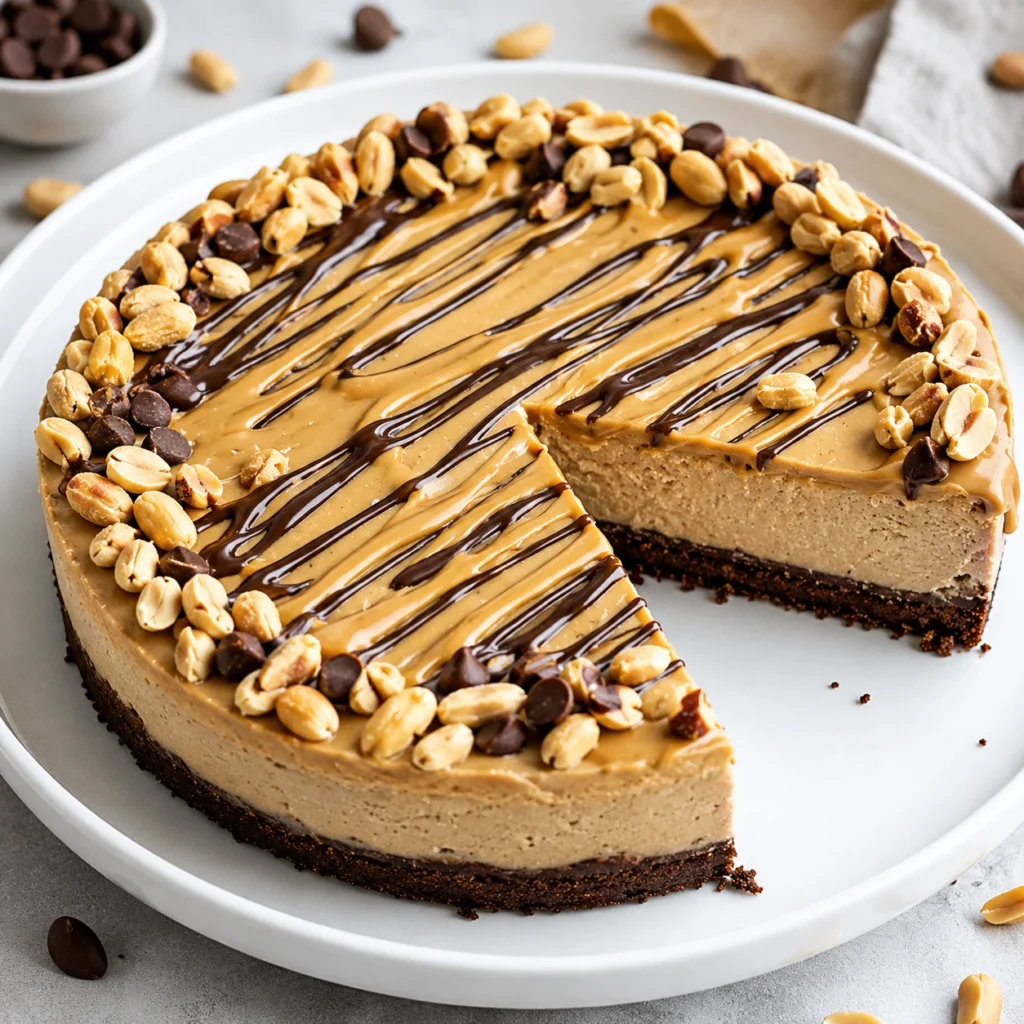
I wanted something that satisfied their cravings without completely derailing our healthy eating habits. That’s how I perfected this incredible Chocolate Peanut Butter Protein Cheesecake.
I remember the first time I whipped up this recipe. The kitchen buzzed with a mix of anticipation and skeptical glances from my eldest, who usually thinks “healthy” means “boring.” But one bite, just one decadent, creamy, chocolatey, peanut buttery bite, and his eyes widened. Suddenly, it was a race to see who could get the last slice!
This cheesecake quickly became a family favorite. It offers that classic rich flavor we all adore, but it cleverly packs a protein punch. Now, when I tell them we’re having Chocolate Peanut Butter Protein Cheesecake, I’m met with cheers, not groans.
It truly is a dessert you can feel good about serving and enjoying. You deserve delicious treats that also support your well being, and this recipe delivers on every front.
Print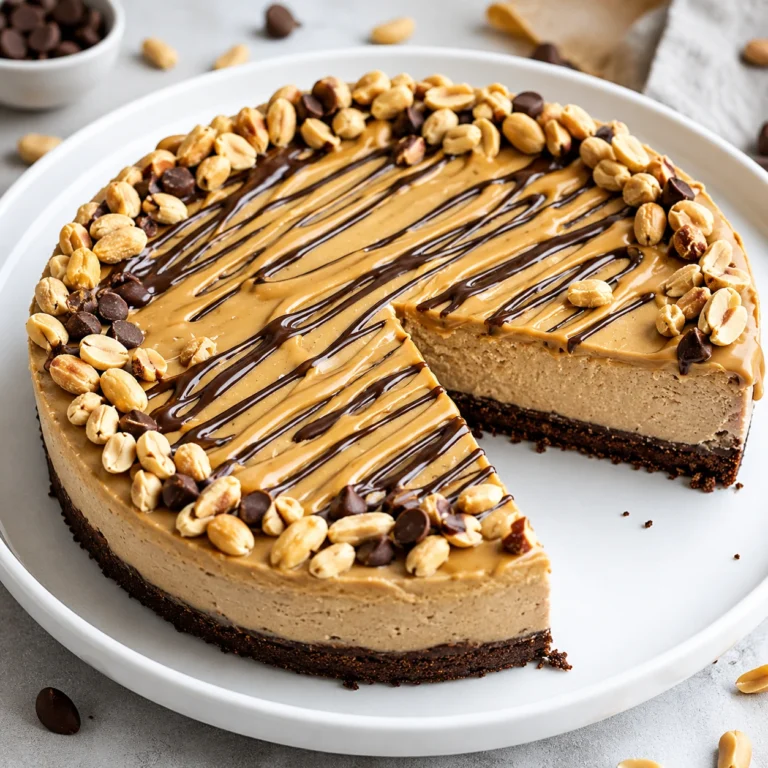
Chocolate Peanut Butter Protein Cheesecake
This no-bake Chocolate Peanut Butter Protein Cheesecake is a healthier dessert that satisfies sweet cravings with a rich chocolate-peanut butter flavor and a protein boost. Perfect for busy families, it’s easy to make and requires no baking.
- Total Time: 8 hours 20 minutes (includes chilling)
- Yield: 12 servings 1x
Ingredients
For the Crust:
1½ cups graham cracker crumbs
¼ cup unsalted butter, melted
2 tablespoons unsweetened cocoa powder
2 tablespoons granulated erythritol or sugar
For the Filling:
2 (8-ounce) blocks cream cheese, room temperature
¾ cup smooth peanut butter (no sugar added)
¾ cup chocolate protein powder (about 2 scoops)
½ cup powdered erythritol or powdered sugar
¼ cup unsweetened almond milk (or dairy milk)
1 teaspoon vanilla extract
¼ teaspoon salt
For the Topping (Optional):
2 ounces dark chocolate, melted
2 tablespoons creamy peanut butter, warmed
Mini chocolate chips or chopped peanuts (for garnish)
Instructions
1. Step 1: Prepare Your Crust
2. 1. Grease a 9-inch springform pan and line the bottom with parchment paper.
3. 2. In a medium bowl, combine graham cracker crumbs, melted butter, cocoa powder, and granulated erythritol (or sugar). Mix until crumbs are evenly moistened.
4. 3. Press the mixture firmly into the bottom of the prepared pan using a spoon or flat glass.
5. 4. Refrigerate the crust while you make the filling.
6. Step 2: Make the Creamy Filling
7. 1. In a large mixing bowl, beat room temperature cream cheese with an electric mixer on medium speed for 2-3 minutes until smooth and fluffy. Scrape down sides.
8. 2. Add peanut butter, powdered erythritol (or powdered sugar), vanilla extract, and salt. Beat on medium until well combined and smooth.
9. 3. Gradually add chocolate protein powder, mixing on low until just combined. Do not overmix.
10. 4. Add almond milk a little at a time, mixing on low until the filling is smooth, creamy, and spreadable (thick but pourable). Adjust milk as needed.
11. Step 3: Assemble and Chill
12. 1. Pour the filling over the chilled crust. Use an offset spatula or spoon to spread evenly.
13. 2. Cover loosely with plastic wrap and refrigerate for at least 6-8 hours, preferably overnight, until fully set.
14. Step 4: Add Toppings (Optional)
15. 1. Once set, melt dark chocolate in a microwave or double boiler. Drizzle over cheesecake.
16. 2. Warm peanut butter and drizzle alongside or over the chocolate.
17. 3. Garnish with mini chocolate chips or chopped peanuts.
18. 4. Carefully remove springform pan sides, slice, and serve.
Notes
Ensure cream cheese is at room temperature for a smooth filling. For best texture, use whey or casein protein powder; if using plant-based, adjust milk quantity. Chill at least 6-8 hours (overnight preferred) for clean slices. Store leftovers in the refrigerator for up to 5-7 days or freeze for up to 2 months. To make gluten-free, use gluten-free graham crackers or almond flour crust. For dairy-free, use plant-based cream cheese and coconut oil in the crust.
- Prep Time: 20 minutes
- Cook Time: 0 minutes
- Category: Dessert
- Method: No-Bake
- Cuisine: American
- Diet: Vegetarian (can be made gluten-free or dairy-free with substitutions)
Nutrition
- Serving Size: 1 slice (1/12 of cheesecake)
- Calories: 310
- Sugar: 12g
- Sodium: 320mg
- Fat: 20g
- Saturated Fat: 9g
- Unsaturated Fat: 8g
- Trans Fat: 0g
- Carbohydrates: 22g
- Fiber: 3g
- Protein: 18g
- Cholesterol: 45mg
Why You’ll Love This Chocolate Peanut Butter Protein Cheesecake
This isn’t just another dessert; it’s a game changer for your sweet tooth. You will fall head over heels for this Chocolate Peanut Butter Protein Cheesecake for so many reasons. First, the flavor combination is simply irresistible.
Rich, decadent chocolate meets creamy, salty peanut butter in perfect harmony. It creates a symphony of taste that satisfies every craving.
Furthermore, this cheesecake is incredibly high in protein. As a mom, I know the importance of fueling our bodies with quality nutrients. This dessert helps you hit your protein goals without even trying.
It makes an ideal post workout treat or a satisfying snack when you need a little something extra. Moreover, the protein helps keep you feeling full and satisfied, preventing those inevitable sugar crashes.
Next, you’ll appreciate its simplicity. We all need recipes that fit into our busy lives. This cheesecake is surprisingly easy to prepare, requiring no baking!
You just mix, press, and chill. This means less time in the kitchen and more time enjoying your family or relaxing after a long day. It’s a perfect make ahead dessert for parties or meal prep throughout the week.
Finally, it offers a healthier alternative to traditional cheesecakes. We swap in protein powder and control the sugar, transforming a typically indulgent dessert into a more wholesome option. This allows you to enjoy your favorite flavors guilt free.
Ultimately, you get all the deliciousness with added nutritional benefits. What’s not to love?
Ingredients You’ll Need
Gathering your ingredients is the first step to creating this delectable Chocolate Peanut Butter Protein Cheesecake. You will likely have many of these staples in your pantry already. Each component plays a vital role in achieving that perfect texture and flavor. We break it down into the crust and the creamy filling.
| Category | Ingredient | Quantity | Notes |
|---|---|---|---|
| For the Crust: | Graham cracker crumbs | 1 ½ cups | Use pre-crushed or crush your own. |
| Unsalted butter, melted | ¼ cup | Or use coconut oil for a dairy-free option. | |
| Unsweetened cocoa powder | 2 tablespoons | Adds a rich chocolate depth to the crust. | |
| Granulated erythritol or sugar | 2 tablespoons | Adjust to your sweetness preference. | |
| For the Filling: | Cream cheese, full-fat or light | 2 (8-ounce) blocks | Room temperature is crucial for smoothness. |
| Smooth peanut butter | ¾ cup | Natural, no-sugar-added works best. | |
| Chocolate protein powder | ¾ cup (about 2 scoops) | Whey or casein blend for best texture. | |
| Powdered erythritol or powdered sugar | ½ cup | Sift to avoid lumps. | |
| Unsweetened almond milk (or dairy milk) | ¼ cup | Adjust consistency as needed. | |
| Vanilla extract | 1 teaspoon | Enhances all the flavors. | |
| Pinch of salt | ¼ teaspoon | Balances the sweetness and chocolate. | |
| For the Topping (Optional): | Melted dark chocolate | 2 ounces | For drizzling. |
| Creamy peanut butter | 2 tablespoons | For extra drizzle. | |
| Mini chocolate chips or chopped peanuts | Optional garnish | For added texture and visual appeal. |
[image 2]
Substitutions & Variations
One of the best parts about cooking is customizing recipes to fit your taste and dietary needs. This Chocolate Peanut Butter Protein Cheesecake recipe offers incredible flexibility. Don’t hesitate to experiment with these delicious substitutions and variations to make it uniquely yours.
For the crust, graham crackers are a classic, but you have many options. Consider using crushed Oreo cookies for an even more decadent chocolate crust. Alternatively, for a gluten-free version, use gluten-free graham crackers or a mixture of almond flour and cocoa powder.
Simply combine 1 ½ cups almond flour with 2 tablespoons cocoa powder, 2 tablespoons sweetener, and ¼ cup melted butter or coconut oil. You could also use crushed oat biscuits for a chewier texture. If you want a lower carb option, blend nuts like pecans or walnuts with a little sweetener and melted coconut oil.
When it comes to the protein powder, the type significantly impacts the final texture and flavor. Chocolate whey protein works wonderfully, providing a smooth finish. However, if you prefer a plant-based option, use a good quality pea or rice protein blend.
Be aware that some plant based proteins can make the cheesecake a bit denser. You can also experiment with other protein powder flavors, like vanilla, for a different twist, then simply add a bit more cocoa powder to the filling. For example, a vanilla protein powder with a bit of banana extract could create a chocolate peanut butter banana cheesecake!
Peanut butter is the star, but other nut butters work too. Almond butter or cashew butter make excellent alternatives, offering a slightly different flavor profile. Just ensure they are natural, creamy varieties without added sugars or oils.
If you have a nut allergy, seed butters like sunflower seed butter (SunButter) are a fantastic, safe substitute. The flavor will change, but the creamy texture remains.
Regarding sweeteners, I often use erythritol to keep sugar content low. However, you can easily swap it for regular granulated or powdered sugar depending on your preference. Maple syrup or agave nectar also work, but you might need to slightly reduce the amount of milk in the filling to maintain consistency, as liquid sweeteners add moisture. Always taste and adjust for sweetness.
Finally, explore other fun additions. Swirl a tablespoon of raspberry jam into the filling for a chocolate peanut butter and jelly vibe. Mix in mini chocolate chips or chopped roasted peanuts for extra texture.
A layer of sliced bananas under the filling adds a delightful fruity note. You can even drizzle a little caramel sauce over the top with your chocolate and peanut butter for an extra layer of indulgence. Unleash your creativity and enjoy tailoring this recipe to your heart’s desire!
Step-by-Step Instructions
Creating this delicious Chocolate Peanut Butter Protein Cheesecake is simpler than you think. Follow these clear steps, and you will have a show-stopping dessert ready to chill in no time. Precision helps, but don’t stress; this recipe is forgiving!
Step 1: Prepare Your Crust
- Line your pan: First, lightly grease a 9 inch springform pan. Line the bottom with a circle of parchment paper. This step helps immensely when removing the cheesecake later.
- Combine ingredients: Next, in a medium bowl, combine the graham cracker crumbs, melted butter, cocoa powder, and granulated erythritol (or sugar). Mix these ingredients thoroughly until the crumbs are evenly moistened and resemble wet sand.
- Press the crust: Then, firmly press the crumb mixture into the bottom of the prepared springform pan. Use the back of a spoon or the bottom of a flat glass to compact it tightly. A well-compacted crust prevents crumbling when you slice the cheesecake.
- Chill the crust: Finally, place the crust in the refrigerator while you prepare the filling. This allows it to firm up and set.
Step 2: Make the Creamy Filling
- Beat cream cheese: Begin by placing the room temperature cream cheese in a large mixing bowl. Beat it with an electric mixer on medium speed for 2-3 minutes until it becomes completely smooth and fluffy. Scrape down the sides of the bowl often.
- Add peanut butter and flavorings: Next, add the smooth peanut butter, powdered erythritol (or powdered sugar), vanilla extract, and salt to the cream cheese mixture. Continue beating on medium speed until all ingredients are well combined and the mixture is smooth.
- Incorporate protein powder: Gradually add the chocolate protein powder to the mixture, beating on low speed until just combined. Be careful not to overmix, as this can affect the texture of the cheesecake.
- Adjust consistency: Pour in the almond milk (or dairy milk) a little at a time, mixing on low speed until the filling reaches a perfectly smooth, creamy, and spreadable consistency. You might not need all the milk, or you might need a tiny bit more; adjust as necessary. The goal is thick but pourable.
Step 3: Assemble and Chill
- Pour the filling: Retrieve your chilled crust. Carefully pour the smooth peanut butter protein cheesecake filling over the crust.
- Smooth the top: Then, use an offset spatula or the back of a spoon to gently spread the filling evenly across the pan, ensuring a flat, smooth top.
- Chill thoroughly: This is the most crucial step! Cover the springform pan loosely with plastic wrap. Transfer the cheesecake to the refrigerator and chill for a minimum of 6-8 hours, or ideally, overnight. This chilling time allows the cheesecake to set properly and firm up, giving you those beautiful, clean slices.
Step 4: Add Toppings (Optional)
- Melt chocolate: Once the cheesecake is fully chilled and set, melt the dark chocolate. You can do this in a microwave-safe bowl in 30-second intervals, stirring between each, or over a double boiler.
- Drizzle: Use a spoon or a piping bag to artfully drizzle the melted chocolate over the top of the cheesecake.
- Add peanut butter drizzle: Similarly, warm the extra creamy peanut butter slightly if needed to make it drippable. Drizzle it alongside or over the chocolate.
- Garnish: For extra flair, sprinkle with mini chocolate chips or chopped peanuts.
- Serve: Carefully remove the sides of the springform pan. Slice and serve your magnificent Chocolate Peanut Butter Protein Cheesecake!
[image 3]
Pro Tips for Success
Making a truly exceptional Chocolate Peanut Butter Protein Cheesecake involves a few insider tricks. These pro tips will help you achieve perfect results every single time, ensuring a smooth, creamy texture and fantastic flavor.
First, always start with room temperature cream cheese. This is a non negotiable tip! Cold cream cheese will inevitably lead to lumps in your filling, no matter how much you mix.
Take your cream cheese out of the fridge at least an hour before you plan to start baking. Softened cream cheese blends effortlessly into a silky smooth batter, creating that luxurious cheesecake consistency we all love.
Next, choose your protein powder wisely. Not all protein powders are created equal, especially for no-bake recipes. A good quality whey or casein blend tends to work best, as they help thicken the mixture and provide a smooth texture.
Avoid using certain plant-based proteins that can sometimes have a grittier texture or absorb liquid differently, potentially making your cheesecake too dry or too thick. If you opt for plant-based, make sure it’s a finely milled variety designed for baking or mixing, and be prepared to adjust the milk quantity slightly.
Furthermore, do not overmix the filling once you add the protein powder. Overmixing can incorporate too much air, which might lead to a less dense, almost fluffy texture rather than the rich creaminess characteristic of cheesecake. Mix only until just combined and smooth. A gentle hand truly helps here.
Pay close attention to the chilling time. Patience is a virtue when making no-bake cheesecakes! The recommended 6-8 hours, or ideally overnight, is essential.
This extended chilling period allows the cream cheese and protein to fully set, firming up the cheesecake for clean, beautiful slices. Rushing this step results in a gooey, unmanageable dessert. Plan ahead for best results.
Finally, when removing your cheesecake from the springform pan, use a thin knife or spatula to carefully loosen the edges before unclasping the pan. This prevents any part of the cheesecake from sticking to the sides and ensures a clean release. A warm, damp cloth gently applied to the outside of the pan for a minute can also help loosen it if needed.
Then, slide the cheesecake onto your serving plate using the parchment paper bottom. These small details make a big difference in presentation and enjoyment.
Storage & Reheating Tips
Proper storage ensures your Chocolate Peanut Butter Protein Cheesecake remains fresh and delicious for days. This no-bake treat stores exceptionally well, making it perfect for meal prepping your desserts or enjoying leftovers.
Store any leftover cheesecake in an airtight container in the refrigerator. You can also leave it in the springform pan, covered tightly with plastic wrap or aluminum foil. This helps prevent it from absorbing any odors from other foods in your fridge.
It will stay fresh and delicious for up to 5-7 days. The flavors actually deepen and meld beautifully after a day or two, so it tastes even better!
For longer storage, you can freeze individual slices or the whole cheesecake. If freezing the whole cheesecake, ensure it is completely set and unwrapped. Place it on a baking sheet in the freezer until firm (about 1-2 hours).
Then, wrap it tightly in plastic wrap, followed by a layer of aluminum foil. This double layer protects it from freezer burn. For individual slices, wrap each slice individually in plastic wrap and then foil. The cheesecake will keep well in the freezer for up to 1-2 months.
To enjoy frozen cheesecake, transfer it to the refrigerator to thaw slowly overnight. You can also let individual slices thaw at room temperature for about 30-60 minutes. Reheating is generally not recommended, as this is a no-bake recipe designed to be served cold. Simply thaw and serve, and you’ll enjoy its creamy texture just as intended.
What to Serve With This Recipe
While this Chocolate Peanut Butter Protein Cheesecake stands alone as a sensational dessert, pairing it with the right accompaniments elevates the experience. Think about balancing its richness or adding a fresh contrast. Since this cheesecake is quite satisfying, a lighter meal beforehand works beautifully.
First, consider serving it with fresh fruit. A handful of ripe berries, like strawberries, raspberries, or blueberries, provides a delightful tart counterpoint to the rich chocolate and peanut butter. Their freshness cuts through the creaminess and adds a vibrant burst of color and natural sweetness. A simple dollop of unsweetened whipped cream or a light Greek yogurt swirl also offers a nice contrast in texture and flavor.
For beverages, a classic cup of coffee or a robust espresso makes an excellent partner. The bitterness of the coffee beautifully complements the sweetness of the cheesecake. If you prefer something lighter, a glass of cold milk, either dairy or a plant-based alternative, provides a comforting pairing that enhances the nostalgic peanut butter flavors.
If you plan a meal before this decadent dessert, keep the main course light yet flavorful. Something that won’t leave you feeling overly full. Consider serving a vibrant and protein-packed main course like these Smash Burger Tacos.
They are full of flavor but not too heavy. Another fantastic option would be a refreshing High-Protein Pasta Salad, which brings a different texture and coolness to the table. Or for a touch of warmth and spice, my Hot Honey Chicken Bowls would make a wonderful savory lead-in to this sweet treat. These options ensure you still have room to fully appreciate every bite of your incredible Chocolate Peanut Butter Protein Cheesecake.
FAQs About Chocolate Peanut Butter Protein Cheesecake
Is this Chocolate Peanut Butter Protein Cheesecake actually healthy?
Yes, compared to traditional cheesecakes, this Chocolate Peanut Butter Protein Cheesecake offers a significantly healthier profile. We utilize protein powder to boost its nutritional value and often use reduced-sugar ingredients like erythritol and natural peanut butter. While it remains a treat, it delivers a substantial amount of protein, making it a more satisfying and nutrient-dense option than many other desserts. Enjoy it in moderation as part of a balanced diet.
Can I make this Chocolate Peanut Butter Protein Cheesecake ahead of time for a party?
Absolutely! This cheesecake is perfect for making ahead. In fact, it tastes even better after chilling for a full 24 hours, as the flavors have more time to meld together.
Prepare it a day or two before your event, store it tightly covered in the refrigerator, and then simply add your toppings just before serving. This makes party planning so much easier!
What kind of protein powder works best for this recipe?
For the best texture and flavor in your Chocolate Peanut Butter Protein Cheesecake, I recommend using a high-quality chocolate-flavored whey or casein protein powder. These types of protein powders typically blend smoothly and help create a firm, creamy consistency without any grittiness. If you opt for a plant-based protein, ensure it’s a finely milled variety and be prepared to slightly adjust the amount of milk, as plant proteins can absorb liquid differently.
Is this Chocolate Peanut Butter Protein Cheesecake gluten-free or dairy-free?
You can easily adapt this Chocolate Peanut Butter Protein Cheesecake to be gluten-free or dairy-free. For a gluten-free version, simply use gluten-free graham crackers for the crust or create a crust from almond flour.
To make it dairy-free, swap the cream cheese for a plant-based cream cheese alternative, use coconut oil instead of butter in the crust, and choose unsweetened almond milk (or another plant-based milk) for the filling. Always double-check your protein powder to ensure it is also dairy-free if needed.
How long does the Chocolate Peanut Butter Protein Cheesecake need to chill to set properly?
The chilling time is crucial for the Chocolate Peanut Butter Protein Cheesecake to set properly. You should refrigerate it for a minimum of 6-8 hours. However, for the absolute best results and the firmest, most sliceable cheesecake, I highly recommend chilling it overnight (12+ hours). This extended time allows all the ingredients to meld and firm up beautifully, ensuring each slice holds its perfect shape.