Oh, friends, let me tell you about a little miracle that happened in my kitchen last week. It was one of those evenings. The kids were *finally* in bed after what felt like a marathon of bedtime stories, forgotten water glasses, and sudden demands for specific stuffed animals.
My feet ached, my brain was buzzing, and all I wanted was something sweet, comforting, and utterly delicious. But, you know me I also wanted something that wouldn’t leave me feeling sluggish or guilty. My body craves nourishment, even when my heart craves dessert!
I rummaged through the pantry, a vision of creamy, dreamy indulgence forming in my mind. Could I create a treat that truly felt like an indulgence but was secretly packed with goodness? That’s when inspiration struck: a Coconut Protein Cheesecake.
I know, it sounds almost too good to be true, doesn’t it? Cheesecake with protein? And coconut?
My kids, bless their picky hearts, are usually suspicious of anything labeled “healthy.” But I decided to put my mom-of-three, food-is-love philosophy to the ultimate test. The result? Pure magic.
This Coconut Protein Cheesecake became an instant hit. My husband, who usually eyes my “healthier” creations with a skeptical eyebrow, devoured his slice and asked for seconds. The kids, after a tentative first bite, were practically licking their plates clean.
It wasn’t just a dessert; it was a moment of happy, shared indulgence, a testament to the fact that food can be both incredibly delicious and wonderfully nourishing. This recipe is simple, it’s wholesome, and it brings so much joy. You absolutely have to try it!
Print
Coconut Protein Cheesecake
A guilt-free, creamy no-bake cheesecake packed with protein and coconut flavor, perfect for a nourishing family dessert.
- Total Time: 6 hours 20 minutes (including chilling)
- Yield: 12 servings 1x
Ingredients
For the Crust:
1 ½ cups graham cracker crumbs
¼ cup melted coconut oil
2 tablespoons maple syrup (or honey)
Pinch of salt
For the Filling:
16 ounces (2 blocks) cream cheese (light or full-fat, softened)
1 cup plain Greek yogurt (full-fat recommended)
¾ cup (about 3 scoops) vanilla protein powder (coconut, vanilla, or unflavored)
½ cup full-fat canned coconut milk (refrigerated, just the thick cream)
½ cup maple syrup (or preferred liquid sweetener)
2 teaspoons vanilla extract
½ cup unsweetened shredded coconut
1 tablespoon fresh lemon juice
Optional Topping:
¼ cup toasted shredded coconut
Fresh berries (raspberries, blueberries)
Instructions
1. 1. Generously grease a 9-inch springform pan. Line the bottom with parchment paper for easy removal. Set aside.
2. 2. In a medium bowl, combine graham cracker crumbs, melted coconut oil, maple syrup, and a pinch of salt. Mix until crumbs are evenly moistened resembling wet sand. Press firmly into the bottom of the prepared pan. Freeze the crust while preparing the filling.
3. 3. In a large bowl, beat softened cream cheese with an electric mixer on medium speed until completely smooth and free of lumps.
4. 4. Add Greek yogurt, thick coconut cream, maple syrup, and vanilla extract. Beat on low speed until just combined.
5. 5. Gently fold in protein powder and shredded coconut until just combined. Stir in lemon juice.
6. 6. Pour filling over chilled crust. Spread evenly. Tap pan on counter to release air bubbles.
7. 7. Cover loosely with plastic wrap and refrigerate for at least 6 hours, or ideally overnight, until set.
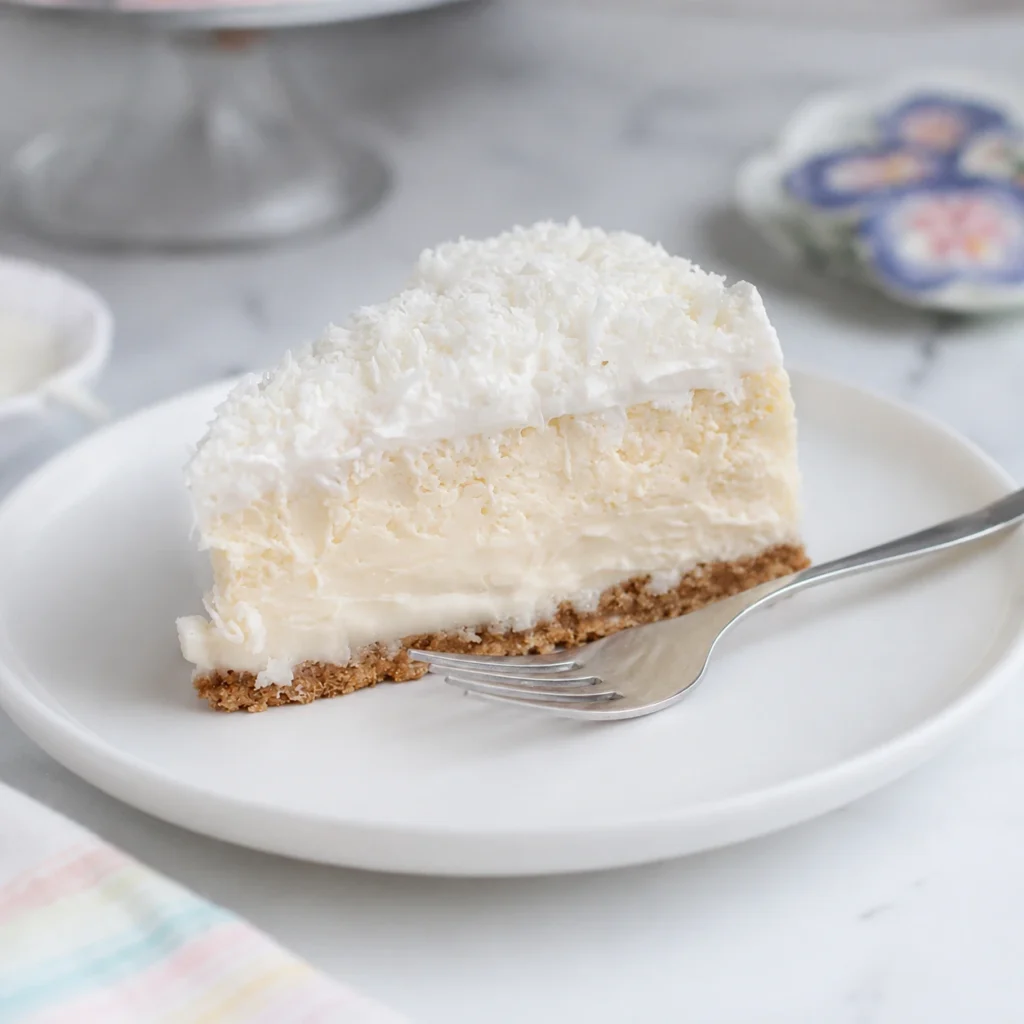
8. 8. Remove sides of pan. Garnish with toasted coconut and fresh berries if desired. Slice and serve.
Notes
Ensure cream cheese and yogurt are at room temperature for smoothest filling. Refrigerate coconut milk overnight and use only the thick cream. Do not overmix after adding protein powder to avoid rubbery texture. Chill at least 6 hours for proper set. For clean slices, run knife under hot water and dry between cuts. Store leftovers in refrigerator up to 4-5 days or freeze individually wrapped for up to 2 months.
- Prep Time: 20 minutes
- Cook Time: 0 minutes
- Category: Dessert
- Method: No-Bake
- Cuisine: American
- Diet: Vegetarian, Gluten-Free option, Dairy-Free option
Nutrition
- Serving Size: 1 slice
- Calories: 295
- Sugar: 18 g
- Sodium: 320 mg
- Fat: 18 g
- Saturated Fat: 11 g
- Unsaturated Fat: 5 g
- Trans Fat: 0.2 g
- Carbohydrates: 28 g
- Fiber: 2 g
- Protein: 14 g
- Cholesterol: 45 mg
Why You’ll Love This Coconut Protein Cheesecake Recipe
You probably already sense my enthusiasm, but let me break down exactly why this protein-packed coconut cheesecake will become a staple in your home. This isn’t just another dessert recipe; it’s a game-changer for anyone who loves sweets but also prioritizes their well-being.
* High in Protein: We moms are always looking for ways to sneak in extra protein for ourselves and our families. This cheesecake delivers! Packed with protein powder and Greek yogurt, it supports muscle recovery and keeps you feeling satisfied longer.
You won’t get that sugary crash you might from a traditional cheesecake.
* Decadently Delicious: Despite its healthy credentials, this cheesecake tastes incredibly indulgent. The creamy texture, the sweet coconut flavor, and the hint of vanilla create a truly gourmet experience.
It truly satisfies those dessert cravings without compromise.
* Surprisingly Simple to Make: As a busy mom, I have zero time for complicated recipes. This easy coconut protein cheesecake is designed with simplicity in mind.
No elaborate techniques, no hours in the kitchen. You can whip it up with minimal fuss, making it perfect for weeknights or special occasions alike.
* Wholesome Ingredients: We use real, wholesome ingredients that you can feel good about.
Greek yogurt, coconut milk, and natural sweeteners replace much of the heavy cream and sugar found in traditional recipes. It’s nourishing food disguised as a treat!
* Family-Friendly: My kids adore this cheesecake, and yours will too!
It’s sweet enough to be a treat, but you know it’s providing them with good nutrients. This recipe truly proves that healthy eating doesn’t mean sacrificing flavor. It’s a fantastic way to enjoy a sweet ending to a meal alongside other nourishing family favorites, like our Smash Burger Tacos or High-Protein Pasta Salad.
Ingredients You’ll Need
Gathering your ingredients is the first step to creating this delightful Coconut Protein Cheesecake. I always recommend getting everything ready before you start, it makes the process so much smoother!
| Ingredient | Quantity |
|---|---|
| For the Crust: | |
| Graham cracker crumbs | 1 ½ cups |
| Melted coconut oil | ¼ cup |
| Maple syrup (or honey) | 2 tablespoons |
| Pinch of salt | |
| For the Filling: | |
| Cream cheese (light or full-fat, softened) | 16 ounces (2 blocks) |
| Plain Greek yogurt (full-fat recommended for creaminess) | 1 cup |
| Vanilla protein powder (coconut, vanilla, or unflavored) | ¾ cup (about 3 scoops) |
| Full-fat canned coconut milk (refrigerated, just the thick cream) | ½ cup |
| Maple syrup (or preferred liquid sweetener) | ½ cup (adjust to taste) |
| Vanilla extract | 2 teaspoons |
| Unsweetened shredded coconut | ½ cup |
| Fresh lemon juice | 1 tablespoon |
| Optional Topping: | |
| Toasted shredded coconut | ¼ cup |
| Fresh berries (raspberries, blueberries) | |
[image 2]
Substitutions & Variations
One of the beautiful things about cooking at home is the freedom to make recipes your own. This Coconut Protein Cheesecake is incredibly versatile!
* Gluten-Free Crust: Simply swap out the regular graham cracker crumbs for gluten-free graham crackers, or use almond flour mixed with a little extra coconut oil and sweetener. You can also make a nut-based crust with finely ground almonds and pecans.
* Dairy-Free Option: For a completely dairy-free version, use dairy-free cream cheese (there are some fantastic almond or cashew-based options now!) and a thick dairy-free yogurt, like coconut cream yogurt.
Just ensure your protein powder is also dairy-free (like a plant-based vanilla protein).
* Protein Powder Power-Ups: While vanilla or coconut protein powder works perfectly, feel free to experiment. A chocolate protein powder could create a delicious chocolate-coconut swirl.
An unflavored protein powder gives you full control over the sweetness and coconut flavor. Just remember that different brands absorb liquid differently, so you might need to slightly adjust the amount of coconut milk for consistency.
* Sweetener Swaps: Maple syrup offers a lovely depth of flavor, but you can use honey, agave nectar, or even a sugar-free liquid sweetener like stevia drops or monk fruit syrup to reduce the sugar content further.
Taste and adjust as you go!
* Flavor Boosts:
* Lemon Zest: Add the zest of one lemon to the filling for a brighter, more vibrant flavor profile.
* Chocolate Swirl: Melt a few tablespoons of dark chocolate and swirl it into the cheesecake filling just before chilling for a rich mocha-coconut treat.
* Tropical Twist: Fold in finely diced mango or pineapple into the filling, or use it as a fresh topping.
* Nut Butter Layer: Spread a thin layer of your favorite nut butter on top of the crust before adding the filling for an extra layer of flavor and protein. This pairs wonderfully with coconut!
Perhaps inspired by our Peanut Butter Overnight Oats, but in cheesecake form!
* Nut-Free: If you need a nut-free option, ensure your graham crackers are nut-free and avoid any nut-based crust alternatives. The original recipe is mostly nut-free as long as you use appropriate protein powder.
Step-by-Step Instructions
Making this easy Coconut Protein Cheesecake is simpler than you think. Follow these steps for a perfect, creamy dessert every time!
1. Prepare Your Pan: First, generously grease a 9-inch springform pan. I like to line the bottom with parchment paper for easy removal, too.
This prevents sticking and ensures a clean slice later. Set it aside.
2.
Make the Crust: In a medium bowl, combine the graham cracker crumbs, melted coconut oil, maple syrup, and a pinch of salt. Mix everything together with a fork until the crumbs are evenly moistened and resemble wet sand. Now, press this mixture firmly into the bottom of your prepared springform pan.
Use the back of a spoon or the bottom of a glass to create an even, compact layer. Place the crust in the freezer to chill while you prepare the filling. This helps it set firmly.
3. Whip the Cream Cheese: In a large mixing bowl, beat the softened cream cheese with an electric mixer (or stand mixer with a paddle attachment) on medium speed until it’s completely smooth and free of lumps. This is a crucial step for a silky-smooth cheesecake.
4. Add Wet Ingredients: Now, add the plain Greek yogurt, thick coconut cream (from the refrigerated can of coconut milk), maple syrup, and vanilla extract to the cream cheese mixture. Beat on low speed until just combined.
Don’t overmix at this stage; we just want everything incorporated.
5. Incorporate Protein Powder & Coconut: Gently fold in the vanilla protein powder and unsweetened shredded coconut.
Mix until just combined. Overmixing protein powder can sometimes make it a bit tough, so be gentle! Next, stir in the fresh lemon juice.
The lemon juice brightens the flavors and helps cut through the richness.
6. Assemble the Cheesecake: Pour the creamy filling over the chilled crust in the springform pan.
Use an offset spatula or the back of a spoon to spread the filling evenly. Gently tap the pan on the counter a few times to release any trapped air bubbles.
7.Chill, Chill, Chill: This is perhaps the most important step for a no-bake cheesecake! Cover the springform pan loosely with plastic wrap and refrigerate for at least 6 hours, or ideally, overnight. A longer chill time ensures the cheesecake sets properly and achieves that classic firm, yet creamy, texture.
Patience truly pays off here.
8. Serve and Enjoy: Once completely set, carefully remove the sides of the springform pan.
If desired, garnish with toasted shredded coconut and fresh berries before slicing. Serve immediately and watch it disappear!
[image 3]
Pro Tips for Success
A few simple tricks can elevate your Coconut Protein Cheesecake from great to absolutely phenomenal.
* Room Temperature Ingredients are Key: For the creamiest, smoothest filling, ensure your cream cheese and Greek yogurt are at room temperature. This allows them to blend together effortlessly without any lumps. Cold cream cheese results in a lumpy filling, and nobody wants that!
* Use Full-Fat Greek Yogurt: While you can use lower-fat versions, full-fat Greek yogurt provides the best texture and richness for this cheesecake. It contributes to that luxurious, creamy mouthfeel we all crave in a cheesecake.
* Chill Your Coconut Milk: For the best results, refrigerate your can of full-fat coconut milk overnight.
This causes the thick coconut cream to separate and rise to the top, allowing you to scoop out just the firm cream for the recipe. This rich cream adds body and intense coconut flavor.
* Don’t Overmix: Once you add the protein powder, mix just until combined.
Overmixing can sometimes make the protein powder “activate” too much, leading to a slightly rubbery texture. We want smooth and creamy!
* The Power of Lemon Juice: Don’t skip the fresh lemon juice!
It doesn’t make the cheesecake taste lemony, but instead, it brightens all the flavors and balances the sweetness, making the cheesecake taste incredibly fresh. It’s like a secret weapon for cheesecakes.
* Patience with Chilling: I know it’s hard to wait, but resist the urge to cut into your cheesecake too soon!
A minimum of 6 hours, or ideally overnight, in the refrigerator is essential for it to fully set and achieve its perfect texture. This also makes for cleaner slices.
* Clean Slices: To get beautiful, clean slices, run a thin, sharp knife under hot water, wipe it dry, and then slice.
Repeat this process for each cut. This trick works wonders!
Storage & Reheating Tips
This healthy protein cheesecake is so good, you might not have much left over! But, if you do, here’s how to keep it fresh and delicious.
* Refrigeration: Store any leftover cheesecake in an airtight container in the refrigerator for up to 4-5 days. Keeping it covered prevents it from absorbing other fridge odors and helps maintain its moisture.
* Freezing: This cheesecake freezes beautifully!
For longer storage, slice the cheesecake into individual portions. Place the slices on a baking sheet and freeze for about an hour until firm. Then, wrap each slice tightly in plastic wrap, followed by aluminum foil, and store in a freezer-safe bag or container.
It will keep in the freezer for up to 1-2 months.
* Thawing: To enjoy frozen slices, simply transfer them from the freezer to the refrigerator a few hours before you plan to eat them. You can also let them sit at room temperature for 15-30 minutes for a quicker thaw, though the texture might be slightly softer.
Never try to “reheat” this cheesecake, as it will lose its texture. It’s meant to be enjoyed chilled or at room temperature.
What to Serve With This Recipe
While this Coconut Protein Cheesecake shines beautifully on its own, a few accompaniments can make it even more special. Think about enhancing the flavors or creating a delightful pairing.
* Fresh Berries: A handful of fresh raspberries, blueberries, or sliced strawberries adds a burst of freshness, a beautiful pop of color, and a lovely tart contrast to the creamy sweetness of the cheesecake.
* Toasted Coconut Flakes: A light sprinkling of toasted coconut flakes (easy to make in a dry pan or oven) enhances the coconut flavor and adds a delightful textural crunch.
* A Dollop of Whipped Cream: For a touch more indulgence, add a dollop of homemade whipped cream.
You can make a lighter version with Greek yogurt or coconut cream for a truly guilt-free treat.
* A Drizzle of Chocolate Sauce: A zigzag of good quality melted dark chocolate or a homemade sugar-free chocolate sauce would be divine, especially if you love chocolate and coconut together.
* Coffee or Tea: A freshly brewed cup of coffee or a comforting mug of herbal tea creates the perfect pairing for an afternoon treat or an after-dinner dessert.
* Post-Workout Treat: Because of its high protein content, this cheesecake makes an excellent post-workout treat! Pair it with a tall glass of water or a protein shake if you’re feeling extra athletic.
* A Balanced Meal: Enjoy this delicious Coconut Protein Cheesecake after a wholesome family dinner. It pairs wonderfully after a lighter protein packed meal like our Hot Honey Chicken Bowls.
FAQs About Coconut Protein Cheesecake
You’ve got questions, I’ve got answers! Let’s address some common queries about this delightful coconut protein cheesecake recipe.
Is this coconut protein cheesecake really healthy?
Yes, it is! Compared to traditional cheesecakes loaded with sugar and heavy cream, this recipe significantly reduces both. We swap in protein powder and Greek yogurt, boosting the protein content and offering beneficial probiotics.
We also use natural sweeteners. It’s a fantastic way to satisfy a sweet craving nutritiously.
Can I make this coconut protein cheesecake ahead of time?
Absolutely! In fact, I highly recommend making it at least a day ahead. It needs ample time to chill and set properly, which enhances both its texture and flavor. Preparing it the day before a gathering means less stress on the day itself.
What kind of protein powder works best?
A good quality vanilla or coconut-flavored whey protein powder or a plant-based protein blend (like pea or rice protein) works beautifully. Look for a powder that mixes well and doesn’t have a strong aftertaste. Avoid unflavored protein powders unless you are confident in adjusting the sweetener and vanilla amounts.
Is this recipe gluten-free/dairy-free?
The base recipe, as written, is not gluten-free (due to graham crackers) or dairy-free (due to cream cheese and Greek yogurt). However, as detailed in the “Substitutions & Variations” section, you can easily adapt it! Use gluten-free graham cracker crumbs for the crust and dairy-free cream cheese/yogurt with a plant-based protein powder for a completely dairy-free version.
How can I make the crust firmer?
Ensure you really press the crust mixture firmly into the pan. You want it to be compact. Also, chilling the crust in the freezer while preparing the filling helps it set.
If your crust feels too crumbly, you might need a tiny bit more melted coconut oil or maple syrup to bind it better. If it’s too soft after chilling, it might not have been pressed firmly enough or didn’t get enough chill time.