Life with three busy kids means constantly juggling schedules, homework, and, of course, endless snack requests. I often find myself searching for treats that satisfy their sweet tooth without leaving me feeling guilty about the ingredients.
It’s a delicate balance, trying to feed them nourishing food while still making mealtime feel like a celebration. Just last week, after a particularly chaotic afternoon of soccer practice and violin lessons, my oldest, Leo, declared he was “starving for something chocolatey.” My middle child, Clara, chimed in, “But not too unhealthy, Mom!” And little Finn, predictably, just wanted “cookies!”
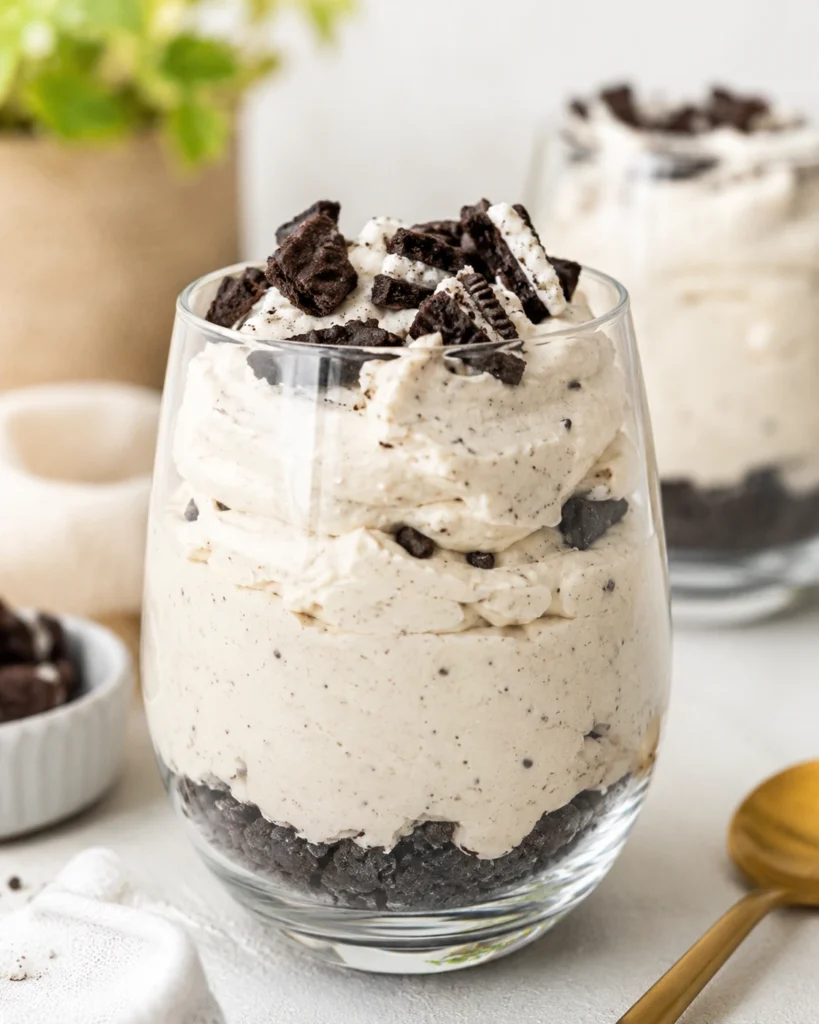
I smiled, a plan already forming in my mind. This was the perfect moment to whip up a batch of my famous Cookies & Cream Protein Cheesecake Cups. These aren’t just any dessert; they are a creamy, dreamy, perfectly portioned treat that tastes incredibly indulgent while secretly packing a powerful protein punch.
Seeing their faces light up as they devoured these individual protein cheesecake cups, crumbs dusting their cheeks, reminded me why I love creating recipes like this. Food truly is love, and when it’s simple, nourishing, and brings joy, it’s a total win.
These delightful cheesecake cups combine the classic flavors of cookies and cream with the goodness of protein, making them an ideal snack or dessert for busy families like ours. They are so easy to make, and honestly, they disappear faster than I can say “clean your room!”
Print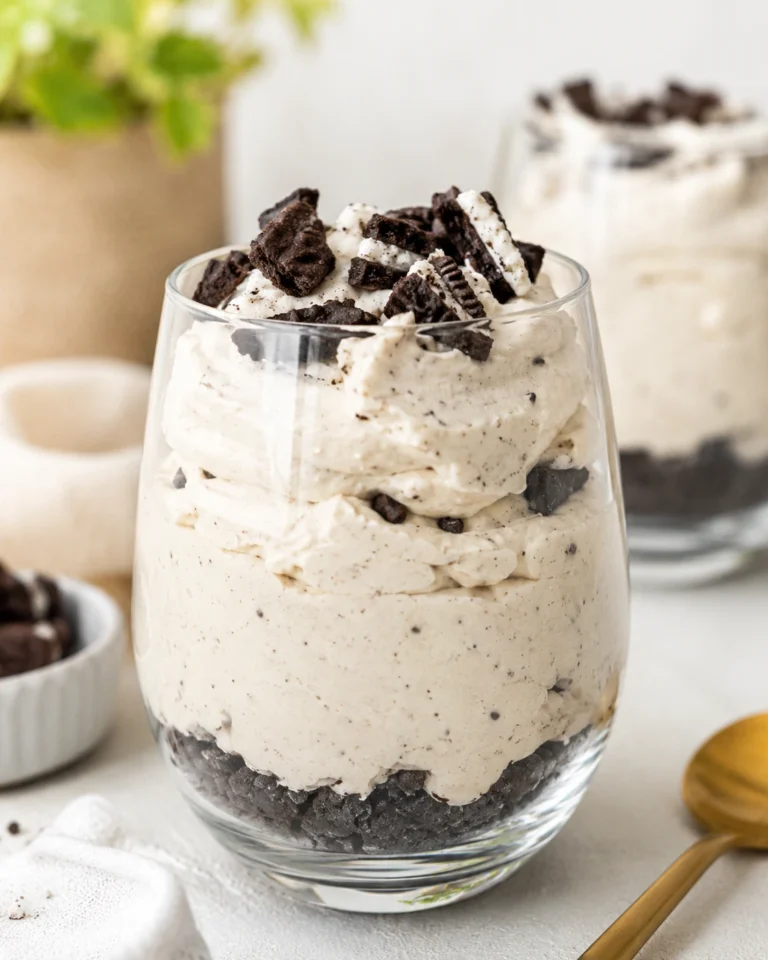
Cookies & Cream Protein Cheesecake Cups
These individual Cookies & Cream Protein Cheesecake Cups are a creamy, dreamy, perfectly portioned treat that tastes indulgent while packing a powerful protein punch. Perfect for busy families and ideal as a snack or dessert.
- Total Time: 4 hours 15 minutes (includes chilling time)
- Yield: 12 cups 1x
Ingredients
12 Oreo cookies (or similar chocolate sandwich cookies)
3 tablespoons unsalted butter, melted
8 ounces cream cheese, softened
1/2 cup plain Greek yogurt
1/2 cup vanilla protein powder (about 2 scoops)
1/4 cup powdered sugar (or sweetener of choice)
1 teaspoon vanilla extract
1/4 cup crushed Oreo cookies (from remaining 4–6 cookies of a standard package)
Instructions
1. Step 1: Prepare the Cookie Crust. Place the Oreo cookies in a food processor and pulse until fine crumbs form. Alternatively, place them in a zip-top bag and crush with a rolling pin. In a bowl, combine the cookie crumbs and melted butter, mixing until evenly moistened. Line a 12-cup muffin tin with paper liners. Firmly press about 1 tablespoon of the mixture into the bottom of each liner. Refrigerate the crusts while you prepare the filling.
2. Step 2: Make the Protein Cheesecake Filling. In a large bowl, beat the softened cream cheese, Greek yogurt, vanilla protein powder, powdered sugar, and vanilla extract with an electric mixer on medium speed until smooth and creamy, about 2-3 minutes. Scrape down the sides as needed. Gently fold in the 1/4 cup crushed Oreo cookies until just combined.
3. Step 3: Assemble the Cheesecake Cups. Remove the muffin tin from the refrigerator. Spoon the cheesecake filling evenly over the crusts (about 2-3 tablespoons per cup). Smooth the tops with the back of a spoon. Sprinkle additional crushed Oreo crumbs on top if desired.
4. Step 4: Chill and Serve. Cover the muffin tin loosely with plastic wrap and refrigerate for at least 4 hours, preferably overnight, until set. Remove cups from the tin and peel off paper liners before serving. Serve cold.
Notes
Ensure cream cheese is at room temperature to avoid lumps. Chill time is essential for proper set. For dairy-free: use plant-based cream cheese, dairy-free yogurt, and vegan cookies. For gluten-free: use gluten-free chocolate sandwich cookies. Store leftovers in an airtight container in the refrigerator for up to 4-5 days, or freeze for up to 1-2 months (thaw in fridge before serving).
- Prep Time: 15 minutes
- Cook Time: 0 minutes
- Category: Dessert, Snack
- Method: No-bake
- Cuisine: American
- Diet: High-protein, Low-sugar (when using sugar substitute), can be made dairy-free or gluten-free
Nutrition
- Serving Size: 1 cheesecake cup
- Calories: 231
- Sugar: 18g
- Sodium: 145mg
- Fat: 14g
- Saturated Fat: 8g
- Unsaturated Fat: 5g
- Trans Fat: 0g
- Carbohydrates: 18g
- Fiber: 1g
- Protein: 10g
- Cholesterol: 35mg
Why You’ll Love These Cookies & Cream Protein Cheesecake Cups
Indeed, you will absolutely adore these Cookies & Cream Protein Cheesecake Cups for so many reasons. First and foremost, they offer incredible flavor. Imagine the rich taste of cookies and cream, perfectly balanced with a tangy cheesecake filling pure bliss in every bite!
Moreover, these cups are wonderfully convenient. Each one is individually portioned, making them an ideal grab-and-go snack or a perfectly controlled dessert. No more wrestling with a whole cheesecake!
Furthermore, they are surprisingly simple to prepare. Even on your busiest days, you can easily whip up a batch of these protein-packed cheesecake cups without any fuss.
Beyond taste and convenience, these cheesecake cups deliver fantastic nutritional benefits. They are loaded with protein, helping you stay full and satisfied longer. This makes them an excellent choice for post-workout recovery or a healthy afternoon pick me up.
Additionally, they satisfy sweet cravings without the usual sugar overload of traditional desserts. As a busy mom, I always appreciate recipes that are both kid-friendly and nourishing. My children devour these without even realizing they are eating something healthy!
Finally, this recipe is incredibly versatile. You can easily adjust the ingredients to suit various dietary needs or simply experiment with different flavor combinations. Truly, these protein cheesecake cups are a guilt-free indulgence that your entire family will love.
Ingredients You’ll Need
Gathering your ingredients is the first step towards creating these delightful Cookies & Cream Protein Cheesecake Cups. You’ll find most of these staples in your pantry and fridge, making this recipe incredibly accessible. We divide the ingredients into two main sections: the crunchy crust and the creamy, protein-packed filling.
For the Oreo Cookie Crust:
| Ingredient | Quantity |
|---|---|
| Oreo cookies (or similar chocolate sandwich cookies) | 12 cookies |
| Unsalted butter, melted | 3 tablespoons |
For the Protein Cheesecake Filling:
| Ingredient | Quantity |
|---|---|
| Cream cheese, softened | 8 ounces (1 block) |
| Plain Greek yogurt | 1/2 cup |
| Vanilla protein powder | 1/2 cup (about 2 scoops) |
| Powdered sugar (or sweetener of choice) | 1/4 cup |
| Vanilla extract | 1 teaspoon |
| Crushed Oreo cookies (from the remaining 4-6 cookies of a standard package) | 1/4 cup |
Make sure your cream cheese is at room temperature; this ensures a smooth, lump-free filling. For the protein powder, I recommend a good quality vanilla whey or casein, but a plant-based vanilla protein powder works beautifully too. Remember, quality ingredients truly make a difference in the final taste of these wonderful Cookies & Cream Protein Cheesecake Cups.
Substitutions & Variations
One of the best things about these Cookies & Cream Protein Cheesecake Cups is their incredible adaptability! You can easily tweak this recipe to suit different dietary preferences or simply experiment with new flavors. Don’t hesitate to get creative in your kitchen; that’s where the magic truly happens.
Dietary Adjustments:
- Dairy-Free: Simply swap out the regular cream cheese for a plant-based cream cheese alternative. Choose a thick, plain dairy-free Greek yogurt, and ensure your protein powder is also dairy-free (like a pea or soy protein). Use vegan chocolate sandwich cookies for the crust, and dairy-free butter.
- Gluten-Free: Luckily, many brands now offer gluten-free chocolate sandwich cookies that mimic Oreos perfectly. Use these for your crust, and ensure your protein powder is certified gluten-free. All other ingredients are naturally gluten-free.
- Lower Sugar: Replace the powdered sugar with your favorite sugar substitute, such as erythritol, stevia blend, or monk fruit sweetener. Adjust the quantity to taste, as sweetness levels vary between brands.
Flavor Adventures:
- Different Protein Powders: While vanilla is classic, experiment with chocolate protein powder for a double chocolate experience. Moreover, a cookies and cream flavored protein powder would intensify that specific taste profile even further!
- Extracts: Beyond vanilla, try a few drops of almond extract, peppermint extract (especially around the holidays!), or even a hint of coffee extract for a mocha twist in your protein cheesecake cups.
- Crunchy Add-ins: Instead of or in addition to crushed Oreos, fold in mini chocolate chips, chopped nuts, or even a few spoonfuls of your favorite granola for extra texture.
- Toppings Galore: Before serving, drizzle with sugar-free chocolate syrup, a dollop of whipped cream, fresh berries, or more crushed cookies. A sprinkle of cocoa powder also adds a beautiful finish.
- Peanut Butter Swirl: For a delightful nutty variation, swirl in a tablespoon or two of melted peanut butter into the cheesecake filling right before spooning it into the cups. This creates a beautiful marbled effect and adds a rich, savory dimension.
- Lemon Zest Brightness: For a lighter, zestier flavor, add 1-2 teaspoons of fresh lemon zest to the cream cheese filling. This cuts through the richness beautifully and adds a refreshing tang.
Remember, cooking is about exploring and finding what your family loves most. These Cookies & Cream Protein Cheesecake Cups offer a fantastic canvas for your culinary creativity!
Step-by-Step Instructions
Creating these delicious Cookies & Cream Protein Cheesecake Cups is straightforward and fun. Follow these simple steps, and you will have a batch of delightful, protein-packed treats ready to chill.
Step 1: Prepare the Cookie Crust
First, take your Oreo cookies. Place them in a food processor and pulse until they form fine crumbs. Alternatively, put them in a zip-top bag and crush them using a rolling pin.
Next, melt the unsalted butter. Pour the melted butter over the cookie crumbs and mix thoroughly until the crumbs are evenly moistened. They should resemble wet sand.
Now, line a 12-cup muffin tin with paper liners. Firmly press about 1 tablespoon of the cookie mixture into the bottom of each liner. Use the back of a spoon or your fingers to compact it well. Place the muffin tin in the refrigerator to chill while you prepare the filling.
Step 2: Make the Protein Cheesecake Filling
In a large mixing bowl, combine the softened cream cheese, plain Greek yogurt, vanilla protein powder, powdered sugar, and vanilla extract. Use an electric mixer on medium speed to beat the mixture until it becomes completely smooth and creamy. Ensure no lumps remain, scraping down the sides of the bowl as needed.
This usually takes about 2-3 minutes. Next, gently fold in the crushed Oreo cookies (the 1/4 cup set aside for the filling). Stir just until they are evenly distributed throughout the cheesecake mixture. Do not overmix.
Step 3: Assemble the Cheesecake Cups
Retrieve your chilled muffin tin with the prepared crusts. Spoon the protein cheesecake filling evenly over the cookie crusts in each liner. Aim for approximately 2-3 tablespoons per cup, filling them almost to the top.
Use the back of a spoon to smooth the tops of the filling. For a final touch, you can sprinkle a few extra crushed Oreo crumbs on top of each cup, if desired.
Step 4: Chill and Serve
Cover the muffin tin loosely with plastic wrap. Transfer the entire tin to the refrigerator. Allow the Cookies & Cream Protein Cheesecake Cups to chill for at least 4 hours, or preferably overnight.
Chilling is crucial as it allows the cheesecake to set properly and the flavors to meld beautifully. Once thoroughly chilled, remove the cups from the muffin tin. Peel off the paper liners just before serving. Enjoy your delicious, protein-packed treat!
Pro Tips for Success
Achieving perfect Cookies & Cream Protein Cheesecake Cups involves a few simple tricks. These insights, learned from countless batches in my own kitchen, will elevate your dessert from good to absolutely amazing!
- Room Temperature Cream Cheese: This tip is paramount! Always ensure your cream cheese is completely softened to room temperature before you begin mixing. Cold cream cheese leads to lumpy filling, no matter how much you beat it. Take it out of the fridge at least an hour before you plan to start.
- Don’t Overmix the Filling: Once your filling is smooth and creamy, stop mixing. Overmixing can incorporate too much air, which sometimes leads to a less dense texture. When you fold in the crushed cookies, do it gently and just until combined.
- Compact the Crust Firmly: A well-packed crust forms a sturdy base for your cheesecake cups. Use the bottom of a small glass or your fingers to press the cookie crumbs firmly into the muffin liners. This prevents a crumbly crust when you remove the cups.
- Quality Protein Powder: The type of protein powder matters. Use a protein powder you genuinely enjoy the taste of, as its flavor will come through in the cheesecake. Vanilla whey or casein works beautifully, offering a smooth texture and excellent flavor profile.
- Chill Time is Essential: Do not rush the chilling process! The 4-hour minimum, or even better, an overnight chill, allows the cheesecake filling to set properly, firm up, and lets the flavors fully develop and meld. This makes for a much more enjoyable texture and taste experience.
- Use Paper Liners: While not strictly necessary for baking, paper liners make these individual cheesecake cups incredibly easy to remove and serve. They also help maintain their shape and prevent sticking.
- Adjust Sweetness to Taste: Protein powders vary in sweetness. Taste your cheesecake filling before folding in the crushed cookies and adjust the powdered sugar as needed. Add a little at a time until it meets your preference.
Following these pro tips ensures your Cookies & Cream Protein Cheesecake Cups turn out perfectly every single time, delighting both your taste buds and your family!
Storage & Reheating Tips
These delightful Cookies & Cream Protein Cheesecake Cups are fantastic for meal prepping or making ahead, which makes them perfect for busy families. Proper storage ensures they remain fresh and delicious for days.
Storage:
- Refrigerator: After chilling, store your protein cheesecake cups in an airtight container in the refrigerator. This protects them from absorbing other food odors and keeps them fresh. They will stay fresh and delicious for up to 4-5 days.
- Freezer: For longer storage, these cheesecake cups freeze beautifully! Once completely chilled and firm, transfer them to a freezer-safe airtight container. You can also wrap each individual cup in plastic wrap before placing them in the container to prevent freezer burn. They will keep well in the freezer for up to 1-2 months.
Reheating:
Unlike many desserts, these Cookies & Cream Protein Cheesecake Cups are best enjoyed cold. Therefore, reheating is generally not recommended or necessary. If you store them in the freezer:
- Thawing: Simply transfer the desired number of frozen cheesecake cups from the freezer to the refrigerator several hours or overnight before you plan to eat them. This allows them to thaw gently and maintain their creamy texture. You can also let them sit at room temperature for about 20-30 minutes for a slightly softer consistency, but ensure they don’t sit out too long to maintain food safety.
Always keep these protein cheesecake cups chilled until ready to serve for the best texture and flavor. They make an excellent grab and go snack straight from the fridge!
What to Serve With This Recipe
These Cookies & Cream Protein Cheesecake Cups are a complete delight on their own, offering a perfect balance of sweetness, creaminess, and a satisfying protein boost. However, you can certainly elevate the experience with a few thoughtful pairings. Think about complements that enhance their flavor without overshadowing it, or other simple, nourishing recipes that fit into a family-friendly lifestyle.
For Dessert & Snack Pairings:
- A Warm Beverage: A freshly brewed cup of coffee or a comforting mug of tea provides a lovely contrast to the cold, creamy cheesecake. For the kids, a glass of cold milk is always a classic match for cookies and cream flavors.
- Fresh Fruit: A small side of fresh berries, like raspberries or blueberries, adds a burst of freshness and a touch of natural sweetness that cuts through the richness of the cheesecake.
- Whipped Cream or Yogurt Topping: A dollop of light whipped cream or a spoonful of extra plain Greek yogurt can add an extra layer of creaminess and visual appeal.
As Part of a Balanced Meal Plan:
These protein cheesecake cups are a fantastic dessert or snack, fitting perfectly into a day filled with other simple, nourishing meals. Consider pairing them with:
- Breakfast: Start your day with something equally easy and satisfying like Peanut Butter Overnight Oats. It’s a quick, protein-packed breakfast that fuels your morning.
- Lunch: For a quick and delicious lunch, you might enjoy High Protein Pasta Salad. It’s easy to make ahead and full of flavor, offering another great protein boost.
- Dinner: After enjoying a flavorful main course such as Smash Burger Tacos or Hot Honey Chicken Bowls, these protein cheesecake cups make an ideal light, yet satisfying dessert. They offer a sweet ending without feeling overly heavy.
Ultimately, these Cookies & Cream Protein Cheesecake Cups are a versatile treat. Whether you serve them as a standalone indulgence or as part of a larger meal, they consistently bring joy to the table.
FAQs About Cookies & Cream Protein Cheesecake Cups
You have questions, and I have answers! Here are some common inquiries about making and enjoying these delightful Cookies & Cream Protein Cheesecake Cups.
Can I use any type of protein powder for these protein cheesecake cups?
Generally, yes, you can use various types of protein powder. However, the best results come from vanilla-flavored whey or casein protein powder due to their excellent texture and mild flavor profile. Plant-based protein powders like pea or soy protein also work well, but they can sometimes alter the texture slightly, making it a bit denser.
Always choose a protein powder you enjoy the taste of, as its flavor will be noticeable in the finished cheesecake cups. Avoid unflavored protein powders unless you are adding additional flavorings, as they might leave the cheesecake tasting bland.
How do I prevent the crust from becoming soggy?
To prevent a soggy crust in your Cookies & Cream Protein Cheesecake Cups, ensure you compact the cookie mixture very firmly into the muffin liners. This creates a dense, solid base. Additionally, chill the crust in the refrigerator for at least 15-20 minutes before adding the filling.
This helps to firm up the butter and cookie crumbs, forming a barrier against moisture. The crust will remain delightfully crunchy and sturdy when properly prepared.
Are these Cookies & Cream Protein Cheesecake Cups suitable for meal prep?
Absolutely! These protein cheesecake cups are an ideal recipe for meal prep. Their individual portions make them incredibly convenient for grabbing a healthy snack or dessert throughout the week.
You can easily make a double batch and store them in the refrigerator for up to 4-5 days, or freeze them for up to 1-2 months. Having these on hand means you always have a delicious, protein-packed treat ready to go, perfect for busy schedules.
Can I make a larger cheesecake instead of individual cups?
Yes, you can certainly adapt this recipe to make a larger protein cheesecake! For a standard 8 or 9-inch springform pan, you will likely need to double the crust ingredients and increase the filling ingredients by about 1.5 to 2 times, depending on the desired thickness. Press the crust into the bottom of the pan, add the filling, and chill as directed.
Note that a larger cheesecake will require a longer chilling time, typically 6-8 hours or overnight, to set completely. Ensure the edges are firm before slicing.
What if my cream cheese filling is lumpy?
Lumpy cream cheese filling usually indicates that your cream cheese was not at room temperature when you started mixing. To fix this, continue beating the mixture with an electric mixer for a few more minutes, scraping down the sides of the bowl frequently. If lumps persist, you can try gently warming the bowl over a pot of simmering water (bain-marie method) for a minute or two, then resume mixing.
The gentle heat will help the cream cheese soften further. However, the best solution is always to ensure the cream cheese is fully softened from the start.